
User's Manual


1
2
3
4
24hr*
7
33 44 33
Follow the on-screen ActiveSync instructions to
establish a connection between the MC70 and the
host computer.
Create a Partnership
5
1
2
4-Slot Cradle
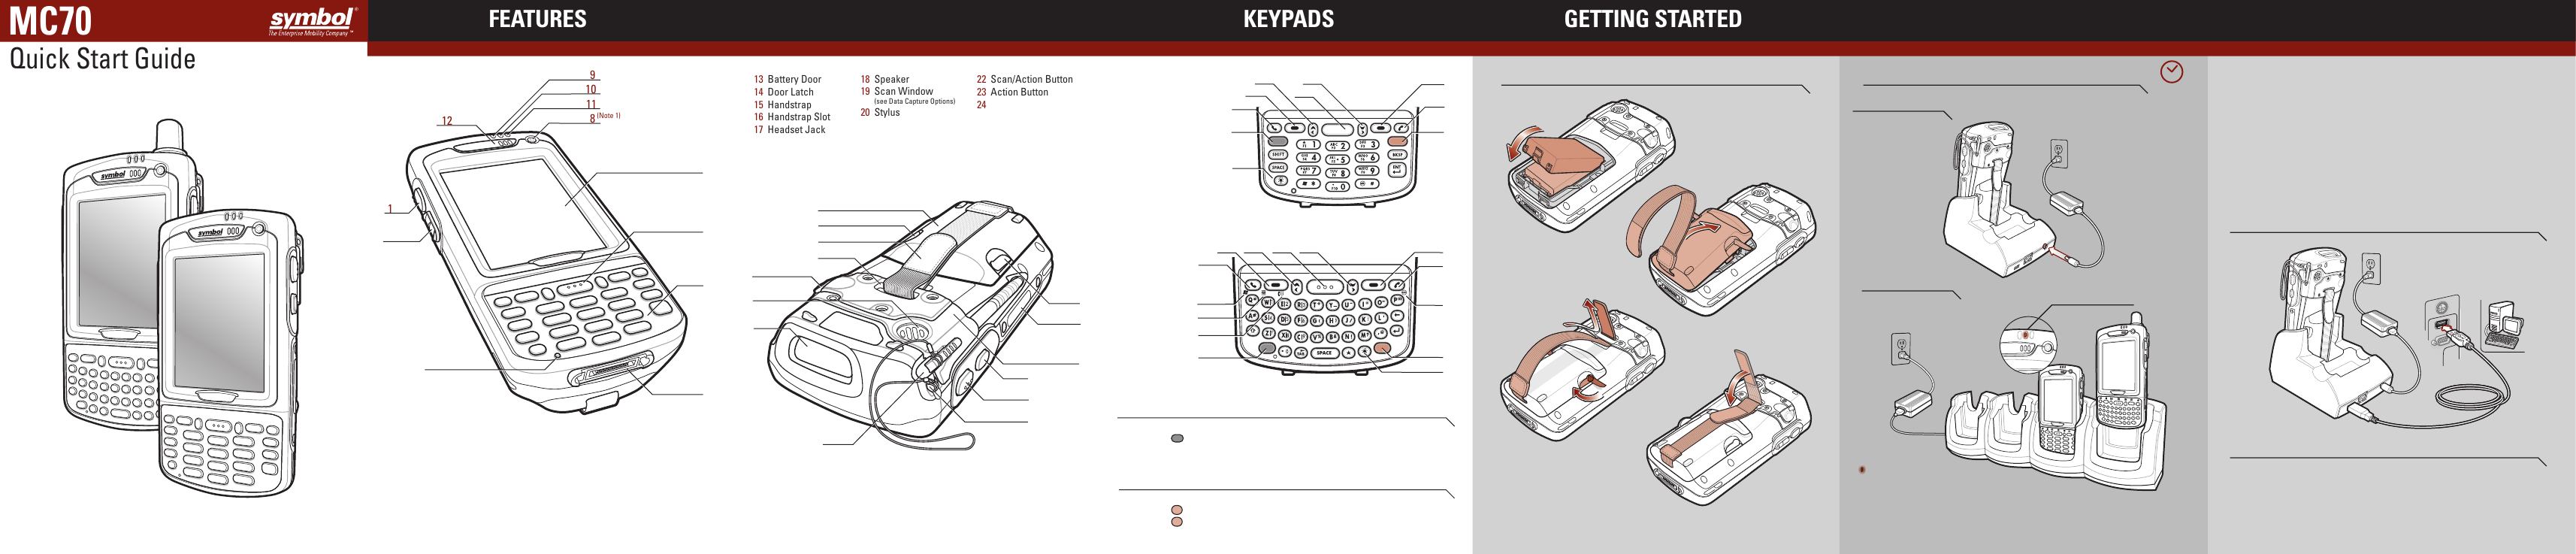
FEATURES KEYPADS
Insert the Battery
1
Charge the MC70
2
Install ActiveSync
®
3
Communicate with Host
4
6
11
4
1-Slot Cradle
Blinking Amber = Charging
Charging LED
Solid Amber = Fully Charged
5
1
2
12
3
7
3
4
3
2
5
1
2 3 4 3
5
*
It is recommended that this product be charged for 24 hours before the first use
to ensure that the internal battery is fully charged.
GETTING STARTED
8
(Note 1)
7
2
6
8
Fast Blinking Amber = Charging Error
9
10
9 Scan/Decode LED
10 Charging LED
11 Radio Status LED
12 Phone Speaker
5 Keypad
6 Scan/Action Button
7 Touch Screen
(with screen protector)
8 Power Button
1 Scan/Action Button
2 Up/Down Button
3 Microphone
4 I/O Connector
8
6
1 Call
2 Soft Key
3 Navigation
4 Scan/Action Button
5 End Call
6 Orange Key
7 Backlight
8 Blue Key
9 OK
10 Phonepad
11 Menu
12 Start Menu
9
12
11
10
Blue Key
Use this key to launch applications and select items (shown on the keypad in blue).
> Press the key once to activate this mode followed by another key.
Orange Key
Use this key to access the secondary layer of characters and actions.
> Press the key once to lock the keypad in the Alpha state.
> Press the key a second time to return to the normal state.
Note 1: To reset the MC70, press and hold the power button for five (5) seconds.
Note 2: Standard Capacity Battery and Door shown.
Charging LED
Download ActiveSync
®
4.0 or higher from
http://www.microsoft.com and follow the
instructions to install ActiveSync onto the host
computer.
13 Battery Door
14 Door Latch
15 Handstrap
16 Handstrap Slot
17 Headset Jack
22 Scan/Action Button
23 Action Button
24 Back Housing Bracket
25 Memory Card Slot
18 Speaker
19 Scan Window
(see Data Capture Options)
20 Stylus
21 Tether Point
17
13
18
20
25
14
14
15
16
19
23
24
22
21
MC
70
Quick Start Guide