Using Bluetooth Chapter 3 R Y Chapter 3 Using Bluetooth Introduction PR 10 E /2 LI 0/ M 06 IN A Bluetooth-equipped devices can communicate without wires, using frequency-hopping spread spectrum (FHSS) radio frequency (RF) to transmit and receive data in the 2.4 GHz Industry Scientific and Medical (ISM) band (802.15.1). Bluetooth wireless technology is specifically designed for short-range (30 feet/10 meters) communication and low power consumption.
3-2 MC70 User Guide Security R Y The current Bluetooth specification defines security at the link level. Application-level security is not specified. This allows application developers to define security mechanisms tailored to their specific need. Link-level security occurs between devices, not users, while application-level security can be implemented on a per-user basis.
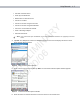
Using Bluetooth 3-3 Disabling Bluetooth PR 10 E /2 LI 0/ M 06 IN A R Y To disable Bluetooth, tap Bluetooth icon - Disable Bluetooth. The Bluetooth icon changes to indicate that Bluetooth is disabled. Figure 3-1 Disable Bluetooth Enabling Bluetooth To enable Bluetooth, tap Bluetooth icon - Enable Bluetooth. The Bluetooth icon changes to indicate that Bluetooth is enabled.
3-4 MC70 User Guide Warm Boot Performing a warm boot on the EDA returns Bluetooth to the last state after initialization. Suspend Suspending the EDA turns off Bluetooth. Suspending the EDA powers off the Bluetooth radio and drops the piconet (Bluetooth connection). When the EDA resumes, it take approximately 10 seconds for the Bluetooth radio driver to re-initialize the radio. R Y NOTE Resume PR 10 E /2 LI 0/ M 06 IN A When the EDA resumes, Bluetooth turns on if it was on prior to suspend.
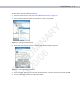
Using Bluetooth 3-5 • Pair with a Remote Device • Active Sync via Bluetooth • Browse Files on Remote Device • Connect to Headset • Connect to Internet Using Access Point • Connect to a Personal Area Network • Send or Exchange Objects • Associate Serial Port. If you select Active Sync via Bluetooth, ensure that the Bluetooth software is set up properly on the host device. PR 10 E /2 LI 0/ M 06 IN A NOTE R Y • Connect to Internet Using Phone/Modem 4. Tap Next.
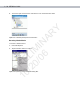
MC70 User Guide 7. In the Favorite Name text box, enter a name for this service that will appear in the Favorite list. 8. Tap Next. The Connection Summary window appears. PR 10 E /2 LI 0/ M 06 IN A R Y 3-6 Figure 3-6 Connection Summary Window 9. Tap Connect to connect to the service. Explorer Mode The Explorer Mode window is easy to navigate and provides greater control to users familiar with Bluetooth. The menu bar provides quick access to the options and tools used to connect to devices.
Using Bluetooth 3-7 You can also use the “tap and hold” technique to view available options. Scroll bars and view options are similar to those on the Windows desktop. The tree structure lists the following sub-items: • Local Device - This EDA • Remote Device - Other Bluetooth devices • Trusted Devices - Bonded (paired) Bluetooth devices • Untrusted Devices - Discovered devices that are not bonded NOTE R Y • Favorites - Selected services that are set as Favorite for quick access.
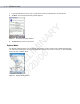
3-8 MC70 User Guide Tap and hold Remote Devices and select Discover Devices from the pop-up menu. The EDA searches for Bluetooth devices in the area. PR 10 E /2 LI 0/ M 06 IN A R Y 4. Figure 3-9 Discover Devices The discovered devices display in the Untrusted Devices folder. Figure 3-10 Discovered Devices Listed in Untrusted Folder Bonding with Discovered Device(s) A bond is a relationship created between the EDA and another Bluetooth device in order to exchange information in a secure manner.
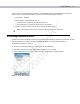
Using Bluetooth To bond with a discovered Bluetooth device: Discover remote devices. See Discovering Bluetooth Device(s) on page 3-7. 2. In the Untrusted Devices folder, tap and hold on a device to pair with. PR 10 E /2 LI 0/ M 06 IN A R Y 1. Figure 3-11 Pairing a Remote Device 3. Select Pair from the pop-up menu. The PIN Code Request window appears. Figure 3-12 PIN Code Request Window 4. In the PIN Code: text box, enter the PIN number (between 1 and 16 characters) and then tap OK. 5.
3 - 10 MC70 User Guide The devices pair and the device name moves to the Trusted Devices folder. PR 10 E /2 LI 0/ M 06 IN A Figure 3-13 Bonded (Paired) Discovered Device R Y 6. Renaming a Bonded Device To rename a bonded device: 1. Launch BTExplorer. 2. Tap and hold the device to rename.
Using Bluetooth 3 - 11 Select Rename in the pop-up menu. The Change Device Name window appears. PR 10 E /2 LI 0/ M 06 IN A Figure 3-15 Change Device Name Window R Y 3. 4. Enter a new name for the bonded device in the text box. Tap OK. Deleting a Bonded Device To delete a device no longer needed: 1. Launch BTExplorer. 2. Tap and hold the device to delete and select Delete in the pop-up menu. Figure 3-16 Deleting a Bonded Device 3. A confirmation dialog appears. Tap Yes.
3 - 12 MC70 User Guide Accepting a Bond When a remote device wants to bond with the EDA, enter a PIN when requested to grant permission. Ensure that the EDA is set to discoverable and connectable. See Bluetooth Settings on page 3-25. When prompted to bond with the remote device the PIN Code Request window appears. PR 10 E /2 LI 0/ M 06 IN A R Y 1. Figure 3-17 PIN Code Request Window 2. In the PIN Code: text box, enter the same PIN entered on the device requesting the bond.
Using Bluetooth 3 - 13 PR 10 E /2 LI 0/ M 06 IN A Figure 3-19 List of Discovered Services R Y The EDA communicates with the remote device and lists the services under the device name. Some examples of available services are: • File Transfer Services • Dial-Up Networking Services • OBEX Object Push Services • Headset or Hands-Free Services • Serial Port Services. See the following sections for information on these services.
3 - 14 MC70 User Guide Select a folder. The contents of the folder appear in the sub-window. PR 10 E /2 LI 0/ M 06 IN A Figure 3-20 Remote Device Folders R Y 8. 9. Tap and hold on the file. A pop-up menu appears. 10. Select the action to perform: • New - create a new file or folder on the remote device • Delete - delete the selected file on the remote device. • Get File - copy the file from the remote device to the EDA. • Put File - copy a file from the EDA to the remote device.
Using Bluetooth 3 - 15 Copying a File To copy a file to a remote device: 1. Tap and hold on the file and select Put. The Send Local File window appears. 2. Navigate to the directory to save the file and select a file. 3. Tap Open. The file copies from the EDA to the remote device. R Y Connecting to the Internet Using an Access Point This section explains how to access a Bluetooth-enabled LAN access point (AP) for a network connection. Use Internet Explorer to connect to a server.
3 - 16 MC70 User Guide Before setting up dial-up networking, obtain dial-up information and other necessary settings for the office network or ISP. To create a new Bluetooth connection: Ensure the EDA is discoverable and connectable. See Bluetooth Settings on page 3-25. 2. Discover and bond (pair) with the remote device. See Bonding with Discovered Device(s) on page 3-8. 3. In BTExplorer, select the Remote Devices folder. 4. Select the Trusted Devices folder. 5. Tap the remote device folder. 6.
Using Bluetooth 3 - 17 10. In the User name: text box, enter the user name for this connection. 11. In the Password: text box, enter the password for this connection. 12. In the Domain: text box, enter the domain for this connection, if required. PR 10 E /2 LI 0/ M 06 IN A R Y 13. Tap OK. The phone begins dialing, then connects to the network. Figure 3-23 Connecting to Bluetooth Phone 14. To end a session, tap the Connection icon and then tap Disconnect in the dialog box.
3 - 18 MC70 User Guide Adding a Dial-up Entry To add a dial-up entry: In the Select Dial-up Networking Entry window, tap and hold, then select Add Entry from the pop-up menu. PR 10 E /2 LI 0/ M 06 IN A R Y 1. Figure 3-25 Add Dial-Up Entry The Add Phone Book Entry window appears. 2. In the Name for the connection: text box, enter a name for this connection. 3. In the Country Code: text box, enter the country code for the country that you are calling. 4.
Using Bluetooth 3 - 19 Object Exchange Push Services Object Exchange (OBEX) is a set of protocols that allows sharing objects such as Contacts or pictures using Bluetooth. To exchange contact information with another Bluetooth enabled device: Ensure the EDA is discoverable and connectable. See Bluetooth Settings on page 3-25. 2. Discover and bond (pair) with the remote device. See Bonding with Discovered Device(s) on page 3-8. 3. In BTExplorer, select the Remote Devices folder. 4.
3 - 20 MC70 User Guide Tap . The Select Contact Entry window appears. PR 10 E /2 LI 0/ M 06 IN A R Y 8. Figure 3-27 Select Contact Entry Window 9. Select a contact to send to the other device. 10. Tap OK. 11. Tap OK to send the contact to the other device and display a confirmation dialog box on the other device to accept the contact. A Send Contact dialog appears. 12. Tap Ok. Sending a Picture To send a picture to another device: 1. Ensure the EDA is discoverable and connectable.
Using Bluetooth 3 - 21 Tap and hold on OBEX Object Push and select Connect. The OBEX Object Push window appears. PR 10 E /2 LI 0/ M 06 IN A Figure 3-28 OBEX Object Push Window R Y 6. 7. In the Action: drop-down list, select Send A Picture. 8. Tap . The Send Local Picture window appears. Figure 3-29 Send Local Picture Window 9. Navigate to the picture to send to the other device. 10. Tap Open. 11.
3 - 22 MC70 User Guide 4. Select the Trusted Devices folder. 5. Tap the remote device folder. 6. Tap and hold on the remote device and select Explore. A headset service item appears. 7. Tap and hold on the headset service name and select Connect. The EDA connects to the headset. Refer to the headset user manual for instructions on communicating with a Bluetooth device. To adjust the microphone gain: Tap and hold on the headset service item and select Adjust Microphone from the pop-up menu.
Using Bluetooth 3 - 23 ActiveSync Using Serial Port Services NOTE By default, COM ports COM4, COM5, and COM9 are Bluetooth virtual ports. If an application opens one of these ports, the Bluetooth driver activates and guides you through a Bluetooth connection. Use the wireless Bluetooth serial port connection for ActiveSync just as you would a physical serial cable connection. You must configure the application that will use the connection to the correct serial port.
3 - 24 MC70 User Guide 9. Tap OK. The mobile computer communicates with the host computer and ActiveSync initates. Personal Area Network Services Connect two or more Bluetooth devices to share files, collaborate, or play multi-player games. To establish a Personal Area Network connection: Ensure the EDA is discoverable and connectable. See Bluetooth Settings on page 3-25. 2. Discover and bond (pair) with the remote device. See Bonding with Discovered Device(s) on page 3-8. 3.
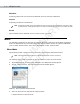
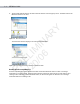
Using Bluetooth 3 - 25 Bluetooth Settings Use the BTExplorer Settings window to configure the operation of the BTExplorer application. Tap Tools Settings. The BTExplorer Settings window appears. Device Info Tab PR 10 E /2 LI 0/ M 06 IN A R Y Use the Device Info tab to configure the EDA’s Bluetooth connection modes. Figure 3-33 BTExplorer Settings - Device Info Tab Device Name Displays the name of the EDA. Discoverable Mode Select whether or not the EDA is discoverable by other Bluetooth devices.
3 - 26 MC70 User Guide To add a service: Tap Add. The Add Local Service window displays. PR 10 E /2 LI 0/ M 06 IN A R Y 1. Figure 3-35 Add Local Service Window 2. In the list, select a service to add. 3. Tap OK. The Edit Local Service window displays for the selected service. 4. Select the appropriate information and then tap OK. See the following sections for information on the available services.
Using Bluetooth 3 - 27 File Transfer Service PR 10 E /2 LI 0/ M 06 IN A R Y File transfer allows other Bluetooth devices to browse files. Figure 3-37 File Transfer Information Window Service Name Displays the name of the service. Service Security Select the type of security from the drop-down list. Options are None, Authenticate, or Authenticate/Encrypt. Root Directory Select the directory that other Bluetooth devices can access.
3 - 28 MC70 User Guide Headset Service PR 10 E /2 LI 0/ M 06 IN A R Y Headset Service allows connection to headset devices. Figure 3-39 Headset Service Window Service Name Lists the name of the audio service. OBEX Object Push Service OBEX Object Push allows other Bluetooth devices to push contacts, business cards, pictures, appointments, and tasks to the EDA. Figure 3-40 OBEX Exchange Information Window Service Name Displays the name of the service.
Using Bluetooth 3 - 29 Personal Area Networking Service PR 10 E /2 LI 0/ M 06 IN A R Y Personal Area Networking hosts a Personal Area Network which allows communication with other Bluetooth devices. Figure 3-41 Personal Area Networking Window Service Name Displays the name of the service. Service Security Select the type of security from the drop-down list. Options are None, Authenticate, or Authenticate/Encrypt. Support Group Ad-Hoc Networking Select to enable Ad-Hoc networking.
3 - 30 MC70 User Guide Displays the name of the service. Service Security Select the type of security from the drop-down list. Options are None, Authenticate, or Authenticate/Encrypt. Local COM Port Select the COM port. Local Baud Rate Select the communication baud rate. Local Port Options Select the port option.
Using Bluetooth 3 - 31 Discovery Tab PR 10 E /2 LI 0/ M 06 IN A R Y Use the Discovery tab to set and modify discovered devices. Figure 3-44 BTExplorer Settings - Discovery Tab Inquiry Length Sets the amount of time the EDA takes to discover Bluetooth devices in the area. Name Discovery Mode Select either Automatic or Manual. Discovered Devices Deletes all discovered devices and link keys. Virtual COM Port Tab Use the Virtual COM Port tab to select the COM ports for Bluetooth communication.
3 - 32 MC70 User Guide PR 10 E /2 LI 0/ M 06 IN A R Y Miscellaneous Tab Figure 3-46 BTExplorer Settings - Miscellaneous Tab Highlight Connections Select the connection type to highlight when connected. In the Wizard Mode, the only options are Favorites or None. In the Explorer Mode the options are None, Tree View Only, List View Only, or Tree and List View. Apply Text Style Select the text style to apply to the connection text.