Wireless Applications Chapter 7 Introduction R Y Chapter 7 Chapter 7 Wireless Applications PR 10 E /2 LI 0/ M 06 IN A Wireless Local Area Networks (LANs) allow mobile computers to communicate wirelessly and send captured data to a host device in real time. Before using the EDA on a WLAN, the facility must be set up with the required hardware to run the wireless LAN and the EDA must be configured.
7-2 MC70 Integrator Guide Signal Strength Icon The Signal Strength icon in the task tray indicates the EDA’s wireless signal strength as follows: Table 7-1 Wireless Applications Icons, Signal Strength Descriptions Status Action Wireless LAN network is ready to use. Very good signal strength Wireless LAN network is ready to use. Good signal strength Wireless LAN network is ready to use.
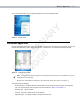
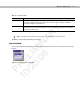
Wireless Applications 7-3 PR 10 E /2 LI 0/ M 06 IN A R Y To turn the WLAN radio on tap the Signal Strength icon and select Enable Radio. Figure 7-3 Enable Radio Find WLANs Application Use the Find WLANs application to discover available networks in the vicinity of the user and EDA. To open the Find WLANs application, tap the Signal Strength icon - Find WLANs. The Find WLANs window displays. Figure 7-4 Find WLANs Window NOTE The Find WLANs display is limited to 32 items (ESSIDs or MAC addresses).
7-4 MC70 Integrator Guide . Table 7-2 Signal Strength Icon Icon Description Excellent signal Very good signal Fair signal Poor signal Out of range or no signal PR 10 E /2 LI 0/ M 06 IN A Table 7-3 Encryption Icon R Y Good signal Icon Description No encryption. WLAN is an infrastructure network. WLAN is an Ad-Hoc network. WLAN access is encrypted and requires a password. Tap-and-hold on a WLAN network to open a pop-up menu which provides two options: Connect and Refresh.
Wireless Applications 7-5 Table 7-4 Profile ID Fields Field Description The name and (WLAN) identifier of the network connection. Enter a user friendly name for the mobile computer profile used to connect to either an AP or another networked computer. Example: The Public LAN. ESSID The ESSID is the 802.11 extended service set identifier. The ESSID is 32-character (maximum) string identifying the WLAN, and must match the AP ESSID for the EDA to communicate with the AP.
7-6 MC70 Integrator Guide Table 7-5 Operating Mode Fields Description Operating Mode Select Infrastructure to enable the EDA to transmit and receive data with an AP. Infrastructure is the default mode. Select Ad Hoc to enable the EDA to form its own local network where mobile computers communicate peer-to-peer without APs using a shared ESSID. Country Country determines if the profile is valid for the country of operation.
Wireless Applications 7-7 Ad-Hoc Use the Ad-Hoc dialog box to select the required information to control Ad-Hoc mode. This dialog box does not appear if you selected Infrastructure mode. To select Ad-Hoc mode: Select a channel number from the Channel drop-down list. The default is Channel 1 (2412 MHz). PR 10 E /2 LI 0/ M 06 IN A R Y 1. Figure 7-7 Ad-Hoc Settings Dialog Box 2. Tap Next. The Authentication dialog box displays.
7-8 MC70 Integrator Guide Table 7-6 Authentication Options (Continued) Authentication Description Select this option to enable PEAP authentication. This method uses a digital certificate to verify and authenticate a user's identity. LEAP Select this option to enable LEAP authentication, which is based on mutual authentication. The AP and the connecting mobile computer require authentication before gaining access to the network. TTLS Select this option to enable TTLS authentication.
Wireless Applications 7-9 Table 7-8 lists the TTLS tunneled authentication options. Table 7-8 TTLS Tunneled Authentication Options TTLS Tunneled Authentication Description Challenge Handshake Authentication Protocol (CHAP) is one of the two main authentication protocols used to verify the user name and password for PPP Internet connections. CHAP is more secure than PAP because it performs a three way handshake during the initial link establishment between the home and remote machines.
7 - 10 MC70 Integrator Guide PR 10 E /2 LI 0/ M 06 IN A Figure 7-10 Installed User Certificates Dialog Box R Y drop-down list of currently installed certificates before proceeding. The selected certificate’s name appears in the drop-down list. If the required certificate is not in the list, install it. User Certificate Installation To install a user certificate (EAP TLS only) and a server certificate for EAP TLS and PEAP authentication: 1. Tap Install Certificate. The Credentials dialog box appears.
Wireless Applications 7 - 11 Tap the Install Certificate button. Figure 7-12 Installed Server Certificates Dialog Box R Y 2. PR 10 E /2 LI 0/ M 06 IN A A dialog lists the currently loaded certificate files found in the default directory (\Application\FusionApps\Certs) with the default extension. Figure 7-13 Browse Server Certificates Press the ENT key to change the default path or extension (and search a new path). Select a certificate before tapping the Install button.
7 - 12 MC70 Integrator Guide Credential Cache Options If you selected any of the password-based authentication types, you can select different credential caching options. These options specify when the network credential prompts appear: at connection, on each resume, or at a specified time. Entering the credentials directly into the profile permanently caches the credentials. In this case, the EDA does not require user login.
Wireless Applications 7 - 13 Figure 7-16 Time Cache Options Dialog Box R Y Selecting the At Time check box displays the TIme Cache Options dialog box. Tap the Interval radio button to check credentials at a set time interval. 2. Enter the value in minutes in the Min box. 3. Tap the At (hh:mm) radio button to check credentials at a set time. 4. Tap Next. The At Time dialog box appears. PR 10 E /2 LI 0/ M 06 IN A 1. Figure 7-17 At Time Dialog Box 5.
7 - 14 MC70 Integrator Guide Password Figure 7-19 Password Dialog Box Enter a password in the Password field. PR 10 E /2 LI 0/ M 06 IN A 1. R Y Use the Password dialog box to enter a password. If EAP/TLS is the selected authentication type, the password is not required and the field is disabled. 2. Select the Advanced ID check box, if advanced identification is required. 3. Tap Next. The Encryption dialog box displays. See Encryption on page 7-15.
Wireless Applications 7 - 15 Encryption Figure 7-21 Encryption Dialog Box PR 10 E /2 LI 0/ M 06 IN A Table 7-10 Encryption Options R Y Use the Encryption dialog box to select an encryption type. The drop-down list includes encryption types available for the selected authentication type. See Table 7-11 for these encryption types. Encryption Description Open Select Open (the default) when no data packet encryption is needed over the network.
7 - 16 MC70 Integrator Guide Table 7-11 Encryption / Authentication Matrix Encryption Authentication Open WEP TKIP Yes Yes Yes EAP TLS No Yes Yes PEAP No Yes Yes LEAP No Yes Yes TTLS No Yes Yes PR 10 E /2 LI 0/ M 06 IN A R Y None Key Entry Page If you select either 40-Bit WEP or 128-Bit WEP the wizard proceeds to the key entry dialog box unless the Use Passkey check box was selected in the Encryption dialog box (see Figure 7-21 on page 7-15). To enter the key information: 1.
Wireless Applications 7 - 17 Tap Next. The IP Mode dialog box displays. IP Mode PR 10 E /2 LI 0/ M 06 IN A Figure 7-24 IP Config Tab (DHCP) R Y Use the IP Mode dialog box to configure network address parameters: IP address, subnet, gateway, DNS, and WINS. Table 7-12 IP Mode Options Encryption Description DHCP Select Dynamic Host Configuration Protocol (DHCP) from the IP Mode drop-down list to obtain a leased IP address and network configuration information from a remote server.
7 - 18 MC70 Integrator Guide Table 7-13 Static IP Address Entry Fields Field Description The Internet is a collection of networks with users that communicate with each other. Each communication carries the address of the source and destination networks and the particular machine within the network associated with the user or host computer at each end. This address is called the IP address (Internet Protocol address).
Wireless Applications 7 - 19 Transmit Power The Transmit Power drop-down list contains different options for Ad-Hoc and Infrastructure mode. Automatic (i.e., use the current AP settings) and Power Plus (use higher than the current AP settings) are available for Infrastructure mode. PR 10 E /2 LI 0/ M 06 IN A R Y Adjusting the radio transmission power level enables the user to expand or confine the transmission area with respect to other wireless devices that could be operating nearby.
7 - 20 MC70 Integrator Guide Table 7-16 Power Transmit Options (Ad-Hoc Mode) (Continued) Field Description Select 15 mW to set the transmit power level to 15 mW. 5 mW Select 5 mW to set the transmit power level to 5 mW. 1 mW Select 1 mW for the lowest transmission power level. Use this level when communicating with other devices in very close proximity, or in instances where you expect little or no radio interference from other devices. Tap Next to display the Battery Usage dialog box.
Wireless Applications 7 - 21 Manage Profiles Application PR 10 E /2 LI 0/ M 06 IN A R Y The Manage Profiles window provides a list of user-configured wireless profiles. Define up to 32 profiles at any one time. To open the Manage Profiles window, tap the Signal Strength icon - Manage Profiles. Figure 7-30 Manage Profiles Window Icons next to each profile identify the profile’s current state. Table 7-18 Profile Icons Icon No Icon Description Profile is not selected, but enabled. Profile is disabled.
PR 10 E /2 LI 0/ M 06 IN A Figure 7-31 Manage Profiles Context Menu R Y 7 - 22 MC70 Integrator Guide Changing Profiles A completed profile is a set of configuration settings that can be used in different locations to connect to a wireless network. Create different profiles to have pre-defined operating parameters available for use in various network environments. When the WLAN Profiles window displays, existing profiles appear in the list.
Wireless Applications 7 - 23 Creating a New Profile PR 10 E /2 LI 0/ M 06 IN A R Y To create new profiles from the Manage Profiles window, tap-and-hold anywhere in this window. Figure 7-33 Manage Profiles - Add Select Add to display the Profile Wizard wherein you can set the profile name and ESSID. Set security, network address information, and power consumption level for the new profile. Deleting a Profile To delete a profile from the list, tap and hold and select Delete from the pop-up menu.
7 - 24 MC70 Integrator Guide Export a Profile PR 10 E /2 LI 0/ M 06 IN A R Y To export a profile to a registry file, tap and hold a profile from the list and select Export from the pop-up menu. The Save As dialog box displays with the Application folder and a default name of WCS_PROFILE{profile GUID}.reg (Globally Unique Identifier). Figure 7-34 Save As Dialog Box If required, change the name in the Name field and tap Save. A confirmation dialog box appears after the export completes.
Wireless Applications 7 - 25 • Wireless Log - displays a log of important recent activity, such as authentication, association, and DHCP renewal completion, in time order. • Versions - displays software, firmware, and hardware version numbers. • Quit - exits the Wireless Status window. Option windows contain a back button to return to the main Wireless Status window.
7 - 26 MC70 Integrator Guide Table 7-19 Signal Strength Status (Continued) Field Description Displays a percentage of the number of data packets the EDA retransmits. The fewer transmit retries, the more efficient the wireless network is. Missed Beacons Displays a percentage of the amount of beacons the EDA missed. The fewer transmit retries, the more efficient the wireless network is. Beacons are uniform system packets broadcast by the AP to keep the network synchronized.
Wireless Applications 7 - 27 Table 7-20 Current Profile Window Field Description Displays the current profile name the EDA uses to communicate with the AP. ESSID Displays the current profile ESSID name. Mode Displays the current profile mode, either Infrastructure or Ad-Hoc. Authentication Displays the current profile’s authentication type. Encryption Displays the current profile’s encryption type. Channel Displays the current profile’s channel setting.
7 - 28 MC70 Integrator Guide Table 7-21 IPv4 Status Fields Field Description Displays the IP type for the current profile: DHCP or Static. If the IP type is DHCP, leased IP address and network address data appear for the EDA. If the IP type is Static, the values displayed were input manually in the IP Config tab on page 7-17. IP Address Displays the EDA’s IP address. The Internet is a collection of networks with users that communicate with each other.
Wireless Applications 7 - 29 Wireless Log Window The Wireless Log window displays a log of recent activity, such as authentication, association, and DHCP renewal completion, in time order. Save the log to a file or clear the log (within this instance of the application only). The auto-scroll feature automatically scrolls down when new items are added to the log. PR 10 E /2 LI 0/ M 06 IN A R Y To open the Wireless Log window, tap Wireless Log in the Wireless Status window.
7 - 30 MC70 Integrator Guide PR 10 E /2 LI 0/ M 06 IN A R Y To open the Versions window, tap Versions in the Wireless Status window. Figure 7-40 Versions Window The window displays software version numbers for the following: • Configuration Editor • Fusion Build • LoginService • Photon1.0 • WCDiag • WCLaunch • WCSAPI • WCSRV • WCStatus.
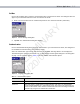
Wireless Applications 7 - 31 Wireless Diagnostics Application PR 10 E /2 LI 0/ M 06 IN A R Y The Wireless Diagnostics application window provides links to perform ICMP Ping, Trace Routing, and Known APs. To open the Wireless Diagnostics window, tap the Signal Strength icon - Wireless Diagnostics. Figure 7-41 Wireless Diagnostics Window The Wireless Diagnostics window contains the following options. Tap the option to display the option window. • ICMP Ping - tests the wireless network connection.
7 - 32 MC70 Integrator Guide PR 10 E /2 LI 0/ M 06 IN A R Y To open the ICMP Ping window, tap the ICMP Ping in the Wireless Diagnostics window. Figure 7-42 ICMP Ping Window To perform an ICMP ping: 1. In the IP field, enter an IP address or select an IP address from the drop-down list. 2. From the Size drop-down list, select a size value. 3. Tap Start Test. The ICMP Ping test starts. Information of the ping test displays in the appropriate fields.
Wireless Applications 7 - 33 to find all routers between the EDA and the destination. The Round Trip Time (RTT) between the EDA and each router appears, along with the total test time. The total test time may be longer than all RTTs added together because it does not only include time on the network. Known APs Window PR 10 E /2 LI 0/ M 06 IN A R Y The Known APs window displays the APs in range using the same ESSID as the EDA. This window is only available in Infrastructure mode.
7 - 34 MC70 Integrator Guide Options Use the wireless Option dialog box to select one of the following operation options from the drop-down list: Operating Mode Filtering • Regulatory • Band Selection • System Options • Change Password • Export. R Y • PR 10 E /2 LI 0/ M 06 IN A Operating Mode Filtering The Operating Mode Filtering options cause the Find WLANs application to filter the available networks found.
Wireless Applications 7 - 35 Regulatory Options Figure 7-46 Regulatory Options Dialog Box PR 10 E /2 LI 0/ M 06 IN A Table 7-24 Regulatory Options R Y Use the Regulatory settings to configure the country the EDA is in. Due to regulatory requirements (within a country) a EDA is only allowed to use certain channels. Field Description Settings Select the country from the drop-down list.
7 - 36 MC70 Integrator Guide System Options Figure 7-48 System Options Dialog Box PR 10 E /2 LI 0/ M 06 IN A Table 7-26 System Options R Y Use System Options to set miscellaneous system setting. Field Description Profile Roaming Configures the EDA to roam to the next available WLAN profile when it moves out of range of the current WLAN profile. Enable IP Mgmt Enables the Wireless Companion Services to handle IP address management.
Wireless Applications 7 - 37 To delete the password, enter the current password in the Current: text box and leave the New: and Confirm: text boxes empty. Tap Save. NOTE Passwords are case sensitive and can not exceed 10 characters. Export PR 10 E /2 LI 0/ M 06 IN A R Y Use Export to export all profiles to a registry file, and to export the options to a registry file. Figure 7-50 Options - Export Dialog Box To export options: 1. Tap Export Options. The Save As dialog box displays.
7 - 38 MC70 Integrator Guide To export all profiles: Tap Export All Profiles. The Save As dialog box displays. PR 10 E /2 LI 0/ M 06 IN A R Y 1. Figure 7-52 Export All Profiles Save As Dialog Box 2. Enter a filename in the Name: field. The default filename is WCS_PROFILES.REG. 3. In the Folder: drop-down list, select the desired folder. 4. Tap Save. Selecting Export All Profiles saves the current profile.
Wireless Applications 7 - 39 Registry Settings Use a registry key to modify some of the parameters. The registry path is: HKLM\SOFTWARE\Symbol Technologies, Inc.\Configuration Editor Table 7-27 Registry Parameter Settings Type Default REG_SZ \\Windows EncryptionMask REG_DWORD 0x0000001F The default directory to find certificates. Defines the supported encryption types. This is a bitwise mask with each bit corresponding to an encryption type.
7 - 40 MC70 Integrator Guide • Log off the EDA to prevent another user from accessing the current users network privileges. • Switch EDA users to quickly logoff the EDA and allow another user to log into the EDA. No User Logged In If no user is logged into the EDA, launch the login dialog box and log in to access user profiles. The Login dialog box varies if it is: Launched by WCS, because the service is connecting to a new profile that needs credentials.
Wireless Applications 7 - 41 off the current user and close the login dialog box. Tapping Cancel closes the Log Off dialog box and the Login dialog box displays. When the user is logged off, the EDA only roams to profiles that do not require credentials or to profiles that were created with the credentials entered into the profile The Cancel button closes the dialog without logging into the network.
PR 10 E /2 LI 0/ M 06 IN A R Y 7 - 42 MC70 Integrator Guide