
Integration Guide
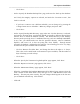
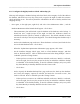
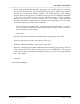
Table Of Contents
- I
- Introduction
- Architecture Overview
- Hardware Requirements
- PSS Software Installation
- Install NT 4.0 Server
- Install the NT 4 Service Pack
- Install Internet Explorer 4.01 Service Pack 2
- NT Option Pack Install
- Install the Video Driver
- Create and Format the Database partition
- Desktop Cleanup (optional)
- Install Microsoft SQL Server 7
- Create and Configure the PSS Database
- Install Microsoft Access
- Internet Explorer 5.0 with Task Scheduler install
- Install WaveWorks
- Install PSS Runtime System
- Install Waveworks Development Studio
- Install PSS Development System
- TFTP Configuration
- DHCP Configuration
- Create an ODBC Data Source
- Load Initial Data
- MS IIS Configuration
- Obtaining Access to PSS System Administration Screens
- Configure Task Scheduler
- Configure Unit Management
- Configure Licensing
- Configure the NBQMAIN Service (IBM 4690 POS Only)
- Setup NT System Log
- Configuration of the PSS System
- Validation of System Operation
- Directory Listing of PSS Folders/Files
- Software Description
- _
- Hardware Overview
- Software Components
- Database Access
- Start of Shopping Trip Processing
- Shopping Trip Processing
- End of Shopping Trip Processing
- Shopping Trip Message Log Entries
- Fatal Messages:
- PSSTransactionFile Processing
- POS Transaction File Processing
- Item Record File Processing
- Customer Update File Processing
- PSS Services
- _
- Customizing the PSS System Software
- Custom DisplayServer Scripts
- Custom Services
- Custom Business Objects
- User Exit DLL
- Available User Exit Functions
- UE_PreProcessItemFile
- UE_PreProcessItemRecord
- UE_PostProcessItemRecord
- UE_PostProcessItemFile
- UE_PreProcessTaxFile
- UE_PostProcessTaxFile
- UE_PreProcessPOSTransFile
- UE_PreProcessPOSTransRecord
- UE_PostProcessPOSTransRecord
- UE_ProcessEODRecord
- UE_PostProcessPOSTransFile
- UE_PreProcessPSSTransFile
- UE_PreProcessPSSTransRecord
- UE_PostProcessPSSTransFile
- UE_CalculateItemPrice_Method10to20
- UE_RescanLevelCalculation
- UE_Pre-RescanDetermination
- UE_PostRescanDetermination
- UE_PreProcessMarketingMessage
- UE_LoginAuthorization
- System Administration Interface
- Specific Features

PSS Software Installation
______________________________________________________________________________
WaveWorks PSS, Integration Guide, 1.10 Page 25
© 2000, Symbol Technologies, Inc. February 1, 2000
4.6 Create and Format the Database partition
You may remember the discussion about the creation of a D: partition on the hard drive from the
early steps of this procedure. If you created a D: partition then, you may skip to the Format
steps. If you did not create a D: partition earlier, we will create (and then format) one here. The
D: partition is where we store all the database data files. Run the Disk Administrator utility to
create and format the D: partition:
• Click on the Start button, then Programs, then Admin Tools, then Disk Administrator
• Click OK to update the configuration
Creating the D: partition
<< TO DO: add steps on creating a Logical drive in an Extended partition. Include info about
possibly needing to move the CD-ROM drive letter to E first, so that you can make the new
partition the D: drive>>
Formatting the D: partition
- Click on the D: drive to select it (make it the active partition)
- Right click on then D: drive, then select “Format”
- Change the file system to NTFS (NTFS is more efficient than FAT)
- Change the Volume label to “Database”
- Select the “Quick Format” option
- Click on the “Start” button
- A warning message about losing data displays. Click OK.
- A “Format complete” message displays. Click OK.
- Click on “Close” to exit the Format window.
- Close “Disk Admin” window (click on the “X” in the upper right corner of the screen).