
User manual

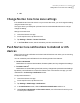
Table Of Contents
- Contents
- 1. Welcome to Norton Core
- 2. Set up your protected network
- 3. Customize your Norton Core settings
- Change your Norton Core network name and password
- Change Norton Core network band settings
- Create your Norton Core guest network
- Enable or disable Norton Core UPnP
- Add or update Norton Core port forwarding settings
- Change Norton Core DNS settings
- Set the Norton Core light brightness and understand light states
- Change Norton Core time zone settings
- Push Norton Core notifications to Android or iOS devices
- 4. Additional solutions
- Find Norton Core version details
- Set up with a replacement Norton Core router
- Norton Core software and firmware updates
- Reset Norton Core to factory settings
- Restart your Norton Core router
- Devices in your Norton Core network
- Submit Norton Core error logs to Symantec
- Send your feedback to Norton Core team
- Norton Core support
- Disclaimers

Once you specify the port numbers, Norton Core router forwards the network traffic on the
specific port to a specific device. Norton Core blocks the inactive ports on the device thereby
providing protection against attacks through hacking techniques such as port scanning.
If you had already set up port forwarding for some devices on your network, they are
automatically listed in the Norton Core Port Forwarding screen and are discoverable by other
UPnP compatible devices. For each listed device, you can view the port range and protocol
used.
Add port forwarding for specific devices
1
Launch the Norton Core app.
2
On the top-left corner, tap the menu icon.
3
Tap Settings > Network > Port Forwarding.
4
In the Port Forwarding screen, tap Add.
5
In the screen that appears, select the device that you want to set port forwarding.
6
Enter the following:
■ Name: Type a service name.
■ Internal Port: Provide a port number.
■ External Port: Provide a port number.
7
Under Protocol, select one of the following:
■ TCP: Transmission Control Protocol (TCP) establishes connections between devices
before it sends any data and verifies that data is properly received.
■ UDP: User Datagram Protocol (UDP) does not establish a connection before sending
data and it does not verify that the data is properly received. UDP is commonly used
for streaming media.
■ TCP/UDP: Select this option if you want to route the traffic using both TCP and UDP.
8
On the top-right corner, tap Add.
Update a port forwarding setting
1
Launch the Norton Core app.
2
On the top-left corner, tap the menu icon.
3
Tap Settings > Port Forwarding.
4
In the Port Forwarding screen, tap the port forward entry that you want to edit and make
the required changes.
5
On the top-right corner, tap Save.
36Customize your Norton Core settings
Add or update Norton Core port forwarding settings