
User manual

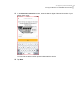
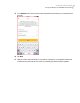
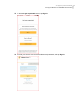
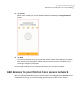
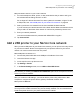

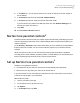
Table Of Contents
- Contents
- 1. Welcome to Norton Core
- 2. Set up your protected network
- 3. Customize your Norton Core settings
- Change your Norton Core network name and password
- Change Norton Core network band settings
- Create your Norton Core guest network
- Enable or disable Norton Core UPnP
- Add or update Norton Core port forwarding settings
- Change Norton Core DNS settings
- Set the Norton Core light brightness and understand light states
- Change Norton Core time zone settings
- Push Norton Core notifications to Android or iOS devices
- 4. Additional solutions
- Find Norton Core version details
- Set up with a replacement Norton Core router
- Norton Core software and firmware updates
- Reset Norton Core to factory settings
- Restart your Norton Core router
- Devices in your Norton Core network
- Submit Norton Core error logs to Symantec
- Send your feedback to Norton Core team
- Norton Core support
- Disclaimers

1
On the Windows taskbar, click Start > Devices and Printers.
2
Click Add a Printer.
3
In the Add Printer wizard, select Add a local printer.
4
Under Choose a printer port, select Create a new port and choose Standard TCP/IP
Port from the Type of port drop-down list.
5
Click Next.
6
In the Hostname or IP address box, type the IP address of the Norton Core gateway.
To find your Norton Core IP address, launch the Norton Core app, then navigate to
Settings > About > Router IP Address.
If you do not want the port name to be the same as the IP address, type a different text
in the Port Name box.
7
Uncheck Query the printer and automatically select the driver to use, and then click
Next.
Wait for your computer to begin its search for the specific TCP/IP port and fail.
8
Under Additional port information required, select Custom and then click Settings.
9
In the Configure Standard TCP/IP Port Monitor dialog, in the Port Settings tab, do the
following:
■ Printer Name or IP Address: verify the IP address of Norton Core gateway.
■ Protocol: select Raw
■ Raw Settings > Port Number: type 9100
10
Click OK.
11
Select the correct printer driver and click Next.
12
Follow the on-screen instructions to complete and exit the Add Printer wizard.
Add a printer in Mac
1
On the Apple menu, click System Preferences.
2
Click Printers & Scanners.
3
In the Printers & Scanners window, click Add +.
4
At the top of the Add dialog, click the IP icon.
5
In the Hostname or IP address box, type the IP address of the Norton Core gateway.
To find your Norton Core IP address, launch the Norton Core app, then navigate to
Settings > About > Router IP Address.
29Set up your protected network
Add a USB printer to your Norton Core network