
User manual
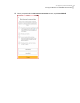
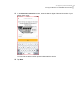
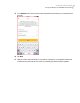
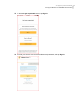
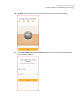
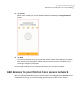

Table Of Contents
- Contents
- 1. Welcome to Norton Core
- 2. Set up your protected network
- 3. Customize your Norton Core settings
- Change your Norton Core network name and password
- Change Norton Core network band settings
- Create your Norton Core guest network
- Enable or disable Norton Core UPnP
- Add or update Norton Core port forwarding settings
- Change Norton Core DNS settings
- Set the Norton Core light brightness and understand light states
- Change Norton Core time zone settings
- Push Norton Core notifications to Android or iOS devices
- 4. Additional solutions
- Find Norton Core version details
- Set up with a replacement Norton Core router
- Norton Core software and firmware updates
- Reset Norton Core to factory settings
- Restart your Norton Core router
- Devices in your Norton Core network
- Submit Norton Core error logs to Symantec
- Send your feedback to Norton Core team
- Norton Core support
- Disclaimers

22
Tap Create.
Norton Core creates your secure wireless network and displays the Congratulations
screen.
23
Tap Next.
You have successfully set up your protected network. Norton Core displays your Norton
Core Security Plus subscription
1
details and then the home screen. The Norton Core
router light changes to solid white.
You are ready to add all of your household devices to your new secure network.
Add devices to your Norton Core secure network
When you add a wireless device to your secure network, it is displayed in the Devices screen
of the Norton Core app. You can then assign the device to the users in your network.
27Set up your protected network
Add devices to your Norton Core secure network