
User manual

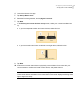
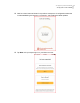
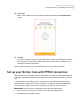

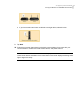
Table Of Contents
- Contents
- 1. Welcome to Norton Core
- 2. Set up your protected network
- 3. Customize your Norton Core settings
- Change your Norton Core network name and password
- Change Norton Core network band settings
- Create your Norton Core guest network
- Enable or disable Norton Core UPnP
- Add or update Norton Core port forwarding settings
- Change Norton Core DNS settings
- Set the Norton Core light brightness and understand light states
- Change Norton Core time zone settings
- Push Norton Core notifications to Android or iOS devices
- 4. Additional solutions
- Find Norton Core version details
- Set up with a replacement Norton Core router
- Norton Core software and firmware updates
- Reset Norton Core to factory settings
- Restart your Norton Core router
- Devices in your Norton Core network
- Submit Norton Core error logs to Symantec
- Send your feedback to Norton Core team
- Norton Core support
- Disclaimers

4
Launch the Norton Core app.
5
Tap Set Up Norton Core.
6
Read the license agreement, and tap Agree & Launch.
7
Tap Next.
8
In the Select your current wireless set up screen, select your current broadband set
up.
■ If you have separate modem and router devices, select this icon:
■ If you have modem and router combined to a single device, select this icon:
9
Tap Next.
10
Follow the on-screen instructions to physically connect Norton Core router with your
current modem or modem and router combo device, and power them on.
Note: You should wait for about one minute after you power on the modem/modem and
router combo device and Norton Core router. Norton Core router displays a blinking white
light to signal it is ready.
14Set up your protected network
Set up your secure network