
Instruction Manual

Sygic GPS navigation
http://www.sygic.com/manuals/manual_en.html#useful[4/05/2009 10:36:45 AM]
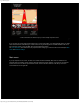
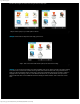
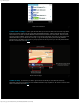
Context menu - context menu contains several options for target that is currently selected by Map cursor.
1) Navigate there - tap this button if you want to be navigated to the selected target on map. Select your
departure and Sygic navigation will compute your route.
(up)
2) Travel via - function is available only if you have already computed a route. It's ideal for when you want to go
to some specific locations which are not presented on your route yet.
(up)
3) Continue - your already planned route would continue to the the selected target from map, it also automatically
adds a Finish waypoint type into your route so that Sygic Navigation would always informs you when you reach it.
(up)
4) Avoid - select which area to avoid and Sygic Navigation will compute route without using avoided locations.
(up)
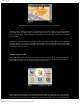
5) Add as POI - selected target on map would be added as POI - you can choose which category it should be put
into, name etc. From this time, saved POI would be also visible on map.
(up)
6) Find nearby POI - choose which POI type you want to search and Sygic Navigation will offer you list of
nearby POIs with accurate distance from your current position.
(up)
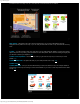
Route and its options
Successful completing of the Navigate to function is first step to plan your basic route. If you tap on the grey screen
right now, there is a new button called Route available in the second slide of the Main menu. Now. You are going to
learn about Route, its options and see how useful tool it is.
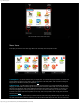
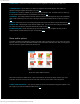
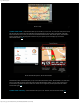
Route menu with six different functions
Route menu consists of six different icons - show route instructions, show route as images, show on map, show
route demo, show route summary and cancel route. Click on the icon you've chosen to see more options.
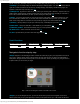
1) Show route instructions - very useful tool that shows you the most important turning points (whether to turn
left or right) on your route and distances between them.
(up)