
User manual


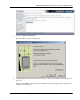


Table Of Contents
- User Guide for M-Business Anywhere™ Client
- Contents
- About this guide
- Part I. Before You Begin
- Part II. Installation
- Installing M-Business Client
- Installing M-Business Client to use a secure digital (SD) card on your Microsoft OS device
- Installing M-Business Client to use a secure digital (SD) card on your Symbian OS device
- Installing M-Business Client with self-registration
- Installing M-Business Client to use with an existing account
- Uninstalling M-Business Client
- Uninstalling M-Business Client from your desktop computer
- Uninstalling M-Business Client from your Palm OS device
- Uninstalling M-Business Client from your Windows Mobile Pocket PC device
- Uninstalling M-Business Client from your Windows XP device
- Uninstalling M-Business Client from your Windows Mobile 5 or 6 or Microsoft Smartphone device
- Uninstalling M-Business Client from your Symbian OS device
- Installing M-Business Client
- Part III. M-Business Client on the Desktop
- Configuring M-Business Client on the desktop computer
- Managing channels on the desktop computer
- Using M-Business Client on a device
- Part IV. M-Business Client on Palm OS
- Configuring a server connection on Palm OS
- Using M-Business Client on Palm OS
- Part V. M-Business Client on Windows Mobile Pocket PC
- Configuring a server connection on Windows Mobile Pocket PC
- Using M-Business Client on Windows Mobile Pocket PC
- Understanding the basics
- Searching to find content in M-Business Client
- Working with text
- Using HTML forms
- Email integration: Launching email from a web page
- Phoneto integration: Launching a dialer application from a web page
- Synchronizing remotely
- Browsing online
- Managing online cache
- Using on-device help
- Part VI. M-Business Client on Windows XP
- Configuring a server connection on Windows XP
- Using M-Business Client on Windows XP
- Part VII. M-Business Client on Windows Mobile 5 or 6, or Microsoft Smartphone
- Configuring a server connection on Windows Mobile 5 or 6, or Microsoft Smartphone
- Using M-Business Client on Windows Mobile 5 or 6, or Microsoft Smartphone
- Understanding the basics
- Searching to find content in M-Business Client
- Working with text
- Using HTML forms
- Email integration: Launching email from a web page
- Phoneto integration: Launching a dialer application from a web page
- Synchronizing remotely on Windows Mobile 5 or 6
- Browsing online
- Managing online cache
- Part VIII. M-Business Client on Symbian OS
- Configuring a server connection on Symbian OS
- Using M-Business Client on Symbian OS
- Understanding the basics
- Searching to find content in M-Business Client
- Working with text
- Using HTML forms
- Email integration: not supported on Symbian OS
- Phoneto integration: Launching a dialer application from a web page
- Synchronizing remotely on Symbian OS
- Browsing online
- Managing online cache
- Using on-device help
- Part IX. Appendix
- Index
Note
If the installer detects a secure digital (SD) card on your device, you will be prompted to install on the
SD card vs. the device main memory.
On Windows Mobile 5 and 6 and Microsoft Smartphone, a dialog pops up on the device asking whether
you want to install to the device main memory or to the SD card.
On Pocket PC, you will see a dialog on the desktop asking whether you want to install to the "default
location" (device main memory) — if you choose NO, you will see a dialog that allows you to select
the SD card as the installation target.
Be sure that you understand the issues involved before you choose to install M-Business Client on your
SD card. See “Installing M-Business Client to use a secure digital (SD) card on your Microsoft OS
device” on page 16.
Tip
If the Download dialog closed, you can use Windows Explorer to search for the installer file name listed
in step 2 in your browser window. Double-click the installer file to continue with the next step below.
9. Follow the instructions on the screen to install M-Business Client on your desktop computer.
10. Click OK when you see the screen display a message telling you that M-Business Client will be installed
to your device the next time you synchronize.
You are returned to the M-Business Client Download page.
Note
M-Business Client also installs M-Business Connect on your desktop and mobile device. M-Business
Connect enables M-Business Client to communicate with M-Business Server.
11. If you ran the installer file by clicking the Open button in the Download Complete dialog, you can
ignore the rest of the instructions on the M-Business Client Download page.
If you closed the Download Complete dialog without running the installer file, follow the directions on
the Install screen ("Step 4 of 7") and click Next after you are finished.
12. Click the Close this Window link when the M-Business Client installer has finished.
Configuring your server connection
♦ To configure a new server connection
1. Start your web browser.
In your browser’s address field, enter http://<servername>:8091, replacing <servername> with the
name of your M-Business Server machine. Your system administrator can provide you with this name.
If your system administrator installed the server on a port other than port 8091, enter http://
<servername>:<port number>.
Installing M-Business Client to use with an existing account
Copyright © 2008, iAnywhere Solutions, Inc. 29