
Specifications


CHAPTER 5 Defining Reports
Users Guide 189
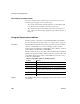
InfoMaker retrieves the rows satisfying the currently defined query in a
grid-style report.
2 Manipulate the retrieved data as you do in the Database painter in the
Output view.
You can sort and filter the data, but you cannot insert or delete a row or
apply changes to the database. For more about manipulating data, see
Chapter 3, “Managing the Database.”
3 When you have finished previewing the query, click the Close button in
the PainterBar to return to the Query painter.
Saving the query
❖ To save a query:
1 Select File>Save Query from the menu bar.
If you have previously saved the query, InfoMaker saves the new version
and returns you to the Query painter. If you have not previously saved the
query, InfoMaker displays the Save Query dialog box.
2 Enter a name for the query in the Queries box (see “Naming the query”
next).
3 (Optional) Enter comments to describe the query, and click OK.
These comments display in the Library painter. It is a good idea to use
comments to remind yourself and others of the purpose of the query.
Naming the query
The query name can be any valid InfoMaker identifier up to 255 characters.
When you name queries, use a unique name to identify each one. A common
convention is to use a two-part name: a standard prefix that identifies the object
as a query (such as
q_) and a unique suffix. For example, you might name a
query that displays employee data
q_emp_data. For information about
InfoMaker identifiers, see Appendix A, “Identifiers.”