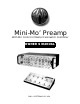
Mini-Mo’ Preamp With Mo’ Control 2 Master Footswitch Controller OWNER’S MANUAL SWR • SCOTTSDALE, AZ• USA
TABLE OF CONTENTS . . . . . . . . . . . . . . . . . . . . . . . . . . . .PG A1 PREFACE IMPORTANT SAFETY INSTRUCTIONS . INTRODUCTION . . . . . . . . . . . . . . FRONT AND REAR PANEL FEATURES SPECIFICATIONS . . . . . . . . . . . . . GETTING STARTED . . . . . . . . . . . . . . . . . . . . . . . . . . . . . . . . . . . . . . . . . . . . . . . . . . . . . . . . . . . . . . . . . . . . . . . . . . . . . . . . . . . . . . . . . . . . . . . . . . . . . . . . . . . . . . . . . . . . . . . . . .
IMPORTANT SAFETY INSTRUCTIONS CAUTION: TO REDUCE RISK OF ELECTRIC SHOCK, DO NOT REMOVE THE COVER OR BACK. NO USER-SERVICEABLE PARTS INSIDE. PLEASE REFER TO A QUALIFIED SERVICE TECHNICIAN. A. READ INSTRUCTIONS: All safety and operation instructions should be read before the product is operated. B. RETAIN INSTRUCTIONS: The safety and operating instructions should be retained for future reference. C. HEED WARNINGS: All of the warnings on this product and in the operating instructions should be adhered to. D.
SWR MINI-MO’ PREAMP • INTRODUCTION Congratulations on your purchase of the SWR Mini-Mo' Preamp! You now own one of the most unique products in the history of musical instrument amplification. Here at SWR we share your spirit of tonal exploration and willingness to experiment in pursuit of the ultimate goal: finding equipment that not only does the job for you as a musician, but actually enhances your overall musical experience and contributes to your creative process.
The amount of tone and patching flexibility available in the Mini-Mo’ Preamp/Mo' Control 2 system is impossible to describe in just a paragraph, but we'll try. 13 audio outputs; 6 post-master, 7 pre-master; 11 unbalanced and 2 balanced. The ability to split the signal into clean and dirty channels by using the Dual Mode function.
•Bass Level Control •Overdrive "Drive" Control •Overdrive Tone Control •Overdrive Level Control •Subwave Tone Control •Subwave Mix Control •Bassynth Filter Control •Bassynth Resonance Control •Bassynth Envelope Control •Bassynth Level Control •Mo' EQ Treble Control •Mo' EQ Midrange Control •Mo' EQ Bass Control •Chorus Depth Control •Chorus Level Control •Chorus Rate Control •Push switches and unique-colored LED indicators for on/off control of all effects •Internal Effects Bypass Switch with LED indicator •
Pre-Master Audio Outputs •Direct Out 1/4" Jack •Tuner Out 1/4" Jack •Mo' Bass Out 1/4" Jack •Direct Out 1/4" XLR Jack •Mo' Bass Out XLR Jack •Line/Direct Switch for 1/4" and XLR Direct Out Jacks •Individual 3-position Pad Switches (0 db, -10 db, -20 db) for both Direct •Out and Mo' Bass Out XLR jacks •Ground/Lift Switch for both Direct Out and Mo' Bass Out XLR jacks •Stereo Effects Loop (Left and Right Send and Return Jacks) •Internal Effects Bypass Footswitch Jack •Filter Sweep Pedal Jack •"Mo' Control 2"
Output Impedance Effects Sends: 220 Ohms Tuner Output: 220 Ohms XLR Balanced Out: 750 Ohms Signal To Noise Ratio -88 dB (<10 millivolts typical) Equivalent Input Noise 15 nanovolts per root/hertz Dimensions (depth includes handles and XLR pad) 19" W x 5.38 " H x 8" D (three rack spaces; depth not including handles) Weight 10 lbs.
local service center.) Also, the preamp tube will take approximately 10 seconds to warm up before producing signal. This too is normal. GETTING SOUND OUT OF THE MINI-MO' PREAMP NOTE: Remember to ensure that your power amp volume is still set to "zero," or the minimum setting before starting this process. Plug your instrument into the desired input jack (please refer to "Mini-Mo’ Preamp––Front Panel Features" for more detail).
PASSIVE/ACTIVE INPUT JACK The Passive/Active Input Jack is the most often used input jack and is the recommended starting point for most SWR users. Connecting your instrument to this jack via a shielded instrument cable will send the signal from your instrument to the initial preamp stage section of Mini-Mo’ Preamp, where it can be adjusted before being sent on through the onboard effects and then to the Master section.
NOTE: NOTE Even though the Preamp Clip LED turning red indicates that at some point the preamplifier is clipping, no harm is being done to your amplifier. LIMITER/LEVELER The Limiter/Leveler circuit is a tube limiter that helps control the dynamic range of the preamp. The Limiter/Leveler control sets the "threshold" for the circuit, which is the level at which limiting begins to take effect. The yellow LED above the control will illuminate, indicating that the Limiter is active.
TREBLE CONTROL The Treble control is a shelving-type tone control that cuts or boosts high frequencies up to 12 dB in either direction. Starting from mid-position ("flat"), turning the Treble control counter-clockwise cuts the highs, while turning the control clockwise boosts the highs. The shelving point for this control is about 2 KHz.
off of the very same specially selected 12AX7 preamp tube mentioned above. We've taken extra care to ensure that, unlike most bass distortion units, there is no significant damage to the fundamental note––specifically in the low end. OVERDRIVE "DRIVE" CONTROL This control determines how heavily the tube overdrive circuit will distort the signal. With the control set at minimum '0', there will be only the tiniest amount of "dirt" present in the signal path.
SubWave The Mini-Mo' Preamp SubWave is a lightning-quick sub-octave wave engine. In plain terms, it hears the note you play and immediately generates a signal one octave below it. You may have heard the term "octave pedal" before. You may have even used one. If so, welcome to the next generation of sub-octave signal processing. SubWave TONE CONTROL This control is very much like the tone control on a passive bass. It simply cuts high frequencies.
BASSYNTH FILTER CONTROL This control allows the user to take away certain overtones that are present in the raw waveform (otherwise known as "Subtractive Synthesis"). In simple terms, it acts like an equalizer for the waveform ––taking away treble but not adding bass. When set counter-clockwise to the minimum position ('0'), the filter is "fully closed" and will subtract as many overtones as possible. When set clockwise to the maximum ('10'), the filter is "wide open" and subtracts nothing.
USING THE BASSYNTH The Mini-Mo' Preamp Bassynth will react differently to every single user. Factors such as the kind of bass, the EQ of the bass, the pickup selection on the bass, the technique of the player, the Preamp volume of the Mini-Mo' Preamp, the control settings of the Bassynth itself, and the Bassynth Mix control will all come into play. Spend some time with it and become comfortable––you'll probably stumble across a sound that we haven't even heard yet.
Not satisfied yet? Throw the Chorus into the mix. Now try some experimenting. Also try using the Dual Mode function. This will allow you to blend the original, unaffected signal back into the chain by using the stereo Master Volume controls. The left side will control the unaffected signal, while the right side will affect the Bassynth's signal, as well as any effects engaged. (Please refer to the "Dual Mode" section for more details.
MO' EQ MIDRANGE CONTROL The band pass filter on this EQ control is set at 1.5 kHz. Starting from mid-position ("flat"), turning the Mo' EQ Midrange control counter-clockwise cuts the upper mids at 1.5 kHz, while turning the control clockwise boosts the mids at 1.5 kHz. Cutting 1.5 kHz can help you "scoop" the EQ for a more transparent sound, while boosting it will help accentuate the upper mids of your tone. MO' EQ BASS CONTROL The band pass filter on this EQ control is set at 40 Hz.
CHORUS DEPTH CONTROL This control determines the amount of chorus applied to the original bass signal. When set at minimum ('0'), the delay is very short, resulting in a very subtle "phasing" effect. As you turn the knob clockwise, the delay time becomes longer and causes more of a "doubling" sound, making the effect more dramatic. CHORUS LEVEL CONTROL This control slowly blends in the chorused signal until it reaches the maximum allowable in the circuit.
see the same signal. Turn on an effect and it will come out of both sides. Turn the effect off and clean bass will come out both sides. Dual Mode changes all that. When Dual Mode is engaged, the signal splits in two after the preamp. One of the two signals––we'll call it the "clean" channel––is routed directly from the preamp straight to the LEFT set of main outputs.
If you are using more than one speaker cabinet (and especially if they contain different speaker configurations), you may want to remember that, in Dual Mode, the Mini-Mo' Preamp will send the "wet" channel to the right main outputs while sending the "clean" channel to the left main outputs. Maybe you want the "clean/left" channel in a 2x10" and the "wet/right" channel in a single 15".
The Effects Blend circuit is similar to that used on recording consoles, with the effects loop on a "side chain" to the original bass signal (which at this point in the signal path may or may not be already processed by the Mini-Mo' Preamp internal effects). This way you can get the full sound of your instrument in addition to whatever the external effects unit sends back. USING THE EXTERNAL EFFECTS BLEND CONTROLS Most players only use one external effect device, so let's start there.
comparisons between the sound coming out of your rig to the sound in the house (or at the mixing board). STEREO MASTER VOLUME CONTROLS The Stereo Master Volume controls adjust the individual volumes of the main outputs. For both controls, fully counter-clockwise ('0') is minimum, while fully clockwise is maximum. As mentioned previously in the "Getting Started" section of the manual, both controls are active at all times.
equal to the main outputs when the Master Volume controls are set to maximum (fully clockwise). That is because, in reality, the Master Volume controls are really pads, or attenuators, of the audio signal. They actually reduce the true signal level from '10' as opposed to boosting it from '0'.
GROUND/LIFT SWITCH The "Ground/Lift" switch affects the XLR jacks only, and affects both at once. Most often the "Ground" position is correct. With the switch in the "Ground" position, the ground to pin 1 is engaged. In case of excessive ground noise (most likely caused by a non-standard wiring of an XLR connection at a mixing console), use the "Lift" position. Moving the switch to the "Lift" position will interrupt or defeat the ground on pin 1.
UNBALANCED PRE-MASTER OUTS TUNER OUT External effects are never present. DIRECT OUT With the "Line/Direct" switch in the "Direct" position, no external effects are present. With the "Line/Direct" switch in the "Line" position signal from only the LEFT EFX return will be present. MO' BASS OUT Signal from only the RIGHT EFX return is present at this output. BALANCED PRE-MASTER OUTS DIRECT OUT External effects are never present.
front panel and heads for the Effects Send jacks just after the Chorus section. Then the signal returns just before the Master section and is blended in to your taste (using the External Effects Blend controls). The Stereo Master Volume controls will NOT affect the level of your Left and Right Effect Sends. However, the Stereo Master Volume controls may be used to recover losses in gain caused by some effects units.
MAIN OUTPUT JACKS (POST-MASTER) These six 1/4" jacks serve as the post-master audio outputs for your Mini-Mo’ Preamp. They are the designated outputs for connection to the power amp being used to drive the speakers for your rig onstage, while the pre-master outputs can be used simultaneously to send audio to a front-of-house mixing board or external effects device.
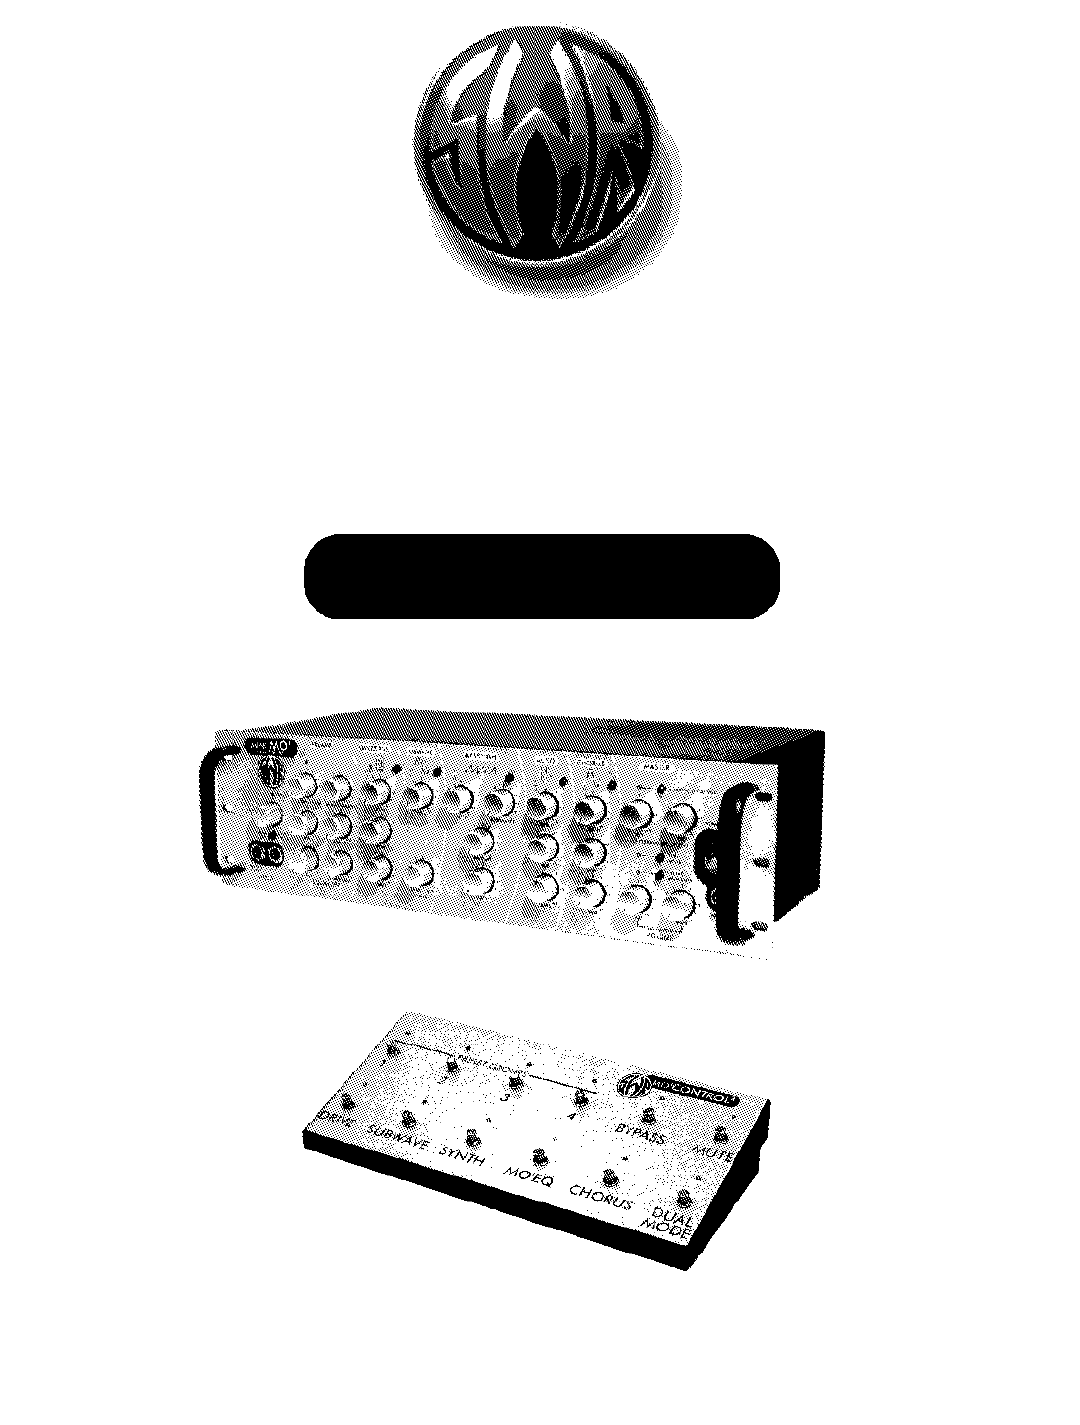
THE MO' CONTROL 2 PROGRAMMABLE MASTER FOOTSWITCH OVERVIEW The SWR Mo' Control 2 Programmable Master Footswitch is custom-made for use with the SWR Mini-Mo' Preamp. With a touch of your foot, you now have individual control over all five effects––Overdrive, SubWave, Bassynth, Mo' EQ and Chorus––plus Bypass and Mute. You can activate the Dual Mode function (a clean/dirty channel splitter) from the floor as well.
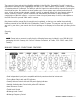
MO' CONTROL 2 - REAR PANEL FEATURES (left to right) •Filter Sweep (Expression) Pedal Out Jack •Tuner Out Jack •Main Footswitch Out (HD15) Jack •Preset Group Mode Switch CONNECTING THE MO' CONTROL 2 TO THE MINI-MO’ PREAMP As mentioned in the "Mini-Mo’ Preamp - Getting Started" section of this manual, it's best to turn your Mini-Mo’ Preamp power off before connecting your Mo' Control 2 Footswitch to it.
To disengage any activated effect, simply step on the switch again and it will shut off. Individual switches will not affect other individual switches. You can turn the effects on and off one at a time, or manually turn on several effects at once. Notice that whatever you do on the Mo' Control 2, the MiniMo’ LED's will reflect it. The reverse is also true. If you engage an effect manually by using the switch on the Mini-Mo’ itself, the corresponding Mo' Control 2 LED will illuminate.
returned to Solo Mode, which when you left it, had no effects on at all. Now step on the "1" switch again. You're back in Group Mode, and the Overdrive, Mo' EQ and Chorus should all turn back on. Congratulations! Now you can program the other three groups however you wish. (We recommend re-reading the entire "Front Panel Features" section in your Mini-Mo’ Owner's Manual for some advice on gain stages, how levels affect other levels, and how effects affect other effects when using combinations of sounds.
Mode. But if you hit any Preset Group switch twice in a row, you'll return to Solo Mode––and whatever you did last in that mode will be what you see and hear. USING THE MO' CONTROL 2 AS A MIDI CONTROLLER You can control both the Mini-Mo’ Preamp and your external MIDI-capable device by using the Preset Group and Bypass switches on the Mo' Control 2. When connected to the Mini-Mo’, the Mo' Control 2 sends simple MIDI program change commands through the MIDI Out Jack on the rear of the Mini-Mo’.
MINI-MO' PREAMP/MO' CONTROL 2 - FREQUENTLY ASKED QUESTIONS Q: With all this talk of clean and wet sounds, do I need a stereo power amp and two speaker cabinets to run the Mini-Mo’ properly? A: No! You can use either of the mono main outputs for a good, solid, single output source to a single power amp and speaker cabinet. Q: I can't seem to get a good balance between clean and wet sounds. What's wrong? A: If you're using the Overdrive, try adjusting the Overdrive Level.
Q: When I run in Dual Mode I seem to lose a little overall level. Why? A: The effects you're using may be boosting the overall signal level (which you can test by hitting the Internal Effects Bypass switch). If so, when you engage Dual Mode, you're taking one channel of the unit and dropping its signal back down to the unaffected level. If you can achieve balance between your clean and wet sounds before using Dual Mode, you should hear no difference when running in Dual Mode.
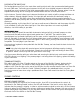
MINI-MO’ - SIGNAL PATH DIAGRAM F3 • MINI-MO’ OWNER’S MANUAL
MINI-MO’ PREAMP / MO’ CONTROL 2 LIMITED WARRANTY The Mini-Mo’ Preamp/Mo’ Control 2 from FMIC is warranted to the original consumer purchaser for TWO YEARS from the date of purchase, against defects in materials and workmanship and provided that it is purchased from an Authorized SWR Dealer. This warranty applies only to products purchased in the USA or Canada.