
Installation Guide
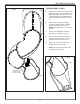
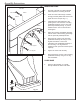
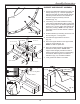
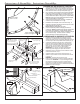
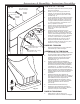
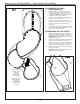
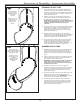

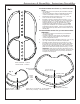
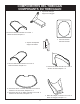

Fig. 10
dimple
hole
11
Assembly Instructions
!" $!
Position the exit section to the previously
attached sections so the seams line up.
Rotate the section two holes to the left
(counterclockwise) and realign with the
h
oles of the entrance section (see Fig.
9).
Insert a 3/4" bolt through a washer,
through the slide sections, a second
washer and secure with a loc nut.
!Hand tighten the loc nuts only at
this time.
Position the slide base to the slide
assembly as indicated in (Fig. 10).
Insert a 3/4" bolt through a washer,
through the slide sections, a second
washer and secure with a loc nut.
Tighten all of the bolts of the slide
sections securely at this time.
!Do not tighten the bolts of the
mounting plate at this time.
-+
Rotate seam two
holes to the left
(counterclockwise)
dimple