
User Guide

PAGE 11
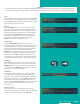
Recording a Series continue...
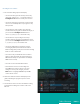
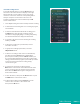
3. The Series Recording Options will display.
• Choose how many episodes to keep at most any
given time. Options are 1 – 10 or All episodes. Use
Left/Right arrow buttons to make your selection.
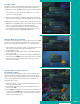
• Choose the show type you wish to record. You may
choose to record All episodes of a program or only
New episodes.
• Choose when to start recording. You can begin
‘on time’ when the program is scheduled to begin, or
you can use the Left/Right arrow buttons to
choose 1, 2, 3, 4, 5,10, 15, or 30 minutes early.
• Choose when to stop recording. You can stop
‘on time’ when the program is scheduled to end, or
you can use the Left/Right arrow buttons to choose
1, 2, 3, 4, 5, 10, 15, 30, or 60 minutes late.
• Choose the folder where you want to save the
recording. By default, the folder will be named
‘All Recordings,’ but you may choose another existing
folder or create a new folder.
• Select the room you would like the Series Rule to
apply to. (This option will only appear if there is a
Whole Home Group set up and there are multiple
DVRs on the account).
• Select Yes or No for the AutoTune feature.
• Arrow down to Create Series Recording and
press OK on the remote control to save your
changes. To cancel your changes, press the
EXIT button or highlight Cancel and press OK
on the remote control.
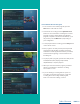
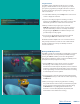
4. A Red circle with two red lines will display in the
guide, indicating the program is part of a series
recording.
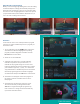
5. You will also be able to see the scheduled recording
in the Future Recordings list as well as in the Series
Rules list.
Table of Contents