™ Advanced security made easy ™ English - Français - Español RemoteCam™ DVR-410 Operating Instructions Instructions d’utilisation Instrucciones de Uso SR361-RMC www.swannsecurity.
English FCC Verification: NOTE: This equipment has been tested and found to comply with the limits for Class B digital device, pursuant to part 15 of the FCC Rules. These limits are designed to provide reasonable protection against harmful interference in a residential installation.
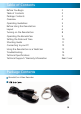
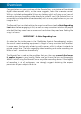
Table of Contents Before You Begin Table of Contents Package Contents Overview Operating Guidelines Before Using the RemoteCam Layout Turning on the RemoteCam Operating the RemoteCam Setting the Date and Time Shooting Guide Connecting to your PC Using the RemoteCam as a WebCam Troubleshooting Technical Specifications Technical Support / Warranty Information 2 3 3 4 5 5 6 8 9 10 11 12 13 14 15 Rear Cover Package Contents RemoteCam Video Recorder USB 2.
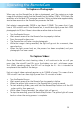
Overview Congratulations on your purchase of the RemoteCam, a miniature self-contained digital video recorder which, as the name suggests, looks like a remote control. With an included rechargeable lithium-ion battery which will give up an hour of recording time and recording video directly to microSD card, the RemoteCam is a convenient and adaptable camera/recorder, with as many applications as you can imagine for it.
Operating Guidelines These are just a couple of points to keep in mind whilst using the RemoteCam: • Do not point the RemoteCam towards exceedingly bright light sources such as the sun, high-powered headlights or stadium lights. The bright light may damage the image sensor, either leaving a permanent ‘shadow’ on your videos where the light source has damaged the sensor, or rendering the sensor completely inoperable. • Avoid adverse weather conditions.
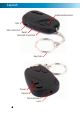
Layout Additional Buttons LED Mini USB Port Reset MicroSD Card Slot Keychain Power Record Microphone Lens 6
LED: A small orange light which will indicate the current state and function of the RemoteCam. In bright light (such as sunlight) this might be difficult to see. Mini USB Port: A Mini-USB-A port. Use the supplied USB cable to attach the RemoteCam to a computer or USB charger. Reset Button: Used to quickly return the RemoteCam to it’s initial booted state. This is typically used only if the RemoteCam freezes and needs to be reset.
Turning on the RemoteCam To turn the RemoteCam ON: • Press and hold the Power Button for approximately one second. • The LED will turn on, indicating that the RemoteCam is now turned on. To turn the RemoteCam OFF: • Press the Power button for approximately two seconds. • Do NOT turn the RemoteCam off whilst recording video, or immediately after recording video.
Operating the RemoteCam To Capture a Photograph: When you use the RemoteCam to take a photograph, you’ll be capturing a single image at the highest quality that the RemoteCam can deliver (1280 x 1024 pixels, the resolution of a mid-level LCD computer monitor). Taking a photo takes approximately two to three seconds as the RemoteCam processes the data. Each photo is approximately 350KB in size (about 0.35MB).
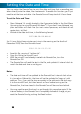
Setting the Date and Time You can setup the RemoteCam to print the date and time that a recording was taken directly onto the video, like a watermark. To enable this function, you’ll just need to set the time and date - the RemoteCam will keep track of it from there. To set the Date and Time: • • Open Notepad. It’s usually located in the Accessories folder in the Start Menu (assuming you’re using Microsoft Windows®).
Shooting Guide Framing: The RemoteCam has a fixed lens (a vari-focal lens would, simply, not fit) – so the size of subjects in your shots depends only on how close to the subject you hold the camera. • Typically, about 3 feet (1m) is about right if filming a shot of someone’s face – this way, their face will occupy approximate half the vertical space in frame. • To get a whole person in frame (assuming they’re approximately six feet tall) then you’ll need to be about 10ft (3m) away from them.
Connecting to your PC You can read the data on the microSD card in the RemoteCam by connecting the RemoteCam to your computer. To do this: • Locate the mini-USB plug on the side of the RemoteCam. • Find a spare USB port on your computer.… • For maximum speed, find a free USB 2.0 port on your computer, and avoid using USB extension cables or hubs. • Connect the spare USB port on your computer to the mini-USB port on the RemoteCam using the supplied USB 2.0 cable.
Using the RemoteCam as a WebCam You can use the RemoteCam as a webcam. To do so, you’ll need to grab the drivers from our website, and install them to your PC. Then, you just have to change the mode of the RemoteCam once it’s connected to your PC. • Go to http://www.swannsecurity.com/downloads/drivers/ • Open the folder called “RemoteCam”. • Download and run the file named “SPCA1528_V2220_MultiLan_090217”. • Follow the onscreen prompts. This program will install the drivers for the webcam.
Troubleshooting Problem: I’ve recorded videos, but the microSD card seems to be blank. Solution: Chances are that this problem is caused by turning the RemoteCam off before the video files have been properly saved to the microSD card. Always use the Rec/Pause button to stop recordings and waiting until the LED has come back on before turning the RemoteCam off. Problem: The RemoteCam won’t turn on. Solution: The most likely culprit is the battery.
Technical Specifications Video Video Format Video Resolution Video Size Photo Format Photo Resolution Photo Size AVI 720 x 480 Variable (avg. > 10, 000kbps) JPEG 1280 x 1024 (Interpolated) Approx.
Français Vérification FCC Note : Cet équipement a été testé et est en conformité avec les limites édictées dans le paragraphe 15 des Règlementations FCC, relatif aux équipements numériques de classe B. Ces limites ont été définies dans le but de fournir une protection raisonnable contre les interférences néfastes dans les installations résidentielles.
Table des matières Avant de commencer Table des matières Contenu de l’emballage Description Conseils d’utilisation Avant d’utiliser le RemoteCam Schéma Mise en route du RemoteCam Utilisation du RemoteCam Réglage de la date et de l’heure Guide de prise de vue Connexion à votre PC Utilisation du RemoteCam comme une Webcam Dépannage Spécifications techniques Informations de garantie Service d’assistance technique 16 17 17 18 19 19 20 22 23 24 25 26 27 28 29 30 31 Contenu de l’emballage Enregistreur vidéo Rem
Description Félicitations pour votre achat du RemoteCam, un enregistreur numérique miniature complet et fonctionnel qui, comme son nom l’indique, ressemble à une télécommande. Avec une pile lithium-ion rechargeable incluse qui vous offrira jusqu’à une heure de temps d’enregistrement et vous permettra de faire un enregistrement vidéo directement sur une carte micro SD, le RemoteCam est une camera/un enregistreur pratique et polyvalent, avec autant d’applications que vous pouvez imaginer.
Conseils d’utilisation Voici quelques remarques à garder à l’esprit lorsque vous utilisez le RemoteCam: • Ne dirigez pas le RemoteCam vers des sources de lumière extrêmement fortes telles que le soleil, les phares très puissants ou les lumières de stade. La lumière brillante pourrait endommager le capteur, laissant une ‘ombre’ permanente sur vos enregistrements vidéos à l’endroit ou la source de lumière à abîmé le capteur, ou rendant le capteur complètement inutilisable.
Schéma Boutons supplémentaires DEL Port Mini USB Réinitialiser Fente de la carte de mémoire micro SD Porte-clés Marche Enregistrement Microphone Lentille 20
DEL: Une petite lumière orange qui indiquera l’état actuel et le fonctionnement du RemoteCam. Dans un endroit éclairé (comme en plein soleil) elle peut être difficile à voir. Port Mini USB: Un port Mini-USB-A. Utilisez le câble USB fourni pour connecter le RemoteCam à un ordinateur ou à un chargeur USB. Bouton Réinitialiser: Utilisé pour ramener le RemoteCam à son état initial au démarrage. Il est habituellement utilisé uniquement si le RemoteCam est bloqué et doit être réinitialisé.
Mise en route du RemoteCam Pour allumer le RemoteCam: • Appuyez et maintenez le bouton Marche pendant environ une seconde. • Le DEL s’allumera, indiquant que le RemoteCam est maintenant en marche. Pour éteindre le RemoteCam: • Appuyez le bouton Marche pendant environ deux secondes. • N’éteignez PAS le RemoteCam pendant que vous enregistrez une vidéo, ni immédiatement après avoir fait un enregistrement vidéo.
Utilisation du RemoteCam Pour capturer une photographie: Lorsque vous utilisez le RemoteCam pour prendre une photo, vous capturez une image unique de la meilleure qualité que peut offrir le RemoteCam (1280 x 1024 pixels, la résolution d’un écran LCD d’ordinateur de niveau moyen). Il faut environ deux à trois secondes pour prendre une photo pendant que le RemoteCam traite les données. Chaque photo a une taille de 350KB environ (à peu près 0,35MB).
Réglage de la date et de l’heure Vous pouvez régler le RemoteCam pour qu’il imprime la date et l’heure auxquelles l’enregistrement a été effectué, directement sur la vidéo, comme un filigrane. Pour activer cette fonction, vous devrez simplement régler l’heure et la date – le RemoteCam conservera une trace de ce réglage. Pour régler la date et l’heure: • • Ouvrir Notepad. Il est habituellement situé dans le dossier Accessoires dans le Menu Démarrer (en supposant que vous utilisez Microsoft Windows®).
Guide de prise de vue Cadrage: Le RemoteCam a une lentille fixe (une lentille vari-focale ne suffirait simplement pas) – donc la taille des sujets de vos photos dépend uniquement de la proximité du sujet avec la camera. • Habituellement, une distance d’1 m environ (3 feet) est à peu près convenable pour capturer le visage d’une personne – ainsi, le visage occupera environ la moitié de l’espace vertical du cadre.
Connexion à votre PC Vous pouvez lire les informations sur la carte micro SD sur le RemoteCam en le connectant à votre ordinateur. Pour cela: • Repérez la prise mini-USB sur le côté du RemoteCam. • Trouvez un port USB disponible sur votre ordinateur … • Pour une vitesse maximale, utilisez un port USB 2.0 sur votre ordinateur, et éviter d’utiliser des câbles d’extension ou les concentrateurs.
Utilisation du RemoteCam comme une WebCam Vous pouvez utiliser le RemoteCam comme une webcam. Pour ce faire, vous devrez télécharger les pilotes de notre site internet, et les installez sur votre PC. Ensuite, il vous suffira de changer de mode sur le RemoteCam une fois qu’il est connecté à votre PC. • Visitez http://www.swannsecurity.com/downloads/drivers/ • Ouvrez le dossier appelé “RemoteCam” • Téléchargez et exécutez le fichier appelé “SPCA1528_V2220_ MultiLan_090217”.
Dépannage Problème: J’ai enregistré mes vidéos, mais la carte micro SD semble être vide. Solution: Il est probable que ce problème soit causé quand vous éteignez le RemoteCam avant que les fichiers vidéo n’aient été sauvegardés correctement sur la carte micro SD. Utilisez toujours le bouton Enregistrement/Pause pour arrêter l’enregistrement et attendez que la DEL se rallume avant d’éteindre le RemoteCam. Problème: Le RemoteCam ne s’allume pas. Solution: Le coupable est probablement la pile.
Spécifications Techniques Format vidéo Résolution vidéo Video taille Photo format Photo Résolution Photo Size Vidéo AVI 720 x 480 Variable (moyenne> 10, 000kbps) JPEG 1280 x 1024 (interpolée) approx.
Information sur la Garantie Swann Communications USA Inc. 12636 Clark Street Santa Fe Springs CA 90670 USA Swann Communications PTY. LTD. Building 4, 650 Church Street, Richmond, Victoria 3121 Australia Arise-Europe Raheen Business Park Pearse Road Raheen, Limerick Ireland Swann Communications garantit ce produit contre tout défaut de fabrication et contre tout défaut matériel pour une période de un (1) an à compter de la date d’achat.
Aide / Support Technique Swann. L’aide est ici! Félicitation pour votre achat.
Español Cumplimiento con normas de la FCC: NOTA: Este equipo ha sido probado y cumple con las disposiciones impuestas para los equipos digitales de clase B, de acuerdo con el aparte 15 de las normas de la FCC. Estas disposiciones se dan con la intención de proporcionar una protección razonable, contra las interferencias perjudiciales en instalaciones residenciales.
Índice Antes de Que Comience Índice Contenido del Paquete Vista general Guía de Operación Antes de Usar la RemoteCam Diseño Encendidendo la RemoteCam Operando la RemoteCam Ajustando la Fecha y Hora Guía para Tomas Conectando a su PC Usando la RemoteCam como WebCam Resolviendo Problemas Especificaciones Técnicas Información de Garantía Soporte Técnico 32 33 33 34 35 35 36 38 39 40 41 42 43 44 45 46 47 Contenido del Paquete Grabadora de Video RemoteCam Cable USB 2.
Vista general Felicidades por comprar la RemoteCam, una grabadora de video digital miniatura auto-contenida que, como lo sugiere su nombre, parece un control remoto. Con una batería de ion litio recargable incluida que le dará hasta una hora de tiempo de grabación y grabando directamente a una tarjeta microSD, la RemoteCam es una cámara/grabadora conveniente y adaptable, con tantas aplicaciones como pueda imaginar.
Guía de Operación Estos son sólo unos cuantos puntos a tomar en cuenta cuando use la RemoteCam: • No apunte la RemoteCam hacia fuentes de luz extremadamente brillantes tales como el sol, luces altas o luces de estadio. La luz brillante puede dañar el sensor de imagen, ya sea dejando una “sombra” permanente en sus videos donde la fuente de luz daño el sensor, o dejando el sensor completamente inoperable. • Evite condiciones climáticas adversas.
Diseño Botones Adicionales LED Puerto Mini USB Reestablecer Ranura para Tarjeta MicroSD Llavero Encendido Grabación Micrófono Lente 36
LED: Una pequeña luz naranja que indicará el estado actual y función de la RemoteCam. Pude que sea difícil de verlo bajo la luz brillante (como la luz solar). Puerto Mini USB: Un puerto Mini-USB-A. Use el cable USB provisto para conectar la RemoteCam a una computadora o cargador USB. Botón para Reestablecer: Úselo para regresar rápidamente la RemoteCam a su estado de arranque inicial. Esto se usa típicamente sólo si la RemoteCam se congela y se necesita reestablecer.
Encendiendo la RemoteCam Para ENCENDER la RemoteCam: • Presione y mantenga presionado el Botón de Encendido por aproximadamente un segundo. • El LED se encenderá, indicando que la RemoteCam está encendida. Para APAGAR la RemoteCam: • Presione el botón de Encendido por aproximadamente dos segundos. • NO apague la RemoteCam mientras graba video, o inmediatamente después de grabar video.
Operando la RemoteCam Para Capturar una Foto: Cuando use la RemoteCam para tomar una fotografía, tomará una imagen sencilla con la mayor calidad que puede dar la RemoteCam (1280 x 1024 píxeles, la resolución de un monitor LCD de computadora de medio nivel). El tomar una foto se lleva aproximadamente dos a tres segundos mientras la RemoteCam procesa la información. Cada foto es de aproximadamente 350KB de tamaño (cerca de 0.35MB).
Ajustando la Fecha y Hora Puede ajustar la RemoteCam para imprimir directamente en el video la fecha y hora en la que se tomó una grabación, como una marca de agua. Para habilitar esta función, sólo necesita ajustar la fecha y hora, la RemoteCam mantendrá el registro a partir de ahí. Para ajustar la Fecha y Hora: • • Abra el Notepad. Usualmente se localiza en la carpeta de Accesorios en el Menú de Inicio (asumiendo que está usando Microsoft Windows®).
Guía para Tomas Encuadrando: La RemoteCam tiene un lente fijo (un lente con enfoque variable simplemente no cabría), así que el tamaño del objetivo en sus tomas depende sólo de qué tan cerca tenga la cámara del objetivo. • Típicamente, 3 pies (1m) es lo correcto si toma el rostro de alguien, de esta forma, su rostro ocupará aproximadamente la mitad del espacio vertical en el cuadro. • Para que una persona completa entre a cuadro (asumiendo que sea de aproximadamente seis pies de altura o 1.
Conectando a su PC Puede leer la información en la tarjeta microSD en la RemoteCam conectando la RemoteCam a la computadora. Para hacer esto: • • • • • • • • Localice el enchufe mini-USB en el costado de la RemoteCam. Busque un puerto USB libre en su computadora… Para una máxima velocidad, busque un puerto USB 2.0 libre en su computadora, y evite usar cables de extensión USB o concentradores. Conecte el puerto USB libre en su computadora al puerto mini-USB en la RemoteCam usando el cable USB 2.0 provisto.
Usando la RemoteCam como WebCam You can use the RemoteCam as a webcam. To do so, you’ll need to grab the drivers from our website, and install them to your PC. Then, you just have to change the mode of the RemoteCam once it’s connected to your PC. • Vaya a http://www.swannsecurity.com/downloads/drivers/ • Abra la carpeta llamada “RemoteCam”. • Descargue y ejecute el archivo llamado “SPCA1528_V2220_ MultiLan_090217”. • Siga las indicaciones en pantalla.
Resolviendo Problemas Problema: He grabado videos, pero la tarjeta microSD parece estar vacía. Solución: Probablemente este problema sea causado por apagar la RemoteCam antes de que los archivos de video se hayan guardado adecuadamente en la tarjeta microSD. Siempre use el botón Grabar/Pausar para detener las grabaciones y espere hasta que el LED se haya vuelto a encender antes de apagar la RemoteCam. Problema: La RemoteCam no se enciende. Solución: El más probable culpable es la batería.
Especificaciones Técnicas Formato de vídeo Resolución de video Video tamaño Formato de fotos Photo Resolution Foto Tamaño Video AVI 720 x 480 variable (promedio> 10, 000kbps) JPEG 1280 x 1024 (interpolada) aprox.
Información sobre la garantía Swann Communications USA Inc. 12636 Clark Street Santa Fe Springs CA 90670 USA Swann Communications PTY. LTD. Building 4, 650 Church Street, Richmond, Victoria 3121 Australia Arise-Europe Raheen Business Park Pearse Road Raheen, Limerick Ireland Swann Communications garantiza este producto por defectos de fabricación y material, por un período de un (1) año a partir de la fecha original de compra.
Centro de asistencia técnica Soporte Técnico Swann Todos los países Correo Electrónico: tech@swannsecurity.com Atención Telefónica al Usuario ESTADOS UNIDOS Sin costo 1800-627-2799 (Dom, 2pm-10pm HP EE.UU.Lun-Juev, 6am-10pm, HP EE.UU. Viern, 6am-2pm HP EE.UU.) ESTADOS UNIDOS Cambios & Devoluciones 1800-627-2799 (Opción 1) (Lun-Viern, 9am-5pm HP EE.UU.) EUROPE 0203 027 0979 De lunes a viernes, 10am-7pm Asistencia técnica disponible en Inglés solamente.
Helpdesk / Technical Support Details Swann Technical Support All Countries E-mail: tech@swannsecurity.com Telephone Helpdesk USA toll free AUSTRALIA toll free 1-800-627-2799 1300 138 324 (Su, 2pm-10pm US PT) (M 9am-5pm AUS ET) (M-Th, 6am-10pm US PT) (Tu-F 1am-5pm AUS ET) (F 6am-2pm US PT) (Sa 1am-9am AUS ET) NEW ZEALAND toll free USA Exchange & Repairs 0800 479 266 1-800-627-2799 (Option 1) INTERNATIONAL +61 3 8412 4610 (M-F, 9am-5pm US PT) See http://www.worldtimeserver.