
User's Manual


56
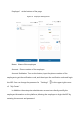
9.2 Mapping
Enter EAVISION Agriculture APP, search for the base station. Find the base station
which the device name starts with “HC”, tap “Connect” to connect your phone
to it. After it is connected, choose “Enter Location Mode”. Tap “Mapping” in the
interface and then go to the plot with your phone, remote control and the base
station. When you arrive at the plot, tap “Record Boundary Point” to start
mapping. After all the boundary points were recorded, upload the plot.
9.3 Operating
After uploading the plot, tap “Enter Station Mode with Current Location”, and
then fix the base station (don’t move the base station anymore). Enter manual
operation mode and check two things: 1. the nose direction of the UAV should be
consistent with the nose direction in the APP map (if the two directions are
consistent, the arrow in the APP that represents the UAV nose is green, otherwise
the arrow is red). 2. Check the pitch angle of the UAV (Lift up the UAV nose and
observe the value of UAV nose on the APP. If the value is positive, it means that
there is no problem). When the check is done, enter auto operation mode interface,
select the plot you have just mapped to plan the flight route, and then upload the
flight route. When the flight route is uploaded, tap “Takeoff”, the UAV will take off
and hover in the air. Then tap “Work”, the UAV will operate according to the
planned flight route. When the operation is over, the UAV will go back to the
starting point and land safely.