
Wristop Computer User's Manual


Table Of Contents
- 1. General Information
- 2. How to Use your Suunto X10
- 3. Modes
- 3.1. General Information
- 3.2. Time Mode
- 3.2.1. Main display
- 3.2.2. Stopwatch
- 3.2.3. Alarm
- 3.2.4. Time/Date
- 3.2.5. Units
- 3.2.6. Setting the position format
- 3.2.7. General
- 3.3. Alti/Baro mode
- 3.3.1. Use
- 3.3.2. Alti use
- 3.3.3. Baro use
- 3.3.4. Alti/Baro data display
- 3.3.5. Reference altitude
- 3.3.6. Barometric Memory
- 3.3.7. Alarm
- 3.4. compass mode
- 3.4.1. Main display
- 3.4.2. Calibrating the compass
- 3.4.3. Declination
- 3.5. NAVIGATION MODE
- 3.5.1. Using the Navigation mode
- 3.5.2. Main display
- 3.5.3. Creating a route
- 3.5.4. Using a route
- 3.5.5. Editing routes and waypoints
- 3.5.6. Navigation data displays
- 3.5.7. Navidata
- 3.5.8. Track Back (Active track)
- 3.6. ACTIVITY MODE
- 3.6.1. Main Display
- 3.6.2. Activity
- 3.6.3. GPS fix
- 3.6.4. Memory
- 3.6.5. Track back (track log)
- 3.6.6. Activity data display
- 3.7. Function menu
- 3.7.1. GPS
- 3.7.2. Mark Memp
- 3.7.3. Mark Home
- 3.7.4. Find Home
- 3.7.5. Position
- 4. suunto X10 in action
- 5. Global positioning system (GPS)
- 6. suunto trek manager
- 7. SUUNTO TRACK EXPORTER
- 8. THIRD PARTY MAPPING SOFTWARE
- 9. SUUNTOSPORTS.COM
- 10. Technical Specifications
- 11. GPS DATUM LIST
- 12. local Grid LIST
- 13. GLOSSARY
- 14. Disclaimers
- 15. Disposal of the Device
39
5. Choose the order number and the name of the new waypoint, and add the bearing
and the distance from the previously selected way point.
6. Press STOP/BACK if you want to return to the waypoint list without accepting
changes.
7. Long press ENTER to accept the changes and return to the main display.
3.5.4. Using a route
After you have created routes, you can use them for navigation. You can also view
individual waypoints.
Selecting a route
To select a route for navigation:
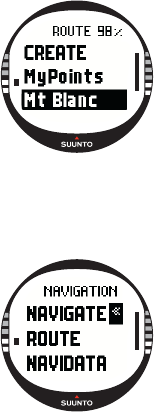
1. In the Set menu, scroll to Route and press ENTER. First the
message ‘
LOADING ROUTELIST’ and then the list itself is
displayed.
2. Select a route with UP/DOWN and press ENTER. The
waypoint list and the related functions are displayed.
NOTE: If you long press ENTER, your Suunto X10
activates the selected route immediately.
3. Scroll to Select and press ENTER. The route is loaded and
you can view it on the Navigation data display.
Choosing the navigation method
The Navigate function defines the preferred navigation method. If the GPS is off, the
Navigate settings determine how the information on the Navigation data display is
presented.
To select the navigation method:
1. In the Set menu, Navigate is the first menu item. Press
ENTER to select it. The symbol field is activated.
2. Choose a suitable symbol with UP/DOWN and press
ENTER.