
User's Manual


SurveyMonkey User Manual
Page 39
How to Save your Restriction Settings:
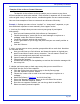
To save your restrictor settings, click the Save Restrictions button.
The saved restrictions message will then confirm that your restrictions for this
collector have been saved.
Your collector restrictions have been saved.
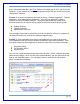
To return to the "Collector Summary" page, click the <<Back to Summary button.
From the "Collector Summary" page, you may collect the link to administer your
survey.
C. Options to Send the Link
SurveyMonkey provides three options for sending the survey to your audience.
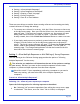
All three options are listed under the Collect icon on the My Surveys page for each
survey created. To get started, you will select the Collect icon and then choose how
you want to send the link. As discussed earlier, remember that the type of collector
you create will determine what kind of link is created and how it is to be
administered:
Collect Icon
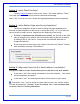
From here, choose between the following three options:
1. Create a link to send in an email message or to place on a webpage
2. Create a popup invitation for your webpage
3. Upload your email list and have us send a survey invitation
The following sections provide information on each of the three types of collectors. It
explains what they do and walks you through how to set up each one. It is up to you
to determine how you want to administer the survey to your audience.
The following section explains each type of collector and how to create and
administer them to your audience.