
User's Manual


SurveyMonkey User Manual
Page 30
Example of How to Use or Create Collectors:
The benefit of the collector is that it enables you to create a survey where
different audiences need to be reached. Each collector‟s responses will all come back
to the original survey‟s Analyze section, combined together into one results summary.
Here are three examples of how to create and use collectors effectively.
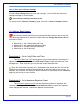
Example 1: Perhaps you want to have “tracked” vs. “anonymous” responses, or you
have additional responses to enter manually from a paper version.
1.) Let's say for example that you want to survey one group of participants
anonymously.
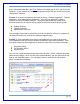
Here you could name one Web Link collector as "Anonymous."
Choose the setting to "create link for an email message or to place on a
webpage" under the Collector Summary.
Create the collector settings and restrictions.
A link is generated for you to copy and paste into your own email provider or
website.
Save the Collector.
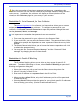
2.) Now, you may want to survey another group and be able to track their identities
for the same survey.
Here you could set up a 2nd collector and choose the option to "upload your
email list and have us send a survey invitation." You can name it "Email List."
Select your settings and restrictions and save them.
Import/create your email distribution list.
Customize the message.
Schedule the delivery for SurveyMonkey to send out the invitation message with
the survey link.
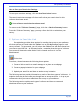
3.) Maybe you have a paper or hard copy survey that you now would like to
incorporate into the rest of the responses.
Click the Collect icon next to the survey on the My Surveys page.
Click the "Add New Collector" button.
Choose the "create a link to send in an email message or to place on a
webpage."
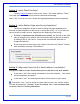
Name the Collector "Data Entry" and click Next Step.
Select the "Manual Data Entry" button on the left side of the screen.
Select the "Add New Response" button.
Once the new response is added, you can also go back in and Edit or
Delete a manually entered response.