
User's Manual
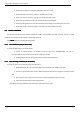
Table Of Contents

CrossFireHP–All-DigitalTransportSystem
UserGuide
©SUNWAVECOMMUNICATIONSLIMITED201558Revision05
2.Checkthatthedevicehasnotbeendeformedorbentinanyway.
3.Checkthattherearenowarps,scratches,bubblesordirtmarks.
4.Checkthattherearenoloose,missingorincorrectlyfastenedscrews.
5.Checkthattheinstallationslotsinthecabinetsub-rackarerectangular.
6.Ensurethattheguidebarhasnotbeendamagedandthefittingsandauxiliarypartsareintact.
7.Checkthatthesilk—screenedimagesonthedeviceareclearlyvisibleandintact.
6.3.
6.3.
6.3.
6.3.Device
De vice
Device
DeviceInstallation
I nstallation
Installation
Installation
TheAU,EUandRUhavetwopossibleinstallationmodes:rackinstallationandwallmounted.TheAUisusually
installedinarack,whiletheEUandRUisusuallywallmounted.
Note:
Never
Never
Never
NeverplacedanoperatingRUhorizontally.
6.3.1.
6.3.1.
6.3.1.
6.3.1.Rack
R ack
Rack
RackInstallation
I nstallation
Installation
Installation(Only
( Only
(Only
(Onlyfor
f or
for
forAU
A U
AU
AUand
a nd
and
andEU)
E U)
EU)
EU)
To
installthedeviceintoa19”standardrack:
1.Chooseanindoorlocation.Thelocationshouldbelargerthan1000×800×2500mmanditis
recommendedthattherackbeatleast200mmawayfromthewall.
2.Installthedeviceintothe19ʺstandardrackandfastenwith4*M6screws.
6.3.2.
6.3.2.
6.3.2.
6.3.2.Wall
W all
Wall
WallMounting
M ounting
Mounting
MountingInstallation
I nstallation
Installation
Installation(for
( for
(for
(forAU
A U
AU
AUand
a nd
and
andEU)
E U)
EU)
EU)
To
installthedeviceusingawallmounting(seeFigure6-1):
1.Rotatethehanger90
o
andinstall(thehangercanbeinstalledinthemiddleoftherack).
2.Chooseanappropriateindoorlocation.Mark4*
φ
6.8holessitesforthehangertobeattachedtothe
wall.
3.Drillatthefoursitesusingapercussiondrillandembed4*
φ
8plasticexpansionpipes.
4.Fastenthecasewith4*ST4.5self-tappingscrews.
Note:
WallmountinginstallationoftheAUisexactlythesameasthatofEU.