
Manual

2 SunTouch WarmWire Installation Manual
Table of Contents
Phase 1: Design the System . . . . . . . . . . . . . . . . . . . . . . . . . . . 3
Specific ations . . . . . . . . . . . . . . . . . . . . . . . . . . . . . . . . . . . . . 4
Phase 2: Preparation. . . . . . . . . . . . . . . . . . . . . . . . . . . . . . . . . . .4
Cautions . . . . . . . . . . . . . . . . . . . . . . . . . . . . . . . . . . . . . . . . . . 4
Tips . . . . . . . . . . . . . . . . . . . . . . . . . . . . . . . . . . . . . . . . . . . . . . . 5
Items Needed . . . . . . . . . . . . . . . . . . . . . . . . . . . . . . . . . . . . . 5
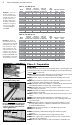
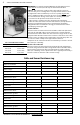
Phase 3: Inspect the Cable and Sensor . . . . . . . . . . . . . . .5
Cable and Sensor Resistance Log. . . . . . . . . . . . . . . . . . . 6
Phase 4: Electrical Rough-in. . . . . . . . . . . . . . . . . . . . . . . . . . .7
New Construction . . . . . . . . . . . . . . . . . . . . . . . . . . . . . . . . . 7
Existing Construction . . . . . . . . . . . . . . . . . . . . . . . . . . . . . . 7
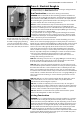
Phase 5: Install the Cable. . . . . . . . . . . . . . . . . . . . . . . . . . . . . .8
Getting Started . . . . . . . . . . . . . . . . . . . . . . . . . . . . . . . . . . . . 8
General Installation . . . . . . . . . . . . . . . . . . . . . . . . . . . . . . . . 9
Other Installations . . . . . . . . . . . . . . . . . . . . . . . . . . . . . . . . 10
Final Steps. . . . . . . . . . . . . . . . . . . . . . . . . . . . . . . . . . . . . . . . 11
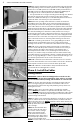
Phase 6: Finish Wiring . . . . . . . . . . . . . . . . . . . . . . . . . . . . . . . .12
New Construction . . . . . . . . . . . . . . . . . . . . . . . . . . . . . . . . 12
Existing Construction . . . . . . . . . . . . . . . . . . . . . . . . . . . . . 12
Phase 7: Install the Control. . . . . . . . . . . . . . . . . . . . . . . . . . .13
Phase 8: Install the Floor Coverings . . . . . . . . . . . . . . . . .13
Phase 9: Install Insulation . . . . . . . . . . . . . . . . . . . . . . . . . . . .13
Phase 10: System Operation . . . . . . . . . . . . . . . . . . . . . . . . .13
Troubleshooting Guide. . . . . . . . . . . . . . . . . . . . . . . . . . . . . . .14
Appendix 1: Types of Construction . . . . . . . . . . . . . . . . .15
Appendix 2: Typic al Electric al Wiring Diagrams . . .17
Appendix 3: Connecting Multiple Cables . . . . . . . . . .19
Appendix 4: Connecting the LoudMouth
™
. . . . . . . . .20
Appendix 5: Sample Layouts. . . . . . . . . . . . . . . . . . . . . . . .21
Installation Facts
Time to install
An average size bathroom should take
about two hours to install the cables and
about four hours to install the electrical box,
control, and power supply.
Skill level
Intermediate skills in electrical wiring and
laying floor coverings required. Consider
hiring an electrician to rough in the wiring,
especially if it is necessary to route from the
circuit breaker panel. Please be aware that
local codes may require this product and/
or the thermostatic control be installed or
connected by an electrician.
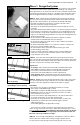
Expected floor temperature
The floor temperature attainable is depen-
dent on how well the floor is insulated, the
temperature of the floor before start up, and
in the case of uninsulated slab applications,
the thermal drain of the underlying materials.
These are the three most common installa-
tions:
1. Wood framing: With the cable
installed on a well-insulated wood subfloor,
and thin-set mortar and tile on top, most
floors can be heated up to 20°F warmer than
they would otherwise be.
2. Insulated concrete slab: With the
cables installed on an insulated concrete slab,
and thin-set mortar and tile on top, most
floors can be heated up to per haps 15°F
warmer than they would otherwise be.
3. Uninsulated concrete slab: With the
cables installed on an uninsulated concrete
slab, and thin-set mortar and tile on top, most
floors can be heated up to per haps 10°–15°F
warmer than they would otherwise be.
Please consult a designer or the factory if
questions remain about the surface tempera-
ture that can be expected from the cables in
any particular construction. Please see “Phase
9: Install Insulation” on page 13.
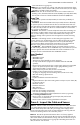
Welcome to SunTouch WarmWire
WarmW ire is a simple, economical way to warm any floor, and
provide years of lasting comfort. This instruction manual
provides complete details, suggestions, and safety precautions
for installing this floor-warming system.
Fasten the cables to the floor. Then, depending on the flo or cov-
erings to be used, put down a layer of thin-set, thick-set, or self-
leveling mortar on top of the cables. Finally, install the
floor coverings. It’s that simple!