
User Manual


16
Get Started
Preparation
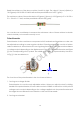
1. Prepare a MicroSD/TF card of no less than 8GB, a 5V 2A DC power adapter with a
MicroUSB port, and a network cable (to connect your router and Raspberry Pi, or plug in
the USB Wi-Fi adapter directly if you have one).
2. Download the image for the Raspbian system onto your computer. Refer to instructions
through DOWNLOADS->RASPBIAN on the official w ebsite raspberrypi.org:
https://www.raspberrypi.org/documentation/installation/installing-images/README.md.
Write the image into the microSD/TF card, and then plug the card into the slot on your
Raspberry Pi.
Note: For 2016-11-25 release or abov e, SSH (a protocol securing remote login session and
other network service) is Disabled by default. Therefore, when you need to log in remotely,
you need to create a file named "ssh" under /boot/ to enable it.
Access to Raspberry Pi’s Console
In the subsequent tutorials, the console w ill be used from time to time. It is platform for
interactions in Linux. Therefore, before starting the lessons, you may need to know how to
access to Raspberry Pi’s console.
Using Console in GUI (terminal, recommended for beginners)
Using console in GUI is of great help for the beginners. You can not only compile and run the
code in terminal, but also be able to do some simple file operating, code-downloading, etc.
cooperating w ith GUI.
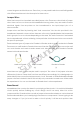
1. Preparations: a screen monitor, an HDMI cable (if your monitor only support VGA, use a
VGA-HDMI converter), a USB mouse, a USB keyboard and a network cable or a USB Wi-Fi
dongle.
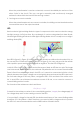
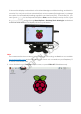
2. Connect the monitor to power. Then connect it w ith the Raspberry Pi via the converter
cable (HDMI cable). Connect the Ethernet cable or the USB Wi-Fi dongle, and the mouse
and keyboard to USB ports. At last, connect a 5V 2A DC power to the RPi. Power on the
screen if needed. Then you can see the display showing the Raspberry Pi icon as shown
below.
SunFounder