
User Manual


99
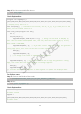
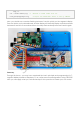
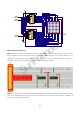
Step 4: Run the executable file above.
sudo ./14_segment
Code Explanation
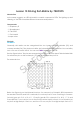
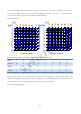
unsigned char SegCode[17] =
{0x3f,0x06,0x5b,0x4f,0x66,0x6d,0x7d,0x07,0x7f,0x6f,0x77,0x7c,0x39,0x5e,0x79,0x71,0x80};
// display array from 0 to F.
void init(void){} // Initialize the function, set ds, st_cp, sh_cp three pins to low
level, and the initial state as 0.
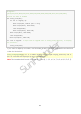
void hc595_shift(unsigned char dat){
int i;
for(i=0;i<8;i++){
digitalWrite(SDI, 0x80 & (dat << i)); // Assign the dat data to SDI(DS) by
bits. Here we assume dat=0x3f(0011 1111, when i=0, 0x3f will shift right(<<) 0 bits,
0x3f & 0x80 = 1000 0000,
digitalWrite(SRCLK, 1); // SH_CP will convert from low to high, and generate a
rising edge pulse, then shift the DS date to shift register.
delay(1);
digitalWrite(SRCLK, 0);
} // to assign 8 bit value to 74HC595’s shift register
digitalWrite(RCLK, 1); // ST_CP converts from low to high and generate a rising
edge, then shift data from shift register to storage register.
delay(1);
digitalWrite(RCLK, 0);
}// Transfer data in shift register to data register to update the displayed data.
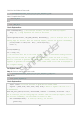
For Python users:
Step 2: Get into the folder of the code.
cd /home/pi/SunFounder_Super_Kit_V3.0_for_Raspberry_Pi/Python
Step 3: Run
sudo python 14_segment.py
Code Explanation
# Define a segment code from 0 to F in Hexadecimal
# Commen cathode
segCode =
[0x3f,0x06,0x5b,0x4f,0x66,0x6d,0x7d,0x07,0x7f,0x6f,0x77,0x7c,0x39,0x5e,0x79,0x71]
# Commen anode
SunFounder