
User Manual

9
Preparing
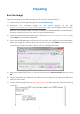
Burn the image
Take the following steps before inserting the TF card into the Raspberry Pi:
1) Prepare the tool of image burning. Such as win32DiskImager
2) Download the complete image on the official website at this link:
https://www.raspberrypi.org/downloads/raspbian/. Both the RASPBIAN STRETCH WITH
DESKTOP and RASPBIAN STRETCH LITE are available, but RASPBIAN STRETCH WITH DESKTOP
would be a better choice if you have no special requirements.
3) Unzip the downloaded package and you will see the xxxx-xx-xx-raspbian- stretch.img file
inside. Note: This file is NOT extractable.
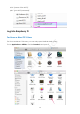
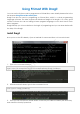
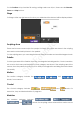
4) Open the win32DiskImager and insert the SD card into the computer with a card reader.
Select the image file and the drive (the card) in the tool. Click Write to write the system
to the SD card. Wait for a while until the system is written to the card.
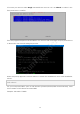
5) When the progress bar comes to the end and a prompt "write successful" appears, click
OK.
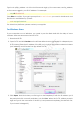
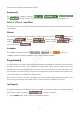
6) Create a blank file ssh under the /boot directory to enable remote login and delete the
suffix in the file name.
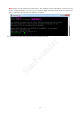
7) Create a WiFi configuration file wpa_supplicant.conf under /boot and add the following
to the file:
SunFounder