Portofino Series Installation & Owner’s Manual
Attention New Spa Owner! Congratulations on the purchase of your new Portofino spa! Listed below are important maintenance recommendations you should observe on a regular basis to protect your new investment. Filter Maintenance Your new spa is equipped with an advanced 2-stage water filtration system that provides unsurpassed water quality! To ensure maximum water quality at all times, you should clean and reuse the larger pleated filter cartridge every month.
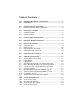
Table of Contents 1.0 2.0 Important Spa Owner’s Information................................... 1 FCC Notice ............................................................................ 1 3.0 3.1 Important Safety Instructions ............................................. 2 General Electrical Safety Instructions .................................... 4 4.0 4.1 4.2 Choosing a Location ........................................................... 5 Outdoor Location .............................................
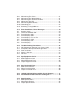
10.5 10.6 10.7 10.8 10.9 10.10 10.11 Maintaining The Cover ........................................................ 21 Maintaining The Wood Cabinet ........................................... 21 Maintaining The Synthetic Cabinet ..................................... 21 Winterizing The Spa ............................................................ 21 Maintaining Water Quality ................................................... 22 Controlling pH .............................................................
1.0 Important Spa Owner’s Information Your Portofino spa is constructed of the highest standards and is capable of providing many years of trouble-free use. However, because heat retentive materials are utilized to insulate the spa for efficient operation, an uncovered spa surface directly exposed to sunlight and high temperatures for an extended period of time is subject to permanent damage. Damage caused by exposing the spa to this abuse is not covered by warranty.
Changes or modifications not expressly approved by the party responsible for FCC compliance could void the user’s authority to operate this equipment. 3.0 Important Safety Instructions When installing and using this equipment, basic safety precautions should always be followed, including the following: 1. READ AND FOLLOW ALL INSTRUCTIONS BEFORE OPERATING THE SPA! 2. DANGER - RISK OF ELECTRICAL SHOCK. Install spa at least 5 feet (1.5 m) from all metal surfaces. (A spa may be installed within 5 feet (1.
8. 9. 10. 11. 12. 13. 14. 15. 16. 17. 18. 19. rated switch or circuit breaker to open all ungrounded supply conductors to comply with the country electrical code. Before entering a spa or hot tub the user should measure the water temperature with an accurate thermometer since the tolerance of the water temperature regulating device may vary as much as ±5 °F (±3 °C). Always enter and exit the spa slowly and cautiously. Wet surfaces are slippery. Do not use the spa alone.
20. Excessive temperatures may cause hyperthermia. Symptoms and first aid information are as follows: • HEAT STROKE: The most susceptible people are the very young and elderly, alcoholics, and most people under the influence of drugs, medication and alcohol. • SYMPTOMS: Hyperthermia causes loss of salt, sweating, dizziness, headache, dryness of mouth and nausea, faintness and/or unconsciousness, convulsions, flushed appearance of skin, and rapid pulse and/or weak, shallow breathing.
4.0 Choosing a Location IMPORTANT: Because of the combined weight of the spa, water, and users, it is extremely important that the base upon which the spa rests be smooth, flat, level and capable of uniformly supporting this weight without shifting or settling for the entire time the spa is in place. If the spa is placed on a surface which does not meet these requirements, damage to the skirt and/or the spa shell may result. Damage caused by improper support is not covered under the manufacturer’s warranty.
4.2 Indoor Location For indoor installations, be certain to make provisions for proper ventilation. When the spa is in use, considerable amounts of moisture will escape. This can damage various surfaces over time. A dehumidifier can help control the moisture in the room. If you have any questions regarding the placement or installation of your spa, consult your authorized Portofino dealer.
All Export 230-240 VAC Models (50 / 60 Hz) Voltage: Frequency: Current Draw: # of Wires: Circuit Breaker: 230VAC/ 20 A* 230 VAC 50 / 60Hz 13A 3 20 A 230VAC/ 30 A** 230 VAC 50 / 60Hz 19A 3 30 A * In the 20 A configuration, the heater will not operate at the same time as the main jets pump. This is the factory setting. ** In the 30 A configuration, the heater will operate at the same time as the main jets pump.
6.0 Electrical Wiring Instructions Important Notice: The electrical supply to this product must be installed by a qualified, licensed electrician to comply with all regulations and standards specified by the electrical authority in your state or country. 1. A 240 VAC powered spa must be permanently connected (hardwired) to the power supply. No plug-in connections or extension cords are to be used in conjunction with the operation of this spa.
fig. I TB1 BLUE BLUE 1 BROWN Power In BROWN 2 to Circuit Board GRN All Export Models: 230-240 VAC, 3-Wire (50/60 Hz) 7.0 Start-Up Instructions Congratulations! You are now all set to get your new spa ready to use. Simply follow this step-by-step procedure and, before long, you will be enjoying your first glorious experience in your Portofino spa. For best results, read each step in its entirety before proceeding with that step.
Always refill with garden hose in filter compartment. This helps to purge trapped air from pump intakes. Failure to do so may cause air to be trapped in either pump 1 or the circulation pump’s intake (air lock), preventing either pump from circulating water. After filling, make sure the filter is installed properly before applying power to the spa. Refer to section 10.1 (Page 17-18) “Cleaning the Filter” for specific cleaning and installation instructions.
8.0 Control Panel Functions Panel Functions: A. Heat Indicator: lit when heater is on. B. Warmer Button: increases water temperature setpoint. C. Cooler Button: decreases water temperature setpoint. A D B E C F *Display shown for example purposes only, actual water temperature display will vary. D. LED Display: can display current water temperature (default display*), water temperature setpoint, selected filtration mode, and error messages. E. Light Button: turns underwater light on and off. F.
9.0 Operating Instructions Startup Sequence The spa control system has automatic functions that operate upon start-up and normal operation to 1. protect the system. Upon power up, the readout displays the following information: 2. 1. Control displays current software release 3. (e.g. 3.54), then; 2. Control panel displays “888” and all indicator LEDs are lit, permitting visual inspection of all display segments and indicator lights for proper operation. 3.
9.4 Solo Massage Selector / Air Control Operation Air Controls Functions: Air Controls A-C Open An Air Venturi to Specified Jets: A = Jets A B = Jets B C = Jet Group C A A A A B B Massage Selector Functions: Z Diverts Water Flow Between Jet Group C and Jets A&B C B Z B C 9.
9.6 Caprio Massager / Air Control Valve Operation Air Controls Functions: Air Controls A-C Open An Air Venturi to Specified Jets: Massage Selector Functions: Z Diverts Water Flow Between Jet Group A and Jets D. A = Jet Group A B = Jet Group B C = Jet Group C Jet Groups B & C Are Always On. However, The Jet Faces of These Jets Can be Adjusted to Personal Preference Levels.
9.7 Filtration Options Your new spa includes a 24-hour circulation pump which filters the water continuously while using less energy than a common 100 watt light bulb! The circulation pump draws water through the short side of the double-ended filter cartridge and effectively removes small debris in your spa. Note: the 24-hour circulation pump system also supplies heated water to the spa when the heater turns on. This features cannot be altered or disabled.
9.11 Selecting The Skimming/Heating Mode Press and hold both control panel WARMER and COOLER buttons at the same time, then release. Then press either WARMER or COOLER button to select skimming/heater mode F0-F6 or lock modes L1-L2 below: Standard Skimming/Heating Modes F0 5 minutes of skimming per day (one 5 minute “Blow-Out” cycle every 24 hours to purge all plumbing lines) F1 1 hour of skimming per day (one 30-minute cycle every 12 hours); this is the factory default setting. F2 1.
To set a time for the first skimming/heating cycle, simply turn power on to the spa two minutes prior to the desired time. EXAMPLE: If you desire your first skimming/heating cycle to begin at 10:00 AM turn off power to the spa and turn it back on again at 9:58 AM. Note: start time is approximate and may vary slightly from day to day. 10.0 Care And Maintenance Proper and regular maintenance of your spa will help it retain its beauty and performance.
ALWAYS TURN POWER TO HOT TUB OFF BEFORE CLEANING THE FILTER CARTRIDGE! Refer to the filter cleaning/replacement procedure below. A TURN POWER TO HOT TUB OFF! B C All Models Metro and Caprio Models Only Replace! DO NOT Reuse! Filter Nut 1. 2. Stage 2 filter Loosen filter nut to provide clearance, then remove filter assembly. All Models D Stage 1 filter (Reuseable) 1. Rotate stage 2 retainer counterclockwise to release, then separate filter assembly. 2.
Periodically, the polyester mesh (pleated) filter will need a more thorough cleaning to remove imbedded oils and minerals. For this, we suggest cleaning as illustrated above (step D), followed by soaking the filter overnight in a plastic container filled with a solution of water and a specially formulated filter cleanser available from your Portofino dealer. CAUTION! Never scrub the polyester mesh filter cartridge with a brush as this will cause the polyester mesh to wear out and come apart.
To drain Solo model, first, shut off the power to the spa. Next, remove the drain cap, then open the equipment access panel and locate the drain valve and turn handle to open. Refer to section 13.1 (page 28). To drain Metro and Caprio models, first, shut off the power to the spa. Pull the external drain cap from the wood skirt (attached to it is a drain hose) and continue pulling upward until it is above the water line. Connect garden hose and drain spa. After draining spa, refer to section 7.
10.5 Maintaining The Cover Using the Portofino insulating spa cover anytime the spa is not in use will significantly reduce your operating costs, heat-up time and maintenance requirements. To prolong the life of the cover, handle it with care and clean it regularly using mild soap and water. Periodic treatments with a special conditioner developed for Sundance spa covers will help protect against deterioration caused by UV rays from the sun.
during periods of severe freezing temperatures, it is important that all water be removed from the spa and equipment to protect against damage from freezing. For expert winterization of your spa, contact your authorized Portofino dealer. 10.9 Maintaining Water Quality Maintaining the quality of the water within specified limits will serve to enhance your enjoyment and prolong the life of the spa’s equipment.
10.11 Sanitizing / Using Additives To destroy bacteria and organic compounds in the spa water, a sanitizing agent must be used regularly. Consult your Sundance dealer for specific sanitizing instructions. IMPORTANT: Do not use Trichlor in your spa. This chemical can have an extremely corrosive effect on certain materials in the spa. Damage caused by use of this chemical, or improper use of any chemicals, is not covered under the manufacturer’s warranty. Many other additives are available for your spa.
11.0 Error Conditions / Error Messages 11.1 Summer Logic When the actual spa water temperature reaches up to 2 °F (1 °C) above the set temperature, the spa goes into “summer logic.” The circulation pump will turn off automatically to avoid adding additional heat to the water, eventually creating an overheat condition. This setting is not user-programmable. Note: The summer logic does not take effect until the spa water temperature reaches 95 °F (35 °C). 11.
sensor is not functioning. Your authorized dealer must repair this. 11.4 Panel displays SN2 Open or shorted sensor (heater disabled). The temperature sensor is not functioning. Your authorized dealer must repair this. 11.5 Panel displays FL1 or FL2 A flashing “FL1” display means the flow switch is malfunctioning open; a flashing “FL2” display means the flow switch is malfunctioning closed. • Flow switch has malfunctioned. • Heater is deactivated. Pump may also be deactivated.
11.7 Panel displays ICE Freeze Protection - A potential freeze condition has been detected. No action is required. Main pump will operate to circulate warm water through the plumbing until the spa is out of danger. 11.8 Panel Displays - - The safety “Watchdog” software has been triggered and the spa is deactivated. A problem has been detected which could cause damage to the spa or its components. Contact your authorized dealer. 12.
certain you tighten the diverter cap and/or reinstall the filter before turning on spa power and restarting the pump. 12.3 Poor Jet Action 1. Press the JETS button to make certain the pump is on. 2. Rotate the air control to the “on” position. 3. Solo Models Only - make certain that the water level is to just below the neck jets. 4. Check for dirty filter. Clean, if necessary. 5. Make sure jets are all the way open. 12.4 Water is Too Hot Reduce thermostat setting so the circulation pump turns off. 12.
13.0 Spa Equipment Packs 13.1 Solo Equipment Pack 1. Overflow Fitting 2. Drain Cap 3. Auxiliary Pan Drain Location 4. Load Box 5. Safety Screen and Heater Intake 6. Drain Valve 7. Heater 8. Circulation Pump 9. Main Pump 10. Filter 11. Pan 12. Wood Frame 13. Pump Unions 12 13 1 5 4 10 9 3 6 2 8 7 11 13.2 Metro Equipment Pack 1. 2. 3. 4. 5.
13.3 Caprio Equipment Pack 1. 2. 3. 4. 5. Load Box Heater Circulation Pump Main Pump Pump Unions 3 4 1 5 2 14.0 Spa Overhead Views 14.1 Solo Overhead View 1. 2. 3. 4. 5. 6. 7. 8. 9. Overflow Control Panel Air Controls Massage Selector 121.92 cm (48") Skimmer Weir Filter Neck Jets Filter Nut Safety Screen (Located Inside Filter Wall Fitting) 180.
14.2 Metro Overhead View 213 cm (84") 2 1. Control Panel 2. Air Controls 3. Massage Selector 4. Filters 163 cm (64") 5. Neck Jets 6. Skimmer Weir 7. Filter Nut 8. Safety Screen (Located Inside Filter Wall Fitting) 2 5 3 6 4 1 7 8 Equipment Access Door Do Not Obstruct 14.3 Caprio Overhead View Equipment Access Side - Do Not Obstruct 3 3 6 1. 2. 3. 4. Filter Nut Control Panel Air Control Massage Selector 5. Filters 6. Neck Jets 7. Filter Pipe 4 5 223.52 cm (88") 1 7 3 2 200.
2 3 TB1 GRN WHT BLK RED 1 RED* BLK 4. If hot tub is to be operated on 30A service, make sure the jumper provided at location JP1 #1&2 on the circuit board is installed. If hot tub is to be operated on 40A service, remove the jumper JP1 #1&2 on the circuit board. 3. Permanently connect to the power supply. Use copper conductors ONLY. Wire size must be appropriate per NEC and/or local codes. 2. Move RED* wire from TB1 position #1 to TB1 position #3 as shown below. 1.
32 GRN Ozonator O3 N 1 J6 J13 2 J15 J11 J16 LO F1 K4 K3 K2 K1 J20 Main Pump J5 J17 HI BLK K5 K7 BRN J8 Heater IN J7 BLU J4 8 6 4 2 K8 J1 J3 J2 J9 BRN BE APPROPRIATE PER NEC AND/OR LOCAL CODES TB1 USE COPPER CONDUCTORS ONLY. WIRE SIZE MUST Export 230 VAC 50 Hz Power Connections J10 Heater OUT BLU 7 5 3 1 JP1 Control Panel 230 VAC, 3-Wire Connection (50 Hz, 1-Phase Service) F1 BRN 20A 250V SC-20 BRN L J12 J21 BRN J14 BRN WHT BLK Circ.
17.0 Specifications 17.1 Solo Specifications • Dimensions: 48” x 71” x 29” (122 cm x 180 cm x 74 cm) • Seating Capacity: 1 Adult • Dry Weight: 401 lbs / 182 kg • Filled Weight: 1,238 lbs / 562 kg • Water Capacity (Avg. Fill): 100 US Gal / 380 Liters • Controls: Solid-State Electronic Controls with LED Readout, Programmable Temperature, Filtration, and Heat Cycles • Water Delivery: 1 TheraFloTM High-Flow Pump • Pump 1 Rating: - US/Canada Convertible Model (60 Hz): 2-Speed /1.5 hp Continuous, 13.6 A Max.
• Filter: Double-End Cartridge, 20” SlipstreamTM Weir with Automatic BrominatorTM • Water Treatment: Brominator Chemical Feeder • Lighting: Underwater with Two Colored Lenses; Optional SunGlowTM Multi-Color LED Light Kit • Handrails: 2 High Quality Stainless Steel • Pillows: 2-Part/2-Tone Gray, Bolt-on; Optional Blue or Camel Insert • Heater: - US/Canada Convertible Model (60 Hz): Low Flow, 1 kW @ 120 VAC or 4 kW @ 240 VAC - Export Models (50/60 Hz): Low Flow, 2.
17.2 Metro Specifications • Dimensions: - With Wood Cabinet: 64” x 84” x 30.5” (163 cm x 213 cm x 78 cm) - With Synthetic Cabinet: 62” x 82” x 30.5” (157 cm x 208 cm x 78 cm) • Seating Capacity: 2 Adults • Dry Weight: 498 lbs / 226 kg • Filled Weight: 2083 lbs / 945 kg • Water Capacity (Avg.
• Air Controls / Massage Selectors: 2 / 1 • Filter: 2-Stage MicroCleanTM Cartridge, 20” SlipstreamTM Weir with Automatic BrominatorTM • Water Treatment: Brominator Chemical Feeder; Ready for PermaClearTM or SunZoneTM CD Installation • Lighting: Underwater, with Two Colored Lenses; Optional SunGlowTM Multi-Color LED Light Kit • Handrails: Integral • Pillows: 2-Part/2-Tone Gray, Bolt-on; Optional Blue or Camel Insert • Heater: - US/Canada Convertible Model (60 Hz): Low Flow, 1 kW @ 120 VAC or 4 kW @ 240 VAC -
17.3 Caprio Specifications • Dimensions: - With Wood Cabinet: 79” x 88” x 33” (201 cm x 224 cm x 84 cm) - With Synthetic Cabinet: 77” x 86” x 33” (196 cm x 218 cm x 84 cm) • Seating Capacity: 3-4 Adults • Dry Weight: 638 lbs / 289 kg • Filled Weight: 3,543 lbs / 1,607 kg • Water Capacity (Avg.
• Air Controls/Massage Selectors: 3/1 • Filter: 2-Stage MicroCleanTM Cartridge, 20” SlipstreamTM Weir with Automatic BrominatorTM • Water Treatment: Brominator Chemical Feeder; Ready for PermaClearTM or SunZoneTM CD Installation • Lighting: Underwater, with Two Colored Lenses; Optional SunGlowTM Multi-Color LED Light Kit • Handrail: 1 High Quality Stainless Steel, 1 Integral • Pillows: 2-Part/2-Tone Gray, Bolt-on; Optional Blue or Camel Insert • Heater: - US/Canada Convertible Model (60 Hz): Low Flow, 1 kW
Notes:
Sundance Spas, Inc. 14525 Monte Vista Ave, Chino, CA 91710/U.S.A., Phone: (909) 606-7733, Fax: (909) 606-0195 Website: http://www.sundancespas.com 6530-386, Rev. A © 2003 Sundance Spas, Inc. Printed in U.S.A.