
Server Module Installation Guide
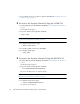
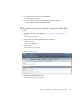


Table Of Contents
- Sun Blade™ X6450 Server Module Installation Guide
- Contents
- Preface
- Introduction
- Installing and Configuring the Server Module
- Installation Worksheet
- Using the BIOS Configuration Utility to Configure the Sun Blade RAID 5 Expansion Module
- Introduction to the BIOS RAID Configuration Utility
- Understanding Hot-Plug Limitations and Conditions Within the BIOS RAID Configuration Utility
- Running the BIOS RAID Configuration Utility
- Using the ACU to Create and Manage Arrays
- Using the -Select Utility to Modify REM Settings
- Using the Disk Utilities to Manage Disk Drives
- Initializing a RAID Array
- Index

36 Sun Blade X6450 Server Module Installation Guide • September 2008
4. Click on the Remote Control tab.
The launch redirection page appears.
5. Click Launch Redirection.
The screen displays a number of dialog boxes.
Note – For systems using Firefox and Mozilla browsers, the Java™ JRE™ version
must be 1.6 or later.
The browser downloads the embedded remote-control application automatically,
and the Remote Console screen appears.
If the Remote Console does not appear, it might be blocked by browser security
controls. Reduce security as required to enable the remote console.
6. Select Remote Control -> Remote Power Control.
The Power Control screen appears.
Note – You can also turn on the system power manually. Use a non-conducting
pointed object, such as a stylus, to press and release the Power button on the front
panel.
7. Select the Power On radio button, then select Submit.
The system displays the initial bootup messages.
After the initial bootup messages, the following display appears.