
Server Module Installation Guide
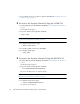
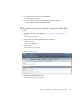


Table Of Contents
- Sun Blade™ X6450 Server Module Installation Guide
- Contents
- Preface
- Introduction
- Installing and Configuring the Server Module
- Installation Worksheet
- Using the BIOS Configuration Utility to Configure the Sun Blade RAID 5 Expansion Module
- Introduction to the BIOS RAID Configuration Utility
- Understanding Hot-Plug Limitations and Conditions Within the BIOS RAID Configuration Utility
- Running the BIOS RAID Configuration Utility
- Using the ACU to Create and Manage Arrays
- Using the -Select Utility to Modify REM Settings
- Using the Disk Utilities to Manage Disk Drives
- Initializing a RAID Array
- Index

32 Sun Blade X6450 Server Module Installation Guide • September 2008
2. To power the server on or off, use a stylus as described in “Routine Power On
and Power Off” on page 3.
▼ To Access the System Console Using the ILOM CLI
1. Connect and log in to the ILOM as described in “Connecting to the ILOM” on
page 23.
The ILOM prompt appears.
2. To power on the system, type the command:
-> start /SYS
Note – You can also power the system on or off using a stylus, as described in
“Routine Power On and Power Off” on page 3.
3. To start the system console, type:
-> start /SP/console
4. To exit the system console, press Esc-Shift-9.
5. To stop the system, type:
-> stop /SYS
▼ To Access the System Console Using the ELOM CLI
1. Connect and log in to the ELOM as described in “Connecting to the ELOM” on
page 28.
The ELOM prompt appears.
2. To power on the system, type the command:
-> set /SYS/CtrlInfo/PowerCtrl=on
The server module power-on sequence begins.
Note – You can also power the system on or off using a stylus, as described in
“Routine Power On and Power Off” on page 3.
3. To start the serial console, type:
-> start /SP/AgentInfo/Console
The system console appears.