
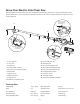
Replacement Part List
10
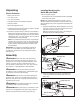
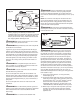
4. To turn the tool ON, push and hold the safety lock button
(located on the rear handle) with your thumb and then
squeeze the trigger with your ngers. Once the tool is
running, you can release the safety lock button (Fig. 16).
5. To turn the tool OFF, release the trigger switch (Fig. 16).
NOTE: Do not press the trigger switch until you are ready
to make a cut.
Adjusting the Telescoping Pole
1. Disconnect the saw from the power supply.
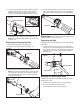
2. Unclip the cam-lock to release the pole (Fig. 17).
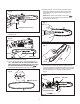
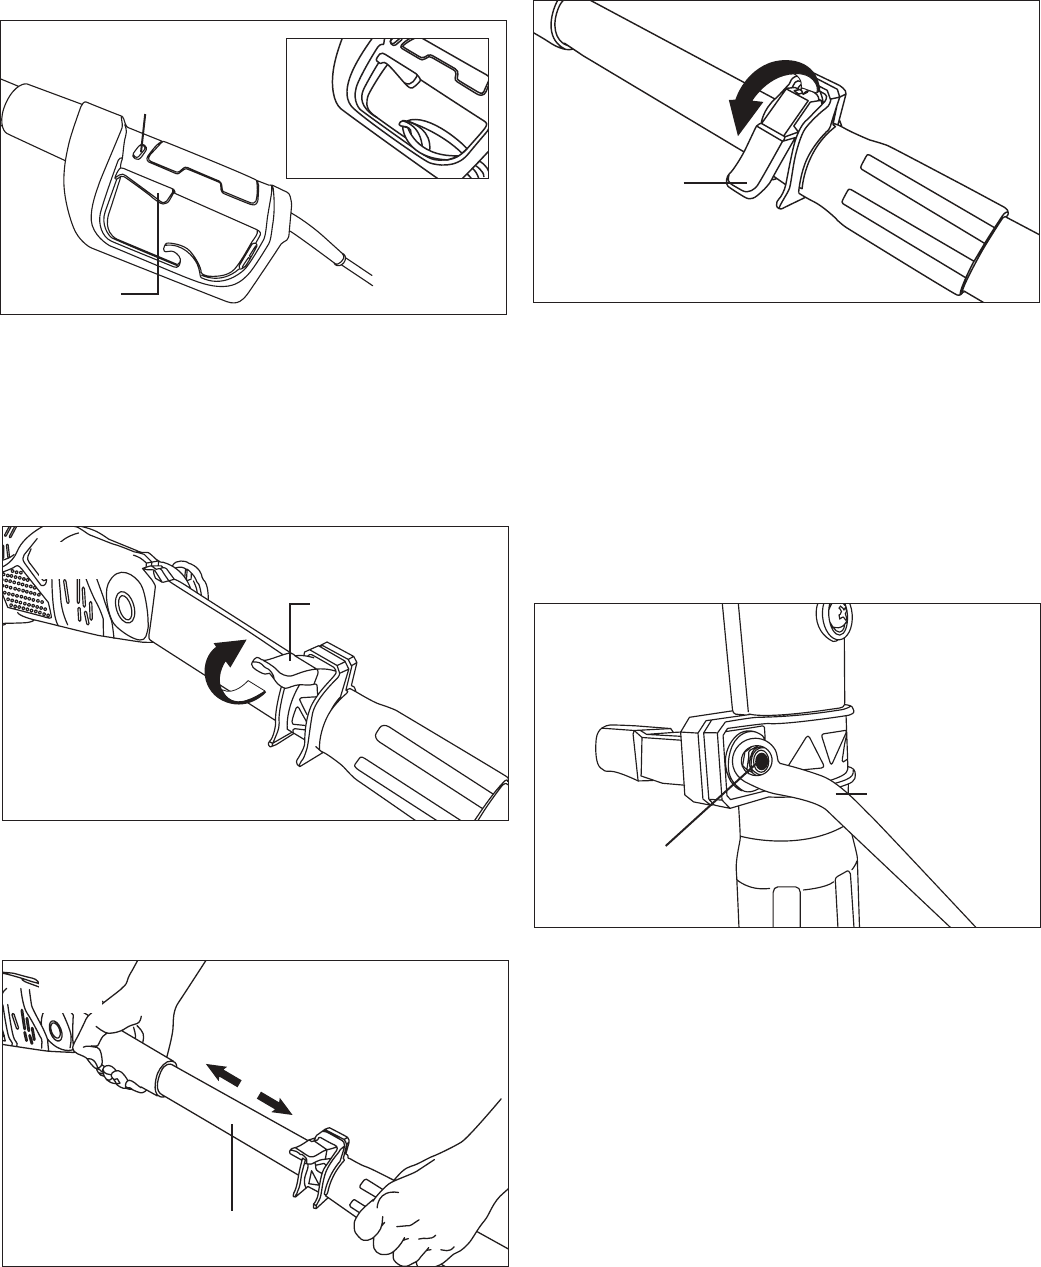
3. Extend the pole to the desired length (Fig. 18).
NOTE: Push poles toward each other to shorten the pole
or pull them away from each other to lengthen the pole.
Only extend the pole to the minimum length required to
reach the limb to be cut.
4. Lock the pole in position by closing the cam-lock (Fig. 19),
and ensure that the pole is secure. If the pole telescopes
when the cam-lock is closed, the nut may need tightening.
mWARNING! Failure to lock the telescopic pole cam-lock
as directed could result in personal injury.
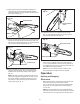
Tightening the Bolt
The retaining bolt may need tightening to secure the telescopic
pole in place.
1. Unclip the cam-lock. Using the hex key wrench, tighten
the cam-lock nut, then close the cam-lock. Ensure that the
pole is secure. The wrench may be required to loosen the
cam-lock nut if you need to adjust the pole to a dierent
height (Fig. 20).
Adjusting the Multi-Angle Head
The pole chain saw head can be rotated for dierent cutting
angles from 0º to 30º.
1. Disconnect the pole chain saw from the power supply.
2. Turn the multi-angle head adjustment dial
counterclockwise to loosen the head (Fig. 21).
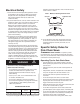
Fig. 16
Safety lock button
Trigger
switch
Cord
restraint
Fig. 17
Cam-lock
Fig. 18
Telescopic pole
Fig. 19
Cam-lock
Fig. 20
Hex key wrench
Cam-lock nut