
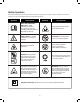
Replacement Part List

9
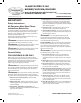
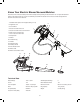
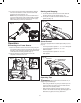
5. To remove the vacuum/mulcher tube assembly, slide the
inlet cover lock button to unlock, then remove the tube
assembly from its housing (Fig. 10).
NOTE: It may be necessary to remove the blower tube or
vacuum/mulcher tubes to clear a blocked tube or impeller.
Make sure to disconnect the unit from the power supply
before attempting to clear any obstructions.
Operation
Connecting to a Power Source
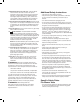
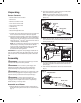
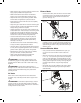
1. Secure the extension cord to the motor housing using the
cord retainer located at the rear of the blower. Securing the
extension cord in this manner prevents accidental removal
of the electrical cord during operation (Fig. 11).
2. Plug the female end of the electrical cord into the
receptacle at the back of the unit.
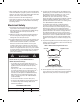
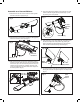
Starting and Stopping
1. To start the electric blower/vacuum/mulcher, slide the
ON/OFF switch to the ON position (I) (Fig. 12).
2. To stop the unit, slide the ON/OFF switch to the OFF
position (O) (Fig. 12).
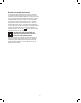
Speed Control
This unit is equipped with six variable speed settings (1 to 6)
(Fig. 13).
• Turn the speed dial to position “1” or “2” for LOW speeds.
• Turn the speed dial to position “3” or “4” for
MEDIUM speeds.
• Turn the speed dial to position “5” or “6” for
HIGH speeds.
Operating Tips
mWARNING! Use the blower/vacuum/mulcher only in
daylight or good articial light.
• When using the blower vac, plant your feet rmly on the
ground and place one hand on the unit handle and the
other hand on the auxiliary handle.
• Wear personal protective equipment during your work
session. This includes boots, safety glasses/goggles, ear
defenders, long pants, and a long-sleeve shirt.
Fig. 10
Inlet cover
lock button
Fig. 11
Cord retainer
Extension cord
Appliance
cord
Fig. 12
ON (I)
OFF (O)
Fig. 13
6 5 4 3 2 1
Variable blower
speed control