
Use and Care Guide


9
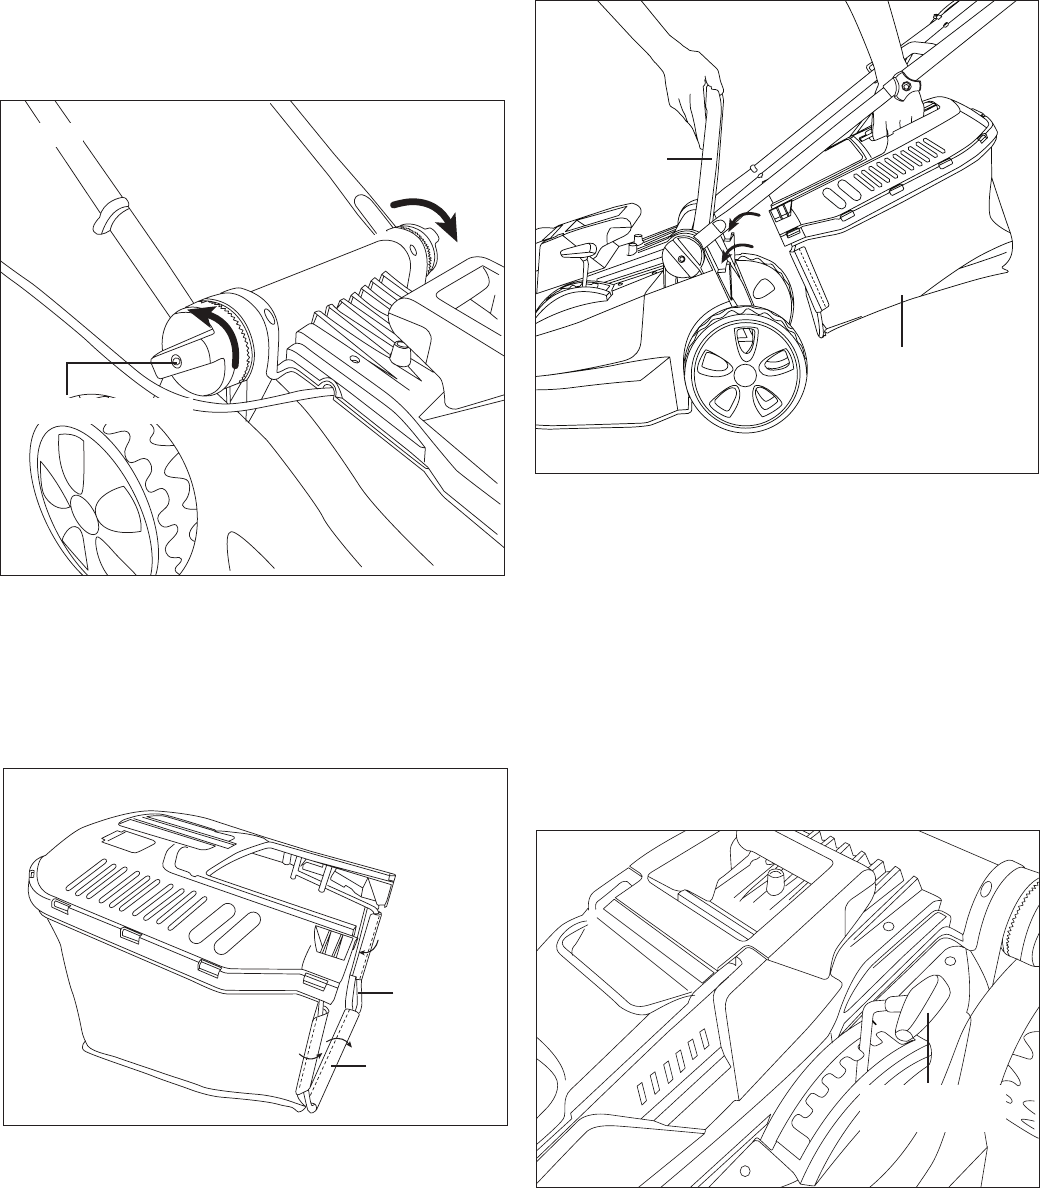
2. Next, release the quick-lock wheel for the lower handle by
turning it counterclockwise. This will allow you to move
the handle to the required position. Secure the handle by
turning the wheel in the opposite direction (Fig. 2).
Fitting the Grass Bag
IMPORTANT! Before tting the grass bag, ensure that the
safety key has been pulled, the motor is switched o and the
blade has come to a complete standstill.
1. Clip the protective plastic straps onto the support rod
(Fig. 3).
2. Lift the ejector ap with one hand.
3. With the other hand, hold the grass bag by the handle and
hook it in from above (Fig. 4).
Setting the Cutting Height
IMPORTANT! Before adjusting the cutting height, make sure
the motor is switched o and the safety key has been pulled.
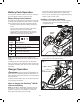
1. To set the cutting height on your lawn mower, pull out
the cutting height adjustment lever, move the lever to the
left or right and push it back into one of the six cutting
positions indicated below. Make sure that the lever
engages properly (Fig. 5).
6-Position Height Adjustment:
1. 1.18 in. (30 mm) 4. 2.17 in. (55 mm)
2. 1.38 in. (35 mm) 5. 2.60 in. (66 mm)
3. 1.77 in. (45 mm) 6. 3.15 in. (80 mm)
Before you begin to mow, check to ensure that the blade is
not blunt and that none of the fasteners are damaged. To
prevent any imbalance, replace blunt and/or damaged blades.
To carry out this check, rst switch o the motor and pull out
the safety key.
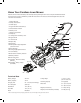
Fig. 2
Quick-lock wheel
Fig. 3
Protective
plastic straps
Support rod
Fig. 4
Ejectorap
Grass bag
2
3
4
5
6
Fig. 5
Cutting height
adjustment lever