
Replacement Part List


12
4. Rotate the cutting head to the desired cutting angle while
pressing the angle adjustment button (Fig. 26).
5. Release the button when the cutting head is xed into the
desired angle.
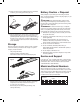
Starting + Stopping
1. To power ON, push and hold the safety lock-o button
with your thumb, while pressing the ON/OFF trigger
switch with your forenger. Once the trigger switch
engages, you can release the safety lock-o button and
proceed with operation (Fig. 27).
NOTE: The safety lock-o button reduces the risk of
accidental starting.
2. To power OFF, simply release the ON/OFF trigger switch
(Fig. 26).
3. If using the telescoping pole, push and hold the safety
lock-o button on the handle with your thumb, while
depressing the ON/OFF trigger switch on the handle with
your forenger. Once the trigger switch engages, you
can release the safety lock-o button and proceed with
operation (Fig. 28).
4. To power OFF, simply release the ON/OFF trigger switch.
mCAUTION! Do not force the blades through dense
growth. If the blades slow down, then reduce your cutting
pace. Should the blades jam, release the trigger immediately.
Do not use your ngers to free up jammed blades. Jammed
blades can release suddenly causing serious injury.
mCAUTION! Always ensure proper footing and balance
in a clean and clear work environment before switching on the
grass shear + hedge trimmer.
NOTE: The yellow charge indicator LED light will illuminate
when the battery is running low and requires charging.
Trimming Tips
mWARNING! Only use the hedge trimmer blade for this
operation. Never use the telescoping pole with the hedge
trimmer for trimming hedges.
NOTE: Try to keep the cutting device angled at approximately
15° to the cutting surface (Fig. 29).
1. Shaping – A hedge should be trimmed to achieve a
trapezoidal form; it should widen toward the bottom on
both sides. Shaping a hedge in this manner improves the
penetration of light to the lower extremities. A general
guideline is to slant the hedge approximately 4 in. (10 cm)
for each 39 in. (1 m) of hedge height.
Fig. 26
Angle adjustment
button
Fig. 27
Safety lock-o button
ON/OFF trigger
switch
Fig. 28
Safety lock-o
button
ON/OFF trigger
switch
R
Fig. 29
15°