
Operating Guide


43
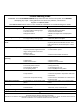
IMPORTANT!READANDFOLLOWALLINSTALLATIONANDMAINTENANCEINSTRUCTIONS,INCLUDINGCLEANINGTHEUNITASSPECIFIED,AND
REPLACINGGASKETSANNUALLY,ANDPARTSASNEEDED.
ENGLAND’SSTOVEWORKSISNOTRESPONSIBLEFORANYDAMAGEORINJURYINCURREDDUETONEGLECT,ORDUETOUNSAFEINSTALLATIONOR
USAGEOFTHISPRODUCT.CALLTECHNICALSUPPORTWITHANYQUESTIONS.
REPLACINGCOMPONENTS
SeeExplodedDiagramatrearofmanualforpartsreference
PartsOrders:(800)516‐3636heatredefined.comQuestions:(800)245‐6489
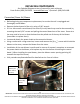
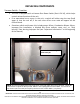
Convection(RoomAir)Blower
Beforebeginninganycomponentreplacement,becertaintheunitisunpluggedand
thoroughlycooleddown.
Removethebackpaneloftheunit,usinga5/16”wrench.
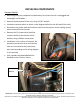
Ifitisaside‐mountcontrolboard,thecontrol(circuit)boardmayneedtoberemoved,by
removingthetwo5/16”
screwsandpullingthecontrolboardoutofthestove.Somewire
tiesmayneedtobecutsothattheboardcanbepulledoutofthewayoftheblower
(remembertoreplacethem).
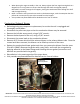
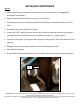
Locateanddetachthepowerleadstotheconvectionblower.
Using a
socketwithalongextension,loosenandremovethe(4)
5
/
16
”screwswhichholdthe
blowertothestove;removetheblowerfromthestove.
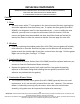
Installationofthenewblowerisperformedinreverseofre moval;remembertoreconnect
thepowerleadstotheblower,andreplaceanywiretiesbeforereinstallingthecontrol
board.(Wheninstallingthenewblower,
placetheblowermotoropeningpointingUP,
towardsthetopofthestove.)
Visityoutube.com/heatredefinedfordetailedservice‘howto’videos.
Convection
(RoomAir)
Blower
Vacuum
Switch(see
Vac.Switch
section)