
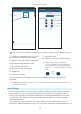
Daim Ntawv Qhia Tus Neeg Siv


- 11 -
A10-TX-US User Guide
See the Frequency Tables in this guide for a complete list of frequencies corresponding to the
channel and sub channel selections.
Audio Input and Control
The A10-TX-US input accepts a wide range of audio input types, including lavalier microphones,
balanced microphones, and balanced and unbalanced line level signals. 12 V and 48 V phantom
power is available for balanced microphones. The Selection Menu offers options for audio level
control, input type, limiters, and low cut lter.
Lavalier Microphones
Unbalanced lavalier microphones wired in two-wire mode, are directly compatible with the
A10-TX-US input. When connected, the A10-TX-US auto-detects the presence of a lavalier
microphone.
Balanced Microphones with Phantom
Balanced microphones, including phantom powered shotgun microphones, can be connected
to the A10-TX-US. 12 V and 48 V phantom power are available for microphones requiring
it. For microphones that can properly operate on 12 V phantom, such as the Schoeps CMIT,
select 12 V phantom to signicantly increase battery runtime.
Line-Level Sources
Wireless systems are often used as “camera hop” systems. For most camera hop applications
the output of a eld mixer is connected to a wireless transmitter. The wireless receiver output
is connected to the camera input. The line level input selection simplies using the A10
System as a camera hop. Select Line in the Selection Menu to accept balanced or unbalanced
line level inputs.
ª To connect balanced microphone or line level sources to the A10-TX-US a cable wired as
described in the specications or the AC-BALXLR cable is required. This connects the shell
of the LEMO connector to pin-1 of an XLR connector.
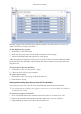
Audio Level Control
Input levels are controlled from the Audio Gain option in the Selection Menu. The gain range
available is source-dependent as follows:
• Lavalier setting: 0 dB to 40 dB, 1 dB increments
• Line setting: -10 to 16 dB, 1 dB increments
• Mic setting (with 20 dB pad): 16 to 40 dB, 1 dB increments
• Mic setting (with no pad): 36 to 60 dB, 1 dB increments
Set input levels so that the limiter is active only on the strongest peaks.
Mute Button
When the Mute Button function is enabled, holding the Left button for 1 second
toggles Mute on or off. While Muted, the transmitter LED ashes red. The paired Receiver
channel display Muted on the channel screens. Audio is muted at the transmitter input, this
means both recorded and transmitted audio will be silent.
Antenna
The SMA antenna connector is used to mount the included 1/4-wave whip antenna. The use of
any other type is forbidden.