
Use and Care Guide


2
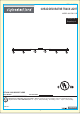
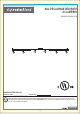
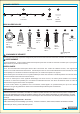
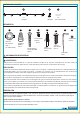
PACKAGE CONTENTS
B CA
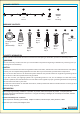
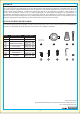
HARDWARE CONTENTS
Note: Hardware shown actual size.
x 6x 1
Fixture
x 6
Trim RingBulb
Qty. 2
Outlet Box
Screw
Qty. 2
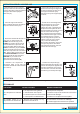
Turn off electricity at main fuse box (or circuit breaker box) before beginning installation by removing fuse (or
switching off circuit breaker).
WARNING
SAFETY INFORMATION
Please read and understand this entire manual before attempting to assemble, operate or install the product.
CAUTION
•All electrical connections must be in agreement with local codes, ordinances or the national electric code (NEC).
Contact your municipal building department to learn about your local codes, permits and/or inspections.
•If a dimmer control switch is used with this fixture, obtain professional advice to determine the correct type and
electrical rating required.
•If you are not sure your lighting system has a grounding means or not, do not attempt to install this fixture.
Consult a qualified, licensed electrician for information with regards to proper grounding methods as required by
the local electrical code in your area.
•Do not connect this fixture to an electrical system that does not provide means for equipment grounding. Never
use a fixture in a two-wire system that is not grounded.
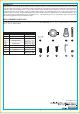
Estimated Assembly Time: 15 minutes
Helpful tools : Wire Strippers, Pliers. (not included)
PREPARATION
Before beginning assembly, installation or operation of product, make sure all parts are present. Compare parts with
package contents list and hardware contents list. If any part is missing or damaged, do not attempt to assemble, install or
operate the product.
Tools required for assembly (not included): Phillips Screwdriver, Electrical Tape, Safety Glasses, Ladder.
Qty. 2
Mounting
Plug
Qty. 2
Machine
Screw
Qty. 1
Qty. 2
CC
DD EE FF GG HH
Qty. 3
Wire Nut
BBAA
Bracket
Screw
Qty. 1
Mounting Bracket
(Not to scale)
Allen Key
Allen Screw