
Installation Guide
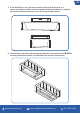
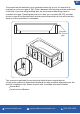
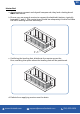
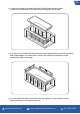
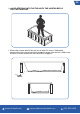
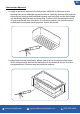
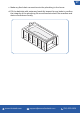
Table Of Contents

streamlinebath.com
support@streamlinebath.com (310) 935-0028
10. Connect the trip lever linkage (J) to the trip lever faceplate (K) by aligning the
holes and inserting the cotter pin (U). Then, using pliers, twist the pin to secure
the connection.
11. From the interior of the bathtub, insert the linkage assembly (J) and the
faceplate (K) through the overflow elbow (A). The drain assembly includes four
linkage wires (1-4) to establish the suitable height of the linkage assembly. Refer
to the next page of the installation manual to identify the correct wire based on
the bathtub's soaking depth. If necessary, adjust the linkage length by turning
the threaded rod (M).
12. With the trip lever set to the closed position, ensure that the plunger (P) rests
on the internal stop of the waste tee (F).
13. Secure the trip lever plate (K) to the overflow elbow (A) by using the two
overflow plate screws (S).
14. Verify the functionality of the plunger mechanism by raising and lowering the
trip lever handle (L).
15. Install the strainer grid plate (R) and fasten it securely using the strainer grid
screw (T).
Firmly tighten all slip joint connections. Perform a water test on the entire
installation by filling the tub with water up to the overflow opening and inspecting
for any signs of leakage from underneath the tub. Let the water sit in the bathtub
for a minimum of 30 minutes and inspect if leakage is occurring.
30