
User's Manual
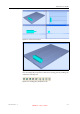
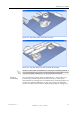

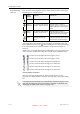
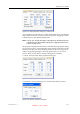
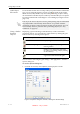
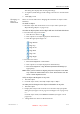
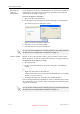
Table Of Contents
- About This Guide
- Safety
- Introducing the Alaris 3-D Printing System
- Installing Objet Software
- Using Objet Studio
- Using Job Manager
- Operating & Maintaining the Alaris30 3-D Printer
- Starting the Alaris30 Printer
- Loading Model and Support Cartridges
- Producing Models
- Resuming Production After Printing has Stopped
- Changing the Model Material
- Keeping the Alaris Printer in Idle Mode
- Shutting Down the Alaris Printer
- Maintaining the Alaris Printer
- Routine Maintenance Schedule
- Cleaning the Print Heads
- Pattern Test
- Improving Print Quality
- Cleaning and Replacing the Wiper
- Cleaning and Replacing the Roller Waste Collector
- Aligning the Print Heads
- Replacing Print Heads
- Calibrating the Load Cells
- Replacing the Odor Filter
- Replacing the UV Lamp
- Replacing the Waste Container
- Cleaning the Exterior Panels
- Backing-Up and Restoring Printer Settings
- ReInitiate Wizard
- Handling Printed Models

DOC-24000 Rev. A 5–9
Alaris30 User Guide
Figure 5-13: Tray before objects are properly arranged
Figure 5-14: Tray after objects have been automatically arranged
Manual
Positioning
Youcanmanuallypositionobjectsonthebuildtray—eveniftheywere
insertedusingautomaticplacement(withtheArrangemodelsoption
selectedintheInsertdialogbox).Considerationsforpositioningobjectsare
reviewedin“ModelOrientation”onpage 5‐10.Toolsforchangingthe
positionofobjectsaredescribedin“RepositioningObjects”onpage
5‐12.
Because of the unique characteristics of each type of modeling material, it
is recommended that you select the material before inserting objects on the
tray with automatic positioning or running Automatic Placement.
DRAFT 4 - July 11, 2010