
Full Product Manual


DO’S
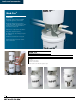
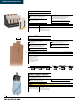
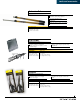
Keep a bucket of water nearby for mixing and tool clean up.
Use all-purpose compound for bed coat and coating screws.
Add water and mix compound thoroughly to a smooth creamy texture.
Keep the inner side walls of the compound bucket clean and smooth with a wet
sponge. Hardened compound on the sides of the bucket could fall into the smooth
compound and will streak when applied to the drywall surface.
Set all screws below the surface of the drywall. Check with a taping knife as the
knife will snag on screws not set deep enough.
Use a brush to wipe away any dust before applying compound
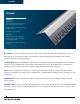
For outside corners, use a drywall rasp to remove any drywall edges that extend
over the adjacent drywall surface.
Use the correct product for the job. The better the framing and hanging; the
smaller the product. The larger the gaps, the worse the framing; the larger the
product.
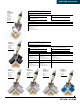
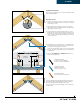
(Composite flexible corner beads) Always fold print side together. Fold tighter for
outside corners and more open for inside corners. This ensures the product lays
flat on the wall.
(Paper-faced flexible corner trims) Print side faces out for both inside and outside
corners.
Trim the ends of corner beads and trims at a 45º angle.
This will keep them flat on wall.
(Patches) Apply compound to the back of all patches, flip over, and apply patch to
the damaged area. Strait-Flex patches become rigid because of compound on back
of patch.
Use 150-200 grit sandpaper when finish coat is lightweight compound (softer
compound). Use 100-150 grit sandpaper when finish coat is all-purpose compound
(harder compound).
DONT’S
Use light-weight finishing compound for bed coats. Light-weight compounds don’t
have the strength of taping compounds.
Dilute compound with too much water.
Use the wrong size product for the job.
Overlap tapes or corner beads.
Please call Strait-Flex
with any product
questions or concerns.
1-888-747-0220
helpful hints
30