
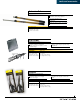
Full Product Manual


Installation Instructions
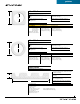
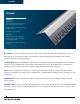
Fasten X-Crack to ceiling trusses or conventional framing members
before drywall installation.
Directions for Use
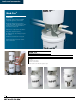
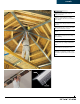
1 Adjust X-Crack to angle of corner. For inside corners, surface of
PVC hinge faces framing members. For outside corners, surface
of PVC hinge faces out.
2 Using drywall screws, first fasten X-Crack at end of lengths.
Align center and fasten to framing members. Overlap X-Crack
approximately one inch at joints.
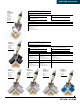
3 Let X-Crack float over irregular framing members to create a
straight line. Six screws per length is all that is required to hold
X-Crack in place. The last screws in the field secures drywall to
ceiling - and the screws through drywall into body of X-Crack
secures inside corners.
4 Install drywall over X-Crack with fine or coarse drywall screws.
Be sure the drywall screws penetrate the X-Crack product but
miss the truss or ceiling joist by 2 to 4 inches.
The last screw in the field should be 10 to 12 inches away from
X-Crack. This allows ceiling members to move independently
of drywall joint.
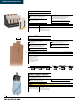
5 Use Strait-Flex Mid-Flex
250
or Mid-Flex
300
flexible corner
trim to finish the application.
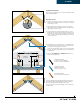
X-Crack’s patented hinge and flexible tab design holds drywall
joints stationary while structural framing members are allowed
to move independently of the drywall. Causes for this
movement may be due to lumber shrinkage, snow or wind loads,
and truss uplift.
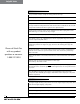
SCREWS THAT SECURE
X-CRACK TO CEILING MEMBER
Penetrates: X-Crack, Framing Member
SCREWS THAT SECURE
DRYWALL TO X-CRACK
Penetrates: Drywall , X-Crack
LAST SCREWS IN FIELD
Penetrates: Drywall, Framing Member
x-crack
29