
User Manual
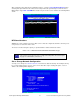


Many options are available from this screen for moving data between disks. This is necessary when the disks
currently available don’t match those defined on the backup, or if you simply want to reorganize the data on the
disks for better performance, or to implement SVM or ZFS mirroring or striping.
To return to the
Settings Menu, press F3 or ESC. The backup data will again be checked to ensure you have
enough room on the disks for the slices or other data as you have defined them. If not, you will be warned, but
can make changes in this or other settings to fix the problem before the installation is actually performed.
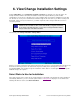
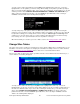
The above screen shows you the original disk the data resided on and the new disk that is assigned that data.
There may be previous disks that are not assigned to a new disk, or even additional detected disks that have no
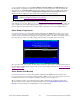
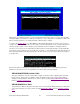
data currently assigned to them. By selecting one of the lines on the screen, you are provided several options
as shown below:
Note that the options for displaying or migrating partitions only appear if the selected disk was previously
partitioned or you have chosen to create partitions on it. Each option is described below:
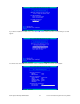
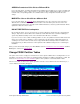
VIEW/CHANGE FDISK Partition Table
This option will appear only if the selected disk is empty or currently contains a partition table (Intel x86-
based systems). This provides the ability to change the partition table for the selected disk by adding,
deleting or resizing partitions. Instructions are same as when selecting
Change FDISK Partition Tables
from the Installation Settings Menu.
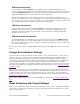
VIEW/CHANGE Slice Table
This provides the ability to change the slice table for the selected disk by adding, deleting or resizing slices
on the disk. Instructions are same as when selecting
Change Slice Tables from the Installation Settings
Menu.
Storix System Backup Administrator 38 Version 8.2 Solaris System Recovery Guide