Solaris System Recovery Guide Version 8.
Trademarks and Copyrights © Copyright Storix, Inc. 1999-2014 USA Storix is a registered trademark of Storix, Inc. in the USA SBAdmin is a trademark of Storix, Inc in the USA and other countries Intel, Pentium, IA32, Itanium, Celeron and IA64 are registered trademarks of Intel Corporation. AMD, Opteron, and Athlon are registered trademarks of Advanced Micro Devices. Sun Microsystems and the Solaris™ operating system is a trademark of Sun Microsystems, Inc. SPARC is a trademark of SPARC International, Inc.
Table of Contents 1. Introduction ......................................................................................................... 5 When to Use this Guide .............................................................................................................................. 5 Terminology ................................................................................................................................................ 5 2. Creating Boot Media for System Installation............
TSM Client Configuration ..................................................................................................................... TSM Server Configuration .................................................................................................................... TSM Administrator Configuration.......................................................................................................... Change the Installation Settings ........................................................
1. Introduction The SBAdmin for Solaris System Recovery Guide is a supplement to the SBAdmin User Guide, providing details on reinstalling a Solaris system from a SBAdmin System Backup. Note that a System Backup is not limited to reinstalling the same system from which it was made, but it may also be used to “clone” the original system onto different systems containing the same or different hardware.
• SVM: The Solaris Volume Manager provides the ability to create devices from disk slices that provide optional data striping (RAID 0), mirroring (RAID 1), parity disks (RAID 5) and Software Partitions (SoftParts) for enhanced performance, flexibility and availability. SVM is supported on most Solaris versions today. If it is available on your system it will be automatically included on the SBAdmin boot media even if you are not using it.
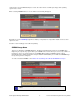
2. Creating Boot Media for System Installation The SBAdmin Backup Administrator User Interface provides a very simple procedure for creating boot media, which is described in this section. This interface may be used to create boot CDROM images, network boot images, or can configure a local hard disk to boot to the system recovery process. This interface may create any of the boot media types.
created on the selected client but may be used to boot other clients of similar system type and operating system release levels. When selecting A Solaris client, a screen similar to the following will appear: Remember to use the QuickHelp (right mouse button) on any button or entry field for details on the use and options for each. Creation of each media type is described separately: CDROM Image Name This process will make a CDROM ISO image, but will not actually burn the image to the CDROM.
Using Network Administrator a minimum of three fields are required Boot Server name, CDROM Boot Image Name, and Client Name. The Boot Server name is the name of the server the boot media will be stored on. Use the drop down arrow to select a configured server. The boot media will be created using the selected client, but will be copied to “CDROM & Network Boot Images” directory as configured on the selected boot server.
Network Use this option to create a network boot image to be used with various network boot loaders to boot a client system over the network from a network boot server. To create a network boot image on any configured client or server and save the image on the boot server, select either: Configure!Network Boot/Install!Create/Update a Network Boot Image or Utilities!Create System Installation Boot Media!Network Boot Media Solaris clients may only be set to network boot from a Solaris boot server.
To prevent a system from being inadvertently reinstalled by simply booting from the wrong device, this option is not available when booting from a hard disk. Be very careful, however, not to leave the CDROM in the drive and the system firmware set to boot from CDROM first, as a no-prompt installation could occur without any user intervention.
Enabling Remote Installation Manager This feature will allow connection to the SBAdmin System Installation Process from any remote system. With proper authority, a remote user can connect to, diagnose and perform system installation of a system after that system has been booted from the SBAdmin boot media. This process may be started from the SBAdmin interface on a Network Administrator system, or from any SSH client application.
Select the Network Adapter that should be configured to connect to the remote install client. If performing a network boot, then you may select UseBootAdapter to use the adapter that was used to perform the network boot. If you configured the Client Network Adapter on the previous screen, you can select UseInstallAdapter to use the same adapter configured for network installation. Enter the IP Address used to configure the network adapter.
3. Network Boot/Install Configuration The information provided in this section will prepare a client system for network boot and installation from a backup server. Understanding Network Boot and Network Installation Any client system defined to the admin system may be installed or reinstalled from a System Backup. That System Backup will typically reside on the disk or on a tape device attached to a backup server.
Options may appear or disappear from this screen depending on your selections. The screen is broken into two main sections; one for configuring the Client network boot options and one for configuring the Client network install options. The setting for the Install Mode toward the bottom of the screen determines whether or not the Client network install options section will appear. The following fields are used to configure the client to boot from a boot server: 1. 2.
4. Gateway Address: If the client must go through a gateway to reach the boot server, enter the IP address of the gateway machine. 5. Subnet Mask: If the client is on a subnet, enter the subnet mask. 6.
To un-configure the client, simply select the option Configure!Network Boot/Install!Enable/Disable Network Installation of a Client from the menu bar. Select the client to disable. The client network install configuration will appear. Simply press the Disable button at the bottom of the screen to un-configure the network install. Un-configuring the network install client will prevent the client from booting over the network.
1. Gateway Address: If the client must go through a gateway to reach the install server, enter the gateway IP address in this field. 2. Subnet Mask: If the network the client uses to reach the install server uses a subnet mask, enter the subnet mask here. 3. Client Network adapter name: If the client will use a different network adapter to reach the install server than was used to reach the boot server, use the arrow button to select an adapter name from the list.
Updating Network Boot Images If you have updated the client operating system or installed new base system hardware support (network devices, disk drives, display adapters) or onto a system that you previously created a network boot image from, you will need to recreate that network boot image before the new device support will be accessible to the clients booting from that image.
4. Booting to the System Installation Process Booting the Various System Types This section will provide general guidelines for booting a system to the Installation and Maintenance Menu, used to install a system from a System Backup. Note that the steps differ widely between systems and new systems are being introduced frequently. If you are not familiar with the process of booting your system from different media, you should refer to your system documentation for detailed instructions.
Network Boot To network boot an Intel-based system with BIOS: Most BIOS-based systems are not, themselves, network boot capable. However, if you have a network adapter card with network boot capabilities, you can have the system BIOS boot to the firmware on the network card. Therefore, the network card will be used to provide the network boot capabilities the system firmware does not. To initiate a network boot, follow these steps: 1.
The detailed instructions for using the options on this menu are provided in the sections Reinstall a System from a Backup and View/Change Installation Settings. Storix System Backup Administrator 22 Version 8.
5. Reinstall from a System Backup A System Backup may be used to reinstall either the original system or a different system with either the same or different hardware configuration. To initiate the installation, you must first boot the client from CDROM, network boot server, or local (internal, or external/portable) disk, using the instructions found in the section Booting to the System Installation Process.
3. The configuration information from the backup will be compared against the current system configuration to ensure that everything may be recreated according to the original backup data. If there are problems which can be corrected, they will be corrected automatically. For instance, if a disk has changed sizes, a filesystem may be automatically reduced in size to make it fit.
ASCII (text) key (or press Enter to reselect key type)", enter they key, or press Enter to return to the options above. The key you enter will be converted to an appropriate hexadecimal number and used to decrypt the data, just as if you entered the hex key yourself. Upon entry of a valid key, the restoration of the data will continue. If an invalid key is entered, you will be informed so, and returned to the above menu of options.
Using Keys and Getting Help Because these menus are designed to appear on both graphic and serial (ASCII), the menus are provided in a form viewable on ASCII terminals. The use of the mouse is not available. Most keyboards will support arrow keys while others do not. Also, some keyboards have page up and page down keys, help keys, etc, that others do not.
Pop-up List Options: Pop-up lists are available for many entry options. When supported, “List=F4” will appear at the bottom of the screen. At that field, you may press the F4 or “$” key (SHIFT-4) to list the available options for the corresponding field and select an option from the list. To select an option, use the arrow keys to highlight the desired option and press Enter. The selected option will be placed in the entry field and the pop-up window will disappear.
If you are restoring from a parallel tape device, then you should select all tape drives that make up that device. Otherwise you should only select a single tape drive. After selecting the tape drive, press F3 or ESC and the following window will pop-up on the screen: If the backup you wish to install from is not the first backup on the media, type the backup sequence number in the Backup Sequence Number field.
The Backup Sequence Number and Autoloader used? options are the same as previously described. However, there is a Parallel Read Policy which should be set to “y” if the backup was created using a Parallel Tape Device. If the backup was created using a Parallel Tape Device, you must select all tape drives that make up this device and enter “y” for Parallel Read Policy.
Select a backup by highlighting the desired line and pressing ENTER, or press F3 or ESC key to cancel the selection. After making your selection, you are returned to the Change Installation Server or Device menu. Install From Local NFS Mount If the system backup you wish to use for the recovery is located on a remote NFS share, you may use this option to get access to the backup by performing a NFS mount of the share to the local system.
After entering the above NFS mount configuration options, select the Select NFS Mount Backup option. Selecting this option will mount the remote share locally and list all system backups found in the share. Only backups of type FULL SYSTEM will be listed. If any are found a screen similar to the following will be shown: NFS Considerations SBAdmin in no way configures the remote NFS server. It must be configured to allow the client IP you are using read access to the files in the share.
To use a network install server, the Server IP Address, Client IP Address and Network Device fields must be filled in. If a gateway is required for the client to reach the install server, enter the gateway the client must use in the Gateway Address field. Under Adapter Configuration, press F4 to list the devices available on the system. The option to Apply Network Configuration to Restored System indicates whether you wish to migrate the above client network settings to the restored system.
After selecting the directory device, a list of System Backup images on the server will be displayed, and you may select a backup from the list. The list will also display the client from which the backup was originally made, the date and backup job ID. If you expect a backup image to appear in the list that does not, it may be that the backup was written with permission for only the original client to read it.
If you wish to install from a TSM server, select Use TSM Server from the list above. The following screen will appear: You will need to enter additional information used to contact the TSM server on the screen below: Storix System Backup Administrator 34 Version 8.
TSM Client Configuration You are required to enter the NODEname of the TSM client you are installing. Note that this is not necessarily the same node from which the backup was originally created. If you know the node’s password, enter it in the NODE Password field. If you do not know the node password, then you will be required to supply the TSM Administrator username and password in the fields below.
The backup settings will again be verified to ensure consistency with the current hardware configuration as described in Verification Process. If any problems are found, you will be returned to the Installation and Maintenance Menu. If no problems were found in the system configuration preventing the installation from proceeding, a confirmation screen will appear, showing you the volume groups and disks that will be created or overwritten by the installation. You will be required to press Enter to continue.
6. View/Change Installation Settings From the Main Menu, select View/Change Installation Settings. The first time you enter this option, the backup information will be read from the installation media and compared with the system and disk configuration to ensure there is adequate space on the available disks to perform the installation. Checks will also be made to ensure you booted from boot media that supports all of the devices you will be restoring from the backup.
Many options are available from this screen for moving data between disks. This is necessary when the disks currently available don’t match those defined on the backup, or if you simply want to reorganize the data on the disks for better performance, or to implement SVM or ZFS mirroring or striping. To return to the Settings Menu, press F3 or ESC. The backup data will again be checked to ensure you have enough room on the disks for the slices or other data as you have defined them.
ASSIGN all contents of this disk to a Different Disk If you select this option, you will be provided a list of available (unused) disks. If you select a new disk from the list, any partitions, slices or their contents (i.e. filesystems, ZFS or SVM volumes) will be moved to the new disk. The corresponding partition, slice and disk names in any configuration files will reflect the change.
You may select to add a new partition by pressing Enter at the highlighted line at the top, or move the highlighted line over the partition you wish to change. When adding a new partition you will be prompted where to insert the partition within the table. If you select a line containing an existing partition, you are first asked if you wish to either CHANGE PARTITION INFORMATION or REMOVE THIS PARTITION. If you want to remove the partition from the disk, select the REMOVE option.
You may change any of the options shown. The Size of the slice can be set by either entering the number of sectors (512-bytes each) or by entering the number of megabytes. In either case, the other will be adjusted accordingly. • Position: This option indicates the position on the disk that this slice will be created. Solaris slices are numbered from 0 to 15, with certain reserved slice numbers, based on the operating system version and platform type.
• Soft Partitions: This is a type of meta-device created using part of a disk slice or other meta-device. Multiple soft-partitions can share the same devices, therefore creating smaller partitions that share the same larger device and can be easily, added, removed and resized. • Replication Database (or State Database): Every meta-device requires this database, describing the meta-device itself. This database can exist in a disk slice of its own, or can share a disk slice with the meta-device itself.
If you want to remove this database, move the cursor to the Create option field and press “D”. Otherwise, you can usually accept the default settings by simply pressing ESC to return to the SVM Settings Menu, or press F1 for help on any entry field.
You must define at least one stripe for a RAID 0 device. To do so, move to the # of Stripes field and press F4. This will produce a list of stripes and/or an option to add a new stripe: After making a selection from the list, an additional window will appear, allowing you to change the settings for the selected stripe: From this window, you must select the device or devices (stripes or other meta-devices) that make up this stripe.
A RAID 1 meta-device can only be built using other (typically RAID 0) meta-devices. Therefore, if you have not already done so, you must create at least one RAID 0 device first. To select the RAID 1 device on which to create this mirror, press F4 in the Device List field. Only RAID 1 meta-devices which already exist will be provided in the selection list. The additional options may be set to the default values shown.
The additional options may be set to the default values shown. Otherwise, you can change the additional options by moving to the desired entry field and pressing F4, or press F1 for additional information. • Soft Partitions: A soft partition is a meta-device that sits on a single disk slice or other meta-device. The difference between the soft partition and other devices is that a soft partition has a fixed size, and multiple soft partitions can share the same underlying device.
If you select Add New, a new device will be created with a new name. The name will always start with “hsp”, followed by a number. When adding a new device or selecting an existing device, the following screen will appear: Move to the Device List field and press F4 to list and select the slice or slices to add to the metadevice. To remove the hot spare pool, move to the Create Option field and press “D”.
Here’s an example: d0 (RAID 1) d11 (RAID 0) d10 (RAID 0) disk 1 slice disk 3 slice disk 2 slice disk 4 slice Devices d10 and d11 are RAID 0 meta-devices, each made from two different disk slices (on different disks). Mirrored meta-device d0 is then created from d10 and d11. Any data written to d0 will be mirrored onto the striped meta-devices, which in turn will each stripe the data onto 2 slices.
ZFS Pools The first item on the menu is used to create a zpool and its underlying virtual devices. This section describes editing zpools. Refer to the following section for virtual devices. When selecting this option, you are given a list of existing zpools and an option to create a new one: If you select Add New, a new zpool name will be generated for you.
Changing the virtual device settings is described in the next section. If you are finished with the zpool selections, pres ESC or F3 to return to the ZFS settings menu. Virtual Devices After you have selected the zpool you want to change, you can add, change or delete virtual devices. The virtual device will be comprised of one or more disk slices, and may be utilized in a mirrored, striped or parity disk configuration for higher performance and/or availability.
When adding a new filesystem, a default mount point and dataset name will be created for you. After selecting to add a new ZFS filesystem or to edit an existing one, the following options screen will appear: Each option can be explained by pressing the Help (F1) key at any entry field. Note the following: • Pool Name: You can press F4 at this field to list the existing zpools and select a different zpool. Doing so will move this dataset and any child datasets (i.e.
ZFS Volumes A ZFS volume has a fixed size (but may be increased) and does not contain a ZFS filesystem. It may contain any type of data, including other Solaris Filesystems. After you have created at last one zpool, you can add any number of ZFS volumes to it. When selecting ZFS Volumes from the ZFS Settings Menu, you are given a list of existing ZFS volumes and an option to add a new one: When adding a new volume, a new dataset name will be created for you.
Change Solaris Filesystems This option may be used to change any of the settings for the Solaris filesystems, which vary depending on the filesystem type.
Mount point – You can change the directory where the filesystem will be mounted. The data is restored relative to this directory, so the contents, if any will not change. You cannot change the mount point of the root (/), /boot or /usr (if any) filesystems. Device – Here you can select a new device where the filesystem should be created and/or restored. Possible filesystem devices are disk slices, meta-devices (SVM) and Zpool Virtual Devices.
If an arrow (") appears next to a device, then that device is currently configured as a swap device. To select an unselected device, highlight the desired line and press Enter. If you do not want to use that device for swap, press Enter and the arrow will disappear. If removed, the device will then be unassigned and may be used for other features, such as filesystem data. When you’ve completed your selections, press F3 or ESC to return to the Installation Settings menu.
7. Install the System To install the system from the SBAdmin System Backup, you first must have selected the Installation Device (which may be located on a local or remote host). You then have the option View/Change the Installation Settings, where you can make any changes to the backup information stored on the backup media. If you used that option, then the backup information was already restored from the backup, verified and modified as needed to ensure the installation can be started.
Starting the Installation If all checks out, you are given one final warning: Press “y” to continue the installation or “n” to return to the Main Menu. If you choose to continue the install, the system will begin by reading additional information from the backup media, then creating the devices and filesystems that are defined. After the devices are created, all filesystems are created and mounted.
Should any system, even when changing the disk configuration, not startup at the end of the installation process the same as the original system, you should report the problem to Storix immediately.
8. System Recovery Utilities From the System Installation and Maintenance Main Menu, select System Recovery Utilities to display the following options: Configure Remote Install Manager If you configured RIM at the time you created the boot media, it will be automatically enabled and it will not be necessary to configure in this option.
1. The Remote Install Username is set to “sbadmin” and may not be changed. Enter a password in the Remote Install Password field. The password will be necessary to login to the remote install client. 2. Select the Network Device (adapter) that should be configured to connect to the remote install client. 3. Enter the IP Address used to configure the network adapter.
To change the groups ID simply begin typing and it will replace the old group id. Press the escape key to save the new setting and return to the previous menu. Start a Maintenance Shell Selecting this option will put you at a Korn (ksh) shell, from which you can enter various system maintenance commands. Should any error occur during the system installation that prevents the process from continuing, you will be automatically placed at this prompt.
Index A F ascii encryption key, 26 filesystems adding, changing, removing, 55 definition, 6 types, 55 firmware, 5 definition, 5 B backup sequence number, 29 network install, 17 BIOS, 21 CDROM boot, 21 networkboot, 22 boot booting to install process, 21 problems, 59 boot loader, 6 definition, 5 boot media cdrom, 8 creating, 7–20 disk, 9 network, 10 when to make, 7 boot server. See network boot server booting, 21, See also network boot broadcast boot, 17, 22 H hard disk.
filesystem, 6 ZFS virtual device, 52 level 0 meta-device. See stripe level 0+1, 49 level 1 ZFS virtual device, 52 level 1 meta-device. See mirror level 5 ZFS virtual device, 52 level 5 meta-device. See parity level 6 ZFS virtual device, 52 raid devices descriptions, 43 meta-devices, 45 raidz1 ZFS virtual device, 52 raidz2 ZFS virtual device, 52 recovery.
U system backup nfs local install device, 31 system installation booting, 21 booting in installation mode, 21 cloning systems, 24 device, 28 errors, 59 install device changing, 28 selecting a remote device, 33 installing the system, 58 main menu, 23 mode, 16 network install server changing, 28, 32 no-prompt install, 11, 24 settings, 36, 57 starting, 59 verification, 58 system recovery. See system installation system recovery utilities, 61–62 UDFS, 6, 55 UFS, 6, 50, 55, 56 utilities.