BA_SR340_30_U_E3.book Seite 0 Montag, 26. Mai 2003 9:28 09 STIH) STIHL SR 340, 420 Instruction Manual Manual de instrucciones Warning! For safe operation follow all safety precautions in Instruction Manual - improper use can cause serious injury. Advertencia! Para su seguridad durante el manejo de este producto, siga siempre las precauciones de seguridad dadas en el manual de instrucciones - el uso indebido puede causar lesiones graves.
English / USA © ANDREAS STIHL AG & Co. KG, 2006 0458 372 8621 A. M0,8. J6. PM. Printed in USA Printed on chlorine-free paper. Printing inks contain vegetable oils; paper can be recycled. BA_SE_004_007_01_05.fm Contents Guide to Using this Manual .............. 2 Safety Precautions and Working Techniques ......................... 3 Assembling the Machine ................ 14 Harness .......................................... 16 Fuel ................................................ 17 Fueling ............
English / USA Guide to Using this Manual Pictograms All the pictograms attached to the machine are shown and explained in this manual. The operating and handling instructions are supported by illustrations. In addition to the operating instructions, this manual may contain paragraphs that require your special attention. Such paragraphs are marked with the symbols described below: Symbols in text Warning where there is a risk of an accident or personal injury or serious damage to property.
English / USA Safety Precautions and Working Techniques Because the mistblower is a tool for spraying chemicals, special safety precautions must be observed to reduce the risk of personal injury. It is important that you read, fully understand and observe the following general safety precautions and warnings. Read the instruction manual and the safety precautions periodically. In addition, read and follow the chemical manufacturer’s instructions for the chemical products being applied.
English / USA THE OPERATOR Physical Condition You must be in good physical condition and mental health and not under the influence of any substance (drugs, alcohol, etc.) which might impair vision, dexterity or judgment. Do not operate this machine when you are fatigued. !Warning! Be alert – if you get tired, take a break. Tiredness may result in loss of control. Working with any power tool can be strenuous.
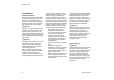
English / USA !Warning! !Warning! !Warning! To reduce the risk of injury to your eyes you may need to wear protective goggles when operating your power tool. Check the product label for the chemical you are spraying. When working with toxic chemicals, the operator and any bystanders may need to wear a properly fitted respirator approved by NIOSH/MSHA for the chemical being used. Consult the product label. Breathing toxic chemicals can cause serious or fatal injury.
English / USA THE POWER TOOL For illustrations and definitions of the power tool parts see the chapter on “Main Parts and Controls.” !Warning! Never modify this power tool in any way. Only attachments supplied by STIHL or expressly approved by STIHL for use with the specific STIHL model are authorized. Although certain unauthorized attachments are useable with STIHL power tools, their use may, in fact, be extremely dangerous.
English / USA When handling chemicals and when spraying, make sure you are operating in accordance with local, state, and federal environmental protection rules and guidelines. Do not spray in windy conditions.To help protect the environment, use only the recommended dosage – do not overuse. !Warning! Do not eat, drink, or smoke while handling chemicals or while you are spraying. Never blow through nozzles, valves, pipes or any other component by mouth.
English / USA Fueling Instructions !Warning! To reduce the risk of serious injury from burns, never attempt to refuel the unit until it has been completely removed from the operator. !Warning! Fuel your power tool in well-ventilated areas, outdoors. Always shut off the engine and allow it to cool before refueling. Gasoline vapor pressure may build up inside the fuel tank depending on the fuel used, the weather conditions and the tank venting system.
English / USA Filling the Container !Warning! Tighten all connections and check to be sure the hose is securely attached and in good condition. Keep the stop cock closed. Before using the power tool with chemicals, fill it with fresh water to assure that you have it properly assembled and practice spraying. Also, check for any leaks at this time. When thoroughly familiar with the power tool operation, follow normal operating procedures. Fill your power tool in well-ventilated areas, outdoors.
English / USA To reduce the risk of injury from thrown parts, check the fan housing for damage (cracks, nicks, chipping). If any damage is found, stop using the unit and contact your STIHL dealer for repair. Starting Start the engine at least 10 feet (3 meters) from the fueling spot, outdoors only. The assistance of another person may be needed in placing the unit on your back after starting.
English / USA !Warning! Adjust carrying harness to suit your size before starting work. In an emergency, you may slip out of the harness and throw off the machine quickly. Try slipping out of the harness a number of times before using the machine in order to become accustomed to it. Do not throw off the machine while practicing as it could damage the machine. !Warning! In order to keep the container upright and reduce the risk of spillage, do not bend at the waist.
English / USA !Warning! If you are unfamiliar with the risks associated with the particular chemical at issue, review the product label and/or material safety data sheet for that substance and/or consult the material manufacturer/supplier. You may also consult your employer, governmental agencies such as the EPA, OSHA and NIOSH and other sources on hazardous materials.
English / USA !Warning! To reduce the risk of fire and burn injury, keep the area around the muffler clean. Remove excess lubricant and all debris such as pine needles, branches or leaves. Let the engine cool down sitting on concrete, metal, bare ground or solid wood (e.g. the trunk of a felled tree) away from any combustible substances. !Warning! Never modify your muffler. The muffler could be damaged and cause an increase in heat radiation or sparks, thereby increasing the risk of fire and burn injury.
English / USA Assembling the Machine !Warning! !Warning! Do not attempt any maintenance or repair work not described in your instruction manual. Have such work performed by your STIHL servicing dealer only. Never test the ignition system with the spark plug boot removed from the spark plug or with a removed spark plug, since uncontained sparking may cause a fire. Use the specified spark plug and make sure it and the ignition lead are always clean and in good condition.
English / USA Mounting the extension tube Fitting the liquid hose 372BA024 KN 5 : : Rotate the pleated hose (1) as far as stop. : Turn the control handle (2) so that it is horizontal. Tighten down the clamp screw (5) (see “Adjusting the control handle”). 372BA027 KN 2 : 372BA025 KN : Push the extension tube (3) into the pleated hose (1) as far as it will go. : The metering unit (4) must point in the same direction as the control handle.
English / USA Harness Adjusting the control handle Adjusting the Harness Throwing Off Backpack : Put the machine on your back. : Loosen the clamp screw (1). : Slide the control handle (2) along the tube to the most comfortable position. : Pull the ends of the straps downward to tighten the harness. Before using the machine, make yourself familiar with how to release and throw off the backpack.
English / USA Fuel This engine is certified to operate on unleaded gasoline and the STIHL twostroke engine oil at a mix ratio of 50:1. Your engine requires a mixture of highquality gasoline and quality two-stroke air cooled engine oil. Use mid-grade unleaded gasoline with a minimum octane rating of 89 (R+M/2). If the octane rating of the mid-grade gasoline in your area is lower, use premium unleaded fuel. Fuel with a lower octane rating may increase engine temperatures.
English / USA Fueling Information Before You Start 373BA030 KN With the engine stopped and before starting, check the air intakes between the backplate and powerhead for blockages and clean if necessary. A protective screen is available as a special accessory to keep the air intakes clear. Before fueling, clean the filler cap and the area around it to ensure that no dirt falls into the tank. After fueling, tighten fuel cap as securely as possible by hand. Change the fuel pick up body every year.
English / USA Starting / Stopping the Engine 373BA008 KN 373BA010 KN 1 373BA009 KN 373BA011 KN 2 : Observe safety precautions – see chapter on “Safety Precautions and Working Techniques”. : Slide the stop switch (1) to # : Move the setting lever (2) to the center position – this is the starting throttle position Before starting : Move stop cock lever (3) to upright position.
English / USA Pull the starter grip slowly with your right hand until you feel it engage and then give it a brisk strong pull. Do not pull the starter rope out all the way as it might otherwise break. : Do not let the starter grip snap back. : Guide it slowly back into the housing so that the starter rope can rewind properly. : : 20 Put the unit on the ground. Check that bystanders are well clear of the general work area and the nozzle.
English / USA 373BA014 KN 2 : Fit the spark plug and reconnect the spark plug boot. : Move the stop switch to # : Turn the choke knob to e even if the engine is cold. : Now start the engine. Fuel tank run until dry and then refueled : 373BA015 KN 373BA016 KN 1 As soon as engine runs: If the engine does not start: : If you did not turn the choke knob to e quickly enough after the engine began to fire, the combustion chamber is flooded.
English / USA Calculating Required Quantity of Solution Step 1: Determine surface area (m2) In the case of ground crops, multiply the length of the field by its width. The surface area of high-growing plants is calculated approximately by multiplying the length of the rows by the average height of the foliage. The result is multiplied by the number of rows and then by two if both sides have to be treated. The area in hectares is obtained by dividing the number of square meters by 10,000.
English / USA Metering Unit Step 4: Determine walking speed Step 5: Determine discharge rate Carry out a trial run with the machine fueled and the container filled with water. Operate the spray tube (swing it back and forth) as it will be during the real run described below. Determine the distance walked in one minute. The setting of the metering knob is calculated as follows: Also use the trial run to check the selected working width. In the case of low-growing crops, the best working width is 4-5 m.
English / USA 3 4 5 4 2 3 372BA005 KN 2 6 1 : The discharge rate can be infinitely varied by turning the metering knob (2) on the nozzle (3). : : Position 1 = minimum flow rate Position 6 = maximum flow rate The required number on the metering knob must be lined up with the molded lug (4) under the knob. Discharge rate without pressure pump1) Discharge rate with pressure pump (special accessory) Knob position Metering nozzle 1 2 3 4 5 6 1.0 1.6 2.0 ULV nozzle 0.5 0.65 0.
English / USA Remove the baffle screen and pressure pump. : Fill the container with water up to 10 liter mark. : Set the metering knob to “6” : Start the machine. : Hold the spray tube horizontally, run the engine at full throttle, spray the contents of the container down to the 5 liter mark and note the time taken. Stand the machine on a level surface. : Always use full throttle when mistblowing. : Close the stop cock.
English / USA Cleaning the Air Filter Dual deflector baffle screen 372BA008 KN 1 2 4 Splits the spray jet in two – allows two closely planted rows to be treated simultaneously. 5 If there is a noticeable loss of engine power : Turn choke knob to g : Release the screws (1) and pull off the filter cover (2). 373BA018 KN 373BA017 KN 1 Dirty air filters reduce engine power increase fuel consumption and make starting more difficult.
English / USA : Clean loose dirt from the filter cover and filter chamber. : Install the main filter and prefilter elements in the filter cover. : Fit the cover on the filter base (5) and tighten it down firmly. SR 340, SR 420 Motor Management Adjusting the Carburetor Exhaust emissions are controlled by the design of the fundamental engine parameters and components (e.g. carburation, ignition, timing and valve or port timing) without the addition of any major hardware.
English / USA Standard Setting It is usually necessary to change the setting of the idle speed screw (LA) after every correction to the low speed screw (L). LA 373BA044 KN L L 373BA043 KN H Adjusting Idle Speed Fine tuning for operation at high altitude A slight correction of the setting may be necessary if engine power is not satisfactory: : Shut off the engine. Engine stops while idling : Check the air filter and clean or replace if necessary. : Check standard setting.
English / USA Spark Arresting Screen in Muffler Checking the Spark Plug If engine is down on power, difficult to start or runs poorly at idling speed, first check the spark plug. 1 2 : Remove spark plug – see "Starting / Stopping the Engine". : Clean dirty spark plug. : Check electrode gap (A) and readjust if necessary – see "Specifications". : Use only resistor type spark plugs of the approved range.
English / USA Replacing Starter Rope and Rewind Spring 1 1 5 4 2 3 1 To reduce the risk of fire and burn injury, use only spark plugs authorized by STIHL. Always press spark plug boot (2) snugly onto spark plug terminal (1) of the proper size. (Note: If terminal has detachable SAE adapter nut, it must be attached.) A loose connection between spark plug boot and ignition wire connector in the boot may create arcing that could ignite combustible fumes and cause a fire.
English / USA 6 5 4 7 : Ease the cap (6) out of the starter grip. : Remove remaining rope from the rotor and grip. : Tie a simple overhand knot in the end of the new starter rope and then thread the rope through the top of the grip and the rope bushing (7). : Refit the cap in the grip. SR 340, SR 420 353BA034 KN 373BA026 KN 353BA041 KN 3 : Thread the rope through the rotor and secure it in the rotor with a simple overhand knot.
English / USA Replacing a broken rewind spring Lubricate the new spring with a few drops of non-resinous oil. : Remove the rope rotor as described in “Replacing the starter rope”. : Remove parts of old spring. : : Fit new spring housing – bottom plate must face downward. Engage outer spring loop over the lug. Tensioning rewind spring : Make a loop in the unwound starter rope and use it to turn the rope rotor six full revolutions in the direction of the arrow (see illustration).
English / USA Storing the Machine When the starter rope is fully extended it must be possible to rotate the rotor at least another half turn. If this is not possible, the spring is overtensioned and could break. Take one turn of the rope off the rotor. : Fit the starter cover on the engine. : Tighten down the screws firmly. SR 340, SR 420 For periods of about 3 months or longer : Drain and clean the fuel tank in a well ventilated area.
English / USA Complete machine Control handle Air filter Pickup body in fuel tank Fuel tank Carburetor Spark plug Cooling air intakes Spark arresting screen in muffler Visual inspection (condition, leaks) if required x x x x x Clean Check idle setting if damaged if problem every 12 months monthly weekly after each refueling stop x Fit new filter x x x Readjust idle x Readjust electrode gap Replace after 100 hours of operation x Clean x Check x Clean or replace Container with hose Vis
English / USA Parts and Controls 1 Baffle screen 2 Standard nozzle 3 Metering knob 4 Extension tube 5 Throttle trigger 6 Setting lever 7 Stop switch 8 Control handle 9 Stop cock 10 Pleated hose 11 Harness 12 Back plate 13 Back padding 14 Air filter housing 15 Antivibration elements 16 16 Container filler cap 17 Container 17 18 Spark plug boot 19 Carburetor adjusting screws 20 Choke knob 18 20 25 SR 340, SR 420 21 372BA022 KN 15 19 # 22 Starter grip 24 23 Fuel tank 24 Muffler (depending on co
English / USA Definitions 9 Stop cock. Opens and closes spray liquid hose. 17 Container. Contains the material to be sprayed. 1 Baffle screen. To vary the direction and shape of the spray. 2 Standard nozzle. Directs and widens the spray. 10 Pleated hose. For spraying, dusting or spreading in the desired direction. 18 Spark plug boot. Connects the spark plug to the ignition wire. 3 Metering knob. For varying the spraying rate. 11 Harness. For carrying the unit. 19 Carburetor adjusting screws.
English / USA Specifications EPA / CEPA: SR 340 Spraying Attachment The Emission Compliance Period referred to on the Emissions Compliance Label indicates the number of operating hours for which the engine has been shown to meet Federal emission requirements. Single cylinder two-stroke engine Displacement: 2.74 ci (44.9 cm3) Bore: 1.61 in (41 mm) Stroke: 1.34 in (34 mm) Idle speed: 3,100 rpm Container capacity: 3.4 gal (13 l) Size of filler strainer mesh: 0.04 in (1 mm) Discharge rate SR 340: 0.03-0.
English / USA Special Accessories Maintenance and Repairs Contact your STIHL dealer for information regarding special accessories that may be available for your product. Users of this unit should carry out only the maintenance operations described in this manual. Other repair work may be performed only by authorized STIHL service shops. Warranty claims following repairs can be accepted only if the repair has been performed by an authorized STIHL servicing dealer using original STIHL replacement parts.
English / USA Not for California: STIHL Incorporated Federal Emission Control Warranty Statement Your Warranty Rights and Obligations Manufacturer's Warranty Coverage: The U.S. Environmental Protection Agency (EPA) and STIHL Incorporated are pleased to explain the Emission Control System Warranty on your equipment type engine. In the U.S. new 1997 and later model year small off-road equipment engines must be designed, built and equipped, at the time of sale, to meet the U.S.
English / USA If any emission related part on your engine is defective, the part will be replaced by STIHL Incorporated at no cost to the owner. Any warranted part which is not scheduled for replacement as required maintenance, or which is scheduled only for regular inspection to the effect of "repair or replace as necessary" will be warranted for the warranty period.
English / USA Trademarks STIHL Registered Trademarks Some of STIHL’s Common Law Trademarks STIHL PICCO™ BioPlus™ STIHL PowerSweep™ Easy2Start™ STIHL Precision Series™ EasySpool™ STIHL Protech™ ElastoStart™ 4-MIX® STIHL RAPID™ Ematic /Stihl-E-Matic™ AUTOCUT® STIHL SuperCut™ FixCut™ EASYSTART® STIHL Territory™ HT Plus™ OILOMATIC® TapAction™ IntelliCarb™ STIHL Cutquik® TrimCut™ Master Control Lever™ STIHL DUROMATIC® Micro™ STIHL Farm Boss® Pro Mark™ ® STIHL q ( The color combin
English / USA 42 SR 340, SR 420
español / EE.UU © ANDREAS STIHL AG & Co. KG, 2006 0458 372 8621 A. M0,8. J6. PM . Printed in USA Impreso en papel sin cloro. Las tintas contienen aceites vegetales,el papel es reciclable. BA_SE_004_007_31_05.fm Contenido Guía para el uso de este manual ............................... Medidas de seguridad y técnicas de manejo ........................ Armado de la máquina ................... Arnés .............................................. Combustible ...................................
español / EE.UU Guía para el uso de este manual Pictogramas Todos los pictogramas que se encuentran en la máquina se muestran y explican en este manual. Las instrucciones de uso y manipulación vienen acompañadas de ilustraciones. Símbolos en el texto Los pasos individuales o procedimientos descritos en el manual pueden estar señalados en diferentes maneras: : Un punto identifica un paso o procedimiento sin referencia directa a una ilustración.
español / EE.UU Medidas de seguridad y técnicas de manejo Dado que el atomizador es una herramienta para rociar productos químicos, es necesario tomar medidas especiales de seguridad para reducir el riesgo de lesiones personales. recibir formación y deben familiarizarse con los procedimientos de manejo correcto de los productos químicos en uso, con los procedimientos de primeros auxilios/emergencia y con los reglamentos de desecho de productos químicos líquidos.
español / EE.UU EL OPERADOR Condición física Usted debe estar en buenas condiciones físicas y psíquicas y no encontrarse bajo la influencia de ninguna sustancia (drogas, alcohol, etc.) que le pueda restar visibilidad, destreza o juicio. No maneje esta máquina cuando está fatigado. !Advertencia! Esté alerta. Si se cansa, tómese un descanso. El cansancio puede provocar una pérdida del control. El uso de cualquier herramienta motorizada es fatigoso.
español / EE.UU !Advertencia! !Advertencia! !Advertencia! Para reducir el riesgo de lesiones de los ojos, puede ser necesario usar gafas protectoras cuando se maneja la herramienta motorizada. Repase la etiqueta del producto químico que se está rociando. Cuando se aplican productos químicos venenosos, puede ser necesario que el operador y las personas en la cercanía utilicen un respirador bien ajustado y aprobado por NIOSH/MSHA para usar con el producto químico en uso.
español / EE.UU LA HERRAMIENTA MOTORIZADA Para las ilustraciones y definiciones de los componentes de la herramienta motorizada, vea el capítulo "Piezas principales y controles". !Advertencia! Nunca modifique, de ninguna manera, esta herramienta motorizada. Utilice únicamente los accesorios y repuestos suministrados por STIHL o expresamente autorizados por STIHL para usarse con el modelo específico de STIHL.
español / EE.UU !Advertencia! !Advertencia! Mezcle solamente los pesticidas compatibles. Las mezclas incorrectas pueden producir vapores tóxicos. En caso de contacto inadvertido o la ingestión de productos químicos o si la ropa ha sido contaminada, detenga el trabajo y consulte inmediatamente las instrucciones del fabricante del producto químico. Si hay dudas acerca de qué hacer, consulte con un centro de información sobre envenenamiento o un médico inmediatamente.
español / EE.UU Instrucciones para el llenado de combustible !Advertencia! Para reducir el riesgo de lesiones graves causadas por quemaduras, nunca intente abastecer la máquina con combustible sin que el operador se haya despojado de la misma. !Advertencia! Cargue de combustible su herramienta motorizada en lugares al aire libre bien ventilados. Siempre apague el motor y deje que se enfríe antes de llenar de combustible.
español / EE.UU Llenado del recipiente !Advertencia! Apriete todas las conexiones y asegúrese que la manguera está bien fijada y en buenas condiciones. Mantenga la válvula de corte cerrada. Antes de usar la herramienta motorizada con productos químicos, llénela con agua limpia para asegurarse que está correctamente armada y practique la pulverización. Además, en este momento busque fugas.
español / EE.UU !Advertencia! Para reducir el riesgo de lesiones causadas por las piezas lanzadas, revise la caja del ventilador en busca de daños (roturas, melladuras, picaduras). Si se descubren daños, deje de usar la máquina y comuníquese con el representante STIHL para las reparaciones del caso. Arranque Arranque el motor al aire libre, por lo menos 3 m (10 pies) del lugar en que lo haya llenado. !Advertencia! Su herramienta motorizada es una máquina que debe ser manejada por solamente una persona.
español / EE.UU !Advertencia! Ajuste el arnés de transporte de modo correspondiente a su estatura antes de empezar a trabajar. Para reducir el riesgo de tropezarse y de perder el control, no camine hacia atrás mientras está utilizando la máquina. !Advertencia En caso de emergencia, es posible despojarse del arnés y quitarse la máquina con rapidez. Intente salir del arnés varias veces antes de usar la máquina para acostumbrarse a el mismo. Para evitar daños, nunca tire la máquina durante estos intentos.
español / EE.UU !Advertencia! Si usted desconoce los riesgos relacionados con el producto químico específico en cuestión, lea la etiqueta del producto y/o la hoja de datos de seguridad del material para la sustancia y/o consulte con el fabricante/proveedor del material. También puede consultar con su empleador, los organismos gubernamentales, tales como EPA, OSHA y NIOSH, y otras fuentes de conocimientos acerca de materiales peligrosos.
español / EE.UU !Advertencia! Para reducir el riesgo de incendio y lesiones por quemadura, mantenga limpia la zona alrededor del silenciador. Quite el lubricante excesivo y toda la basura tal como las agujas de pinos, ramas u hojas. Deje que el motor se enfríe apoyado sobre una superficie de hormigón, metal, suelo raso o madera maciza (por ej., el tronco de un árbol caído) lejos de cualquier sustancia combustible. !Advertencia! Nunca modifique el silenciador.
español / EE.UU Armado de la máquina !Advertencia! !Advertencia! No intente hacer ningún trabajo de mantenimiento o reparación que no esté descrito en su manual de instrucciones. Este tipo de trabajo debe ser realizado únicamente por el concesionario de servicio de STIHL. No pruebe nunca el sistema de encendido con el casquillo desconectado de la bujía, o sin tener instalada la bujía, ya que las chispas al descubierto pueden causar un incendio.
español / EE.UU 2 372BA024 KN 5 : : Gire la manguera con pliegues (1) hasta el tope. : Gire el mango de control (2) hasta la posición horizontal. 2 Apriete el tornillo de fijación (5) (vea "Ajuste del mango de control"). : 4 : : La unidad dosificadora (4) debe apuntar en la misma dirección que el mango de control. 4 4 3 372BA028 KN 372BA025 KN Meta el tubo de extensión (3) en la manguera con pliegues (1) hasta donde sea posible.
español / EE.UU Arnés Ajuste del mango de control Ajuste del arnés Retiro rápido de la mochila Colóquese la máquina sobre la espalda. : Suelte el tornillo de fijación (1). : Deslice el mango de control (2) a lo largo del tubo para ponerlo en la posición más cómoda. : Apriete el tornillo de fijación (1) firmemente. : Tire de los extremos de las correas hacia abajo para apretar el arnés. 58 Antes de usar la máquina, familiarícese con el procedimiento de retiro de la mochila.
español / EE.UU Combustible Este motor está certificado para funcionar con una mezcla de 50 a 1 de gasolina sin plomo y aceite STIHL para motores de dos tiempos. Su motor requiere una mezcla de gasolina de calidad y aceite de calidad para motores de dos tiempos enfriados por aire. Use gasolina sin plomo regular con un octanaje mínimo de 89 (R+M/2). Si el octanaje de la gasolina regular en su zona es más bajo, use combustible sin plomo superior.
español / EE.UU Llenado de combustible Información previa al arranque 373BA030 KN Con el motor parado y antes de arrancar el mismo, revise las tomas de aire entre la placa para la espalda y la unidad motriz en busca de obturaciones y límpielas según se requiera. Hay disponible como accesorio especial una malla protectora para mantener abiertas las tomas de aire.
español / EE.UU Arranque / Parada del motor 373BA008 KN 373BA010 KN 1 373BA009 KN 373BA011 KN 2 : Respete las medidas de seguridad – vea el capítulo "Medidas de seguridad y técnicas de manejo". : Mueva el interruptor de parada (1) a # : Mueva la palanca de ajuste (2) a la posición central – ésta es la posición de arranque del acelerador Antes de arrancar : Mueva la palanca de la válvula de corte (3) a la posición vertical.
español / EE.UU Con la mano derecha tire lentamente del mango de arranque hasta que sienta una resistencia definitiva y en seguida dele un tirón fuerte y rápido. No tire de la cuerda de arranque totalmente hasta fuera, se podría cortar. : No deje que el mango de arranque salte bruscamente hacia atrás. : Guíelo lentamente hacia el interior de la caja para que la cuerda de arranque se enrolle correctamente. : : 62 Apoye la máquina en el suelo.
español / EE.UU 373BA014 KN 2 : Instale la bujía y vuélvale a conectar su casquillo. : Mueva el interruptor de parada a # : Gire la perilla del estrangulador a e aun si el motor está frío. : Ahora arranque el motor.
español / EE.UU Determinación de la cantidad de solución requerida Paso 1: Determine la superficie (m2) En el caso de cultivos a nivel del suelo, multiplíquese el largo del campo por su anchura. La superficie de plantas con tallos altos se calcula de modo aproximado multiplicando el largo de las hileras por la altura promedio de las plantas. El resultado se multiplica por el número de hileras y luego por dos si es necesario tratar ambos lados.
español / EE.UU Unidad dosificadora Paso 4: Determine la velocidad de avance Paso 5: Determine el caudal de descarga Haga una pasada de prueba con la máquina llena de combustible y el recipiente lleno de agua. Mueva el el tubo rociador de uno a otro lado de la misma manera que lo será durante la aplicación real del producto, descrita a continuación. Determine la distancia avanzada en un minuto.
español / EE.UU 3 4 5 4 2 3 : : : 372BA005 KN 2 6 1 El caudal de descarga puede variarse infinitamente girando la perilla de dosificación (2) en la boquilla (3). Posición 1 = caudal mínimo Posición 6 = caudal máximo El número requerido en la perilla de dosificación debe alinearse con la orejeta moldeada (4) debajo de la perilla.
español / EE.UU Llenado del recipiente Pulverizado Revisión de la unidad dosificadora : Apoye la máquina en una superficie nivelada. : Siempre utilice el atomizador a máxima aceleración. : Coloque la máquina sobre el suelo. : Cierre la válvula de corte. : : Quite la rejilla deflectora y la bomba de presión. La válvula debe estar completamente abierta al pulverizar – no varíe el caudal con la válvula. : Llene el envase con agua, hasta la marca de 10 litros.
español / EE.UU Limpieza del filtro de aire Rejilla deflectora doble 372BA008 KN 1 2 4 Divide el chorro en dos, permitiendo así tratar dos hileras de plantas simultáneamente. 3 5 Los filtros de aire sucios reducen la potencia del motor, aumentan el consumo de combustible y dificultan el arranque del motor. Si se nota una pérdida considerable de la potencia del motor 68 : Gire la perilla del estrangulador a g : Suelte los tornillos (1 y saque la cubierta del filtro (2).
español / EE.UU : Limpie la tierra suelta de la cubierta del filtro y de la cámara del filtro. : Instale los elementos del filtro principal y del prefiltro en la cubierta. : Coloque la cubierta en la base (5) del filtro y apriétela bien firme. SR 340, SR 420 Manejo del motor Ajuste del carburador Las emisiones de gases de escape son controladas por el diseño de parámetros y componentes fundamentales del motor (por ej.
español / EE.UU Ajuste estándar Ajuste de ralentí : Apague el motor. : Revise el filtro de aire y límpielo o sustitúyalo de ser necesario. : Revise el chispero del silenciador (si lo tiene) y límpielo o sustitúyalo de ser necesario. : Gire los dos tornillos de ajuste cuidadosamente en sentido contrahorario hasta que topen: El tornillo de velocidad alta (H) ahora está 1/4 de vuelta abierto. El tornillo de velocidad baja (L) ahora está 1/4 de vuelta abierto.
español / EE.UU Chispero en el silenciador Revisión de la bujía Si el motor tiene poca potencia, le cuesta arrancar o funciona deficientemente a velocidad de ralentí, primero revise la bujía. Si el motor pierde potencia o no funciona suavemente a máxima aceleración, revise el chispero del silenciador (si lo tiene). Espere a que el motor se enfríe por completo antes de efectuar las operaciones siguientes.
español / EE.UU Sustitución de la cuerda de arranque y resorte de rebobinado 1 1 5 4 2 3 1 Para reducir el riesgo de incendios y lesiones por quemadura, use solamente bujías autorizadas por STIHL. Siempre encaje un casquillo (2) del tamaño correcto bien ajustado en el borne (1) de la bujía. (Nota: Si el borne tiene una tuerca adaptadora SAE desprendible, colóquela.
español / EE.UU 6 5 4 7 : Saque cuidadosamente la tapa (6) del mango de arranque. : Quite el resto de la cuerda del rotor y del mango. : Haga un nudo de rizo sencillo en el extremo de la cuerda de arranque nueva y después pase la cuerda por la parte superior del mango y por el buje de la cuerda (7). : Vuelva a instalar la tapa en el mango. SR 340, SR 420 353BA034 KN 373BA026 KN 353BA041 KN 3 : Pase la cuerda a través del rotor y fíjela en éste con un nudo de rizo simple.
español / EE.UU Sustitución de resorte de rebobinado roto Lubrique el resorte nuevo con unas cuantas gotas de aceite sin resina. : Quite el rotor de la cuerda de la forma descrita en "Sustitución de la cuerda de arranque". : Quite las piezas del resorte viejo. : : Instale una caja de resorte nueva – la placa inferior debe quedar orientada hacia abajo. Enganche el lazo exterior del resorte en la orejeta. Vuelva a instalar el rotor de la cuerda. Pase a "Tensado del resorte de rebobinado".
español / EE.UU Almacenamiento de la máquina Cuando la cuerda de arranque se extiende completamente, debe ser posible girar el rotor por lo menos media vuelta adicional. En caso contrario, el resorte está sobretensado y podría romperse. Quítele una vuelta de la cuerda al rotor. : Instale la cubierta del arrancador en el motor. : Apriete los tornillos firmemente. SR 340, SR 420 Para intervalos de 3 meses o más : Vacíe y limpie el tanque de combustible en una zona bien ventilada.
español / EE.
español / EE.
español / EE.UU Definiciones Rejilla deflectora Varía la dirección y forma del chorro rociado. 9 2. Boquilla estándar. Dirige y regula el ancho del chorro rociado. 10 Manguera con pliegues. Para pulverizar, aplicar o esparcir materiales en la dirección deseada. 18 Casquillo de la bujía. Conecta la bujía al alambre de encendido. 3. Perilla dosificadora. Varía el caudal pulverizado. 11 Arnés. Para portar la unidad. 4. Tubo de extensión. Accesorio que permite alargar el tubo de descarga.
español / EE.UU Especificaciones EPA / CEPA: SR 340 Accesorio pulverizador El período de cumplimiento de emisiones indicado en la etiqueta de cumplimiento de emisiones es la cantidad de horas de funcionamiento para la cual la máquina ha demostrado la conformidad con los requerimientos de emisiones del Gobierno federal de los EE.UU. Motor de un cilindro, dos tiempos Cilindrada: 2,74 pulg cúb.
español / EE.UU Accesorios especiales Mantenimiento y reparaciones Comuníquese con su concesionario STIHL para información acerca de los accesorios especiales que pueden estar disponibles para su producto. Los usuarios de esta máquina deben efectuar únicamente los trabajos de mantenimiento descritos en este manual. Solamente los talleres autorizados por STIHL deben llevar a cabo los demás trabajos de reparación.
español / EE.UU No para California: Declaración de garantía de STIHL Incorporated sobre sistemas de control de emisiones según normas Federales Sus derechos y obligaciones de garantía La Agencia de Protección del Medio Ambiente (EPA) de los EE.UU. y STIHL Incorporated se complacen en explicarle la garantía del sistema de control de emisiones instalado en el motor de su equipo. En los EE.UU.
español / EE.UU subsiguiente que el motor está libre de defectos en el material y fabricación que puedan causar el incumplimiento de los reglamentos aplicables durante un período de dos años. Período de garantía El período de garantía comienza en la fecha en que el motor del equipo utilitario es entregado a usted y usted firma y remite la tarjeta de garantía a STIHL.
español / EE.
español / EE.
BA_SR340_30_U_E3.book Seite 1 Montag, 26. Mai 2003 9:28 09 ! WARNING! ! ADVERTENCIA! The engine exhaust from this product contains chemicals known to the State of California to cause cancer, birth defects or other reproductive harm. El gas de escape del motor de esta máquina contiene productos químicos que en el estado de California son considerados como causantes de cáncer, defectos de nacimiento u otros efectos nocivos para los órganos de la reproducción.