
Instruction Manual


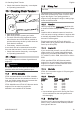

Table Of Contents
- STIHL MS 171, 181, 211
- 1 Guide to Using this Manual
- 2 Safety Precautions
- 3 Reactive Forces
- 4 Working Techniques
- 5 Cutting Attachment
- 6 Mounting the Bar and Chain (side chain tensioner)
- 7 Mounting the Bar and Chain (quick chain tensioner)
- 8 Tensioning the Saw Chain (side chain tensioner)
- 9 Tensioning the Saw Chain (quick chain tensioner)
- 10 Checking Chain Tension
- 11 Fuel
- 12 Fueling
- 13 Chain Lubricant
- 14 Filling Chain Oil Tank
- 15 Checking Chain Lubrication
- 16 Chain Brake
- 17 Winter Operation
- 18 Starting / Stopping the Engine
- 18.1 Positions of the master control lever
- 18.2 Adjusting the master control lever
- 18.3 Fuel pump
- 18.4 Holding the chain saw
- 18.5 Starting
- 18.6 Starting the chain saw
- 18.7 When the engine has turned over for the first time
- 18.8 Once the engine is running
- 18.9 At very low temperatures
- 18.10 Switch off the engine
- 18.11 If the engine does not start
- 19 Operating Instructions
- 20 Taking Care of the Guide Bar
- 21 Shroud
- 22 Air Filter System
- 23 Cleaning the Air Filter
- 24 Adjusting the Carburetor
- 25 Spark Arresting Screen in Muffler
- 26 Spark Plug
- 27 Engine Running Behavior
- 28 Storing the Machine
- 29 Checking and Replacing the Chain Sprocket
- 30 Maintaining and Sharpening the Saw Chain
- 31 Maintenance and Care
- 32 Main Parts
- 33 Specifications
- 34 Ordering Spare Parts
- 35 Maintenance and Repairs
- 36 Disposal
- 37 EC Declaration of Conformity

–
Clear escape paths, eliminate obstacles
–
Put down tools and equipment at a safe dis‐
tance – but not on the escape paths
–
When felling, stand only to the side of the fall‐
ing trunk and only move back laterally onto the
escape path
–
Plan escape paths on slopes parallel to the
slope
–
When walking away along the escape path,
watch out for falling limbs and watch the top of
the tree.
Preparing work area at base of tree
–
First clear the tree base and work area from
interfering limbs and brush to provide a secure
footing.
–
Carefully clear the base of the trunk (e.g., with
an axe) – sand, stones and other foreign
objects will blunt the saw chain
001BA146 KN
–
Remove largest buttresses: first the largest
buttress – saw first vertically, then horizontally
– only if the tree is in sound condition
4.3 Felling notch
Preparing the felling notch
001BA271 KN
C
C
The felling notch (C) determines the direction of
fall.
Important:
–
Make a felling notch at right angle to direction
of fall
–
Saw as close to the ground as possible
–
Cut to a depth of approx. 1/5 to 1/3 of the
diameter of the trunk
Determine direction of fall with gunning sight on
cover and fan housing
001BA153 KN
Your chainsaw has a gunning sight on the cover
and fan housing. Use this gunning sight.
Making the felling notch
When making a felling notch, align the chainsaw
so that the notch lies at a right angle to the direc‐
tion of fall.
During the procedure, various sequences are
permitted for making a felling notch with a bottom
(horizontal) cut and top (angled) cut – comply
with national legislation regarding felling techni‐
que.
► Make a bottom (horizontal) cut
► Make the top (angled) cut approx. 45°‑ 60° to
the bottom cut
Checking the direction of fall
001BA153 KN
► Insert the chainsaw with guide bar in the bot‐
tom of the felling notch. The gunning sight
must point in the planned direction of fall – if
necessary, correct direction of fall by re-cutting
the felling notch.
4 Working Techniques English
0458-533-8321-E 11