
Instruction Manual
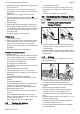

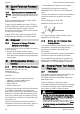
Table Of Contents
- STIHL HSA 56
- 1 Introduction
- 2 Guide to Using this Manual
- 3 Overview
- 4 Safety Precautions
- 5 Preparing Hedge Trimmer for Operation
- 6 Charging the Battery, LEDs
- 7 Removing and Fitting the Battery
- 8 Switching the Hedge Trimmer On/Off
- 9 Testing the Hedge Trimmer and Battery
- 10 Operating the Hedge Trimmer
- 11 After Finishing Work
- 12 Transporting
- 13 Storing
- 14 Cleaning
- 15 Maintenance
- 16 Repairing
- 17 Troubleshooting
- 18 Specifications
- 19 Spare Parts and Accessories
- 20 Disposal
- 21 EC Declaration of Conformity
- 22 General Power Tool Safety Warnings

► Observe the following points when storing the
charger:
–
Charger is out of the reach of children.
–
The charger is clean and dry.
–
Charger is in an enclosed space.
–
Charger is stored separately, away from the
battery.
–
The charger is not suspended from the con‐
necting cable or the holder (3) for the con‐
necting cable.
–
Charger is in a temperature range between
+ 5°C and + 40°C.
14 Cleaning
14.1 Cleaning the Hedge Trimmer
► Switch off the hedge trimmer, push retaining
latch to position and remove the battery.
► Clean the hedge trimmer with a damp cloth or
STIHL resin solvent.
► Clean vents with a paintbrush.
► Remove foreign objects from the battery com‐
partment and clean the battery compartment
with a damp cloth.
► Clean the electrical contacts in the battery
compartment with a paintbrush or soft brush.
14.2 Cleaning the Cutting Blades
► Switch off the hedge trimmer, push retaining
latch to position
and remove the battery.
► Spray both sides of blades with STIHL resin
solvent.
► Fit the battery.
► Run the hedge trimmer for 5 seconds, .
The cutting blades run. STIHL resin solvent is
distributed evenly.
14.3 Cleaning the Battery
► Clean the battery with a damp cloth.
14.4 Cleaning the Charger
► Disconnect the mains plug from the power
supply.
► Clean the charger with a damp cloth.
► Clean vents with a paintbrush.
► Clean the charger’s electrical contacts with a
paintbrush or a soft brush.
15 Maintenance
15.1 Sharpening the cutting blade
STIHL recommends you have the cutting blades
resharpened by a STIHL dealer.
WARNING
■ The teeth of the cutting blades are very sharp.
This may result in the user cutting themselves.
► Wear work gloves made from resistant
material.
► Switch off the hedge trimmer, push retaining
latch to position and remove the battery.
0000-GXX-1426-A0
► Use a STIHL flat file to sharpen each cutting
edge on the upper blade. The file only sharp‐
ens on the forward stroke. Maintain the pre‐
scribed sharpening angle, 18.2.
► Turn the hedge trimmer over.
► Sharpen the remaining cutting edges.
► Deburr each cutting edge from below.
► Turn the hedge trimmer over.
► Deburr the remaining cutting edges.
► Use a damp cloth to remove the filing dust.
► Spray both sides of cutting blades with STIHL
resin solvent.
► Run the hedge trimmer for 5 seconds.
The cutting blades run. STIHL resin solvent is
distributed evenly.
► If you have any doubts, be sure to consult a
STIHL dealer.
16 Repairing
16.1 Repairing Hedge Trimmer, Bat‐
tery and Charger
The hedge trimmer, cutting blades, battery and
charger are not user serviceable.
► If the hedge trimmer or cutting blades are
damaged: Do not use your hedge trimmer and
contact your STIHL servicing dealer.
► If the battery has a malfunction or is damaged:
Replace the battery.
► If the charger has a malfunction or is dam‐
aged: Replace the charger.
► If the connecting cable has a malfunction or is
damaged: Do not use the charger and have
connecting cable replaced by a STIHL servic‐
ing dealer.
14 Cleaning English
0458-714-0121-C 15