Owner'sManual The Steyr Universal Sporting Rifle Mannlicher STEYR USR
Owner's Manual Steyr Universal Sporting Rifle This manual and the warnings contained herein must be read and understood before using your rifle. This manual familiarizes the user with the function and the handling of the rifle and warns of the potential dangers of misuse that may lead to accidents or injuries. This manual should always accompany this firearm and be transferred with it upon change of ownership, or when the firearm is loaned or presented to another person.
Dear Customer! With your purchase ofthe new USR rifle, manufactured by Steyr Mannlicher AG & Co KG, you have acquired a sporting rifle that meets the highest quality standards. This rifle has been conceived to the state-of-the-art requirements oftoday's sportsman. Unsurpassed performance, superb quality, optimum user comfort, and long service life were the design goals for the new USR. Steyr Mannlicher AG & Co KG has been certified according to ISO 9001 since 1994.
Before you attempt to use or shoot your new USR rifle, learn and understand the following basic rules. Your safety and the safety of others depends upon safe and careful handling of your new rifle. Any firearm must be considered a potentially dangerous object requiring particular caution in storage, handling and use. Make sure to always handle and treat every rifle as if it were loaded. NEVER place your finger on the trigger unless you want to fire a shot.
NEVER store ammunition with a firearm. In order to avoid damage during transport, the rifle should always be transported in the original packing carton or in a commercially available carrying case. ALWAYS keep the muzzle of your rifle pointed in a safe direction. NEVER point any firearm at anything you do not intend to shoot. Stay alert and be aware of all persons and property within shooting range. NEVER give a loaded firearm to another person.
The mechanical safety's function is to block sear engagement to prevent accidental discharge of the firearm. However, should this device fail, it is possible to fire a rifle even when the safety is in the non-firing position. NEVER place your finger on the trigger when you do not intend to shoot. NEVER place your finger on the trigger or test any safety device when the muzzle of a rifle is pointed in an unsafe direction. NEVER transport a loaded rifle.
Ifthere are any questions concerning the proper caliber for your sporting rifle, call or contact GSI, Inc., 108 Morrow Avenue, P.O. Box 129, Trussville, Alabama 35173, Tel. (205)655-8299. STEYR MANNLlCHER AG & Co KG specifically disclaims any responsibility for damage or injury whatsoever occurring in connection with, or as a result of, the use of faulty, or non-standard, or "remanufactured" or handloaded (reloaded) ammunition.
If the round does not fire, open the breech of the rifle and remove the cartridge. If the primer of the cartridge is indented, discard the cartridge in a safe manner. If the primer of the cartridge is not indented, or is lightly indented, or offcenter, have the rifle examined by a competent gunsmith before the rifle is fired again. USE caution to avoid dropping a loaded gun. Dropping the rifle may cause an accidental discharge even if the safety is in the on-safe position.
ALWAYS instruct children to respect firearms. If you teach your children to shoot, teach them or get them trained by a qualified instructor to treat and use firearms properly, and always supervise them closely. NEVER abuse your rifle by using it for any purpose other than shooting. NEVER fire your firearm near an animal unless it is trained to accept the noise. An animal's startled reaction could injure it or cause an accident.
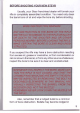
BEFORE SHOOTING YOUR NEW STEYR Usually, your Steyr franchised dealer will furnish your rifle in completely assembled condition. You need only clean the barrel bore of oil and wipe the bore dry before shooting. BORE OBSTRUCTION WARNING! ANY OBSTRUCTION IN THE BORE OF THE RIFLE MA YRESUL TIN DAMAGE TO THE RIFLE OR INJURY OR DEATH TO THE SHOOTER AND OR OTHER PERSONS NEARBY.
the bore if (assuming the trigger has been pUlled with a live cartridge in the chamber) the cartridge contains no powder, or the powder fails to ignite, and only the primer charge ignites, resulting in insufficientforce to propel the bullet out ofthe bore. Whenever an obstruction occurs, keep the rifle pointing in a safe direction and proceed as follows: * Any cartidges in the magazine should be removed.
11
Table of contents 1. GENERAL 13 2. TECHNICAL DATA 14 3. DESCRIPTION 15 4. ACCESSORIES 16 5. HOW TO USE THE RIFLE 17 6. DISASSEMBLY AND ASSEMBLy ....... 22 7. IMMEDIATE CLEARING OF JAMS AND MALFUNCTIONS 35 8. TROUBLESHOOTING 36 9. CLEANING AND MAINTENANCE ........ 38 10.
STEYR UNIVERSAL SPORTING RIFLE USR Caliber .223 Rem. 1. GENERAL - Universal Sporting Rifle (USR) - Ammunition: Cartridge cal. .223 Rem.
2. TECHNICAL DATA Caliber: 5.56x45 mm (.223 Rem.) Length of barrel: 508 mm (20") Length of twist: 228 mm (9" right) Chamber and barrel bore Chrome plated Overall length: 765 mm (30") Height: 231 mm (9") Weight of weapon with empty magazine: 3980 g (8.8 Ibs) Weight of weapon with filled magazine: 4100g (9.0Ibs) Weight of empty magazine 80 g (0.17 Ibs) Magazine capacity ---.. 10 rounds Fig.
3. DESCRIPTION The USR is comprised of 6 main groups: 1 , Barrel - group 2 Receiver - group 3 Hammer - group 4 Bolt - group 5 Magazine - group 6 Stock - group 2 1 4 ==----.. .!1113 Fig. 2 Steyr USR.
4. ACCESSORIES 1 2 3 4 5 Cleaning kit (not included) Carrying sling (black) Sight adjusting tool (not included) Bolt left ejection (not included) Special Picatinny style mounting rail (not included) Fig. 3 Accessories 2 4 5 ..... nnnnnnn;t=nnnnnnn g (2 .
5. HOW TO USE THE RIFLE Before shooting, check position of the gas plug. For normal shooting the gas plug plunger should be aligned with the small circle symbol stamped on the gas cylinder (Fig.4). The serrated "ears" ofthe plug will then be positioned approximately horizontally. With some ammunition, or a very dirty rifle, gas pressure may be insufficient for reliable functioning. In such a case the gas plug plunger may be aligned with the large circle symbol to increase gas flow. Fig.
WARNING: Make sure that the ejection port cover is mounted on the same side as the shooter's cheek rests, and that the correct (right or left-handed) bolt is installed. Locking and releasing: WARNING: . Keep the muzzle pointed in a safe direction. To place safety "ON" (white dot visible), push the square safety button through the stock from left to right. A white indicator dot on the button will be fUlly exposed when the safety is "ON" (white dot visible) (Fig.5).
Loading and Firing: WARNING: Keep the muzzle pointed in a safe direction. Loading: Place the safety in the "ON" position (white dot visible). Load 10 rounds in the magazine (Fig. 6) and insert in the magazine well firmly until the magazine catch, clicks audibly (Fig.?). Retract the charging handle with left hand and turn it inwards. Take hand off the charging handle and press the charging handle (With the thumb only) outwards (Fig.8). Bolt moves freely forward and feeds a round into the chamber.
Unloading: WARNING: Keep the muzzle pointed in a safe direction. - Push safety "ON" (white dot visible) - Take out the magazine. Grab the magazine with one hand. With the other hand press the magazine catch to release the magazine (Fig. 9). - Place four fingers of right hand under the magazine well, with the right thumb cover the ejection port. - Retract the charging handle and secure in the rear position. The cartridge will be extracted and fall through the magazine well into your right hand.
Adjusting the optical sight: The optical tube is mounted in the optic housing. The special screws for elevating and lateral adjustment and the fixing screw are adjusted at the factory prior to shipment and no further adjustment is recommeded (Fig.1 0). Elevation is adjusted by turning the inner disc on the elevating adjustment screw. Turning the elevation adjustment disc in direction of "U" raises the point of impact. Turning the elevation adjustment disc in direction of "0" lowers the point of impact.
6. DISASSEMBLY AND ASSEMBLY The Steyr-USR can be assembled and disassembled without the use of special tools. Complete stripping of the rifle should be done only by an authorized gunsmith. WARNING: BEFORE DISMANTLING MAKE SURE RIFLE IS UNLOADEDl Keep the muzzle pointed in a safe direction and be sure the rifle is unloaded. DISASSEMBLY: Before disassembling the rifle, place the safety "ON" (white dot visible).
Fig. 13 Fig.
Removing the barrel: Put the receiver on a table or on a workbench. Press down the barrel locking catch with a screwdriver or other suitable tool (Fig.15). At the same time turn the barrel grip upswards and remove the barrel from the receiver (Fig.16). Fig. 15 Fig.
Removing the optic housing: Place the receiver on a table or on a workbench. Press down the release button with a screwdriver or with a cartridge (Fig.17). Atthe same time pull back the optic housing and remove it (Fig.18). Take the Picatinny style mounting rail, place it on the receiver and slide it forward until it audibly engages. Fig. 17 I 1 Fig.
Removing the butt plate: - Secure the front of the stock. - With the right thumb press the marked position on the butt plate (Fig.19). - At the same time press in the retaining bolt (rear sling swivel) (Fig.19). -Take off the butt plate (Fig.20). Fig. 19 Fig.
Removing the hammer group: (To remove the hammer group it is necessary to remove the butt plate first.) - Press in the spring support and pUll the rear sling swivel (retaining bolt) out completely (Fig.21). - Grasp the tab on the rear of the hammer group and pUll the hammer group out of the stock (Fig.22). - Now you have stripped the rifle into its main groups. Fig. 21 Fig.
Dissembly of the gas mechanism: - Press down the serrated "ears" on the gas plug and turn clockwise until the slot on the plug is lined up with the gas cylinder (Fig.23). The gas plug is now free to be removed. - Remove the piston and spring with the right thrust piece of bolt group or other suitable tool (Fig.24). DO NOT ADJUST WHILE BARREL IS HOT. Fig. 23 Fig.
Dissasembly of the bolt group: - Hold bolt group in left hand (operating rods pointing left). - With the right hand rotate the firing pin 90 degrees counterclockwise and remove it from the bolt (Fig.25). - While keeping the bolt from moving forward with the left index finger, use the right index finger to push down the control bolt in the bolt carrier's cam slot (Fig.26). - The bolt, adaptor sleeve, bolt spring, and bolt spring sleeve will now come out as a unit.
Disassembly of the ejection lids, inner and outer: (Only for converting from right hand to left hand ejection. Note: also requires new bolt assembly.) Carefullyliftthe edge ofthe outer ejection lid using a screwdriver. pocket knife or similar tool pushing it forward simultaneously (Fig.28). Nowthe outer ejection lid may be removed, while the inner ejection lid drops downward into the stock and may be removed either through the magazine well or through the ejection port. Fig.
Inserting the hammer group: Insert hammer group in stock (Fig. 3D). Press in the hammer group tab until the holes in the tab, the hammer group and the stock are all aligned. Insert the retaining bolt (rear sling swivel) and push it all the way in. DO NOT FORCE (Fig.31). It will assemble easily when correctly aligned. Fig. 30 Inserting hammer group Fig.
Reassembling of bolt: - Insert cocking piece in the slide piece body (Fig.32). - Insert the bolt (with adaptor sleeve, bolt spring, and bolt spring sleeve correctly attached) into the bolt carrier. Make sure the control bolt is free to move (Fig.33). - Press the bolt down into the bolt carrier until the control bolt is visible in the cam slot (Fig.34). - While holding the bolt in this position, reinstall the firing pin by pushing it in until it audibly engages (Fig.35).
Installing the butt plate: Insert butt plate (bottom end first, as shown) (Fig.35). DO NOT FORCE. It will seat easily if the sling swivel is pushed in fully. When the butt plate is seated, pull out the sling swivel about 1/4" to lock it in place (audible click). Inserting the receiver in the stock: Fig. 35 Put the bolt carrier into the receiver (Fig.36). Press receiver with bolt carrier completely into the stock (Fig. 37). Push in the housing lock (Fig.38). The system is now Fig. 36 locked. Fig. 37 Fig.
Inserting the barrel: Grasp barrel atthe barrel grip. insert barrel completely into the receiver. Turn barrel until the barrel retaining pin is locked automatically (Fig.39). Fig.
7. IMMEDIATE CLEARING OF JAMS AND MALFUNCTIONS: If the rifle is kept clean and given proper care, it will function very reliably. However, if ajam occurs, follow these procedures: - Keep the muzzle pointed in a safe direction. - Put the rifle on safe and remove the magazine. - Pull back charging handle entirely, in order to eject jammed cartridge. WARNING: Be sure there is no obstruction in the barrel before attempting to chamber another cartidge.
8. TROUBLESHOOTING: INCORRECT FEEDING AND LOADING CAUSE magazine is inserted incorrectly REMEDIAL ACTION remove magazine and any loose cartridges, reinsert magazine until magazine release button locks audibly damaged magazine inspect magazine and change it, if necessary incomplete cycling (low gas pressure) align gas plug with the large circle symbol to increase gas flow*, clean gun.
MISFIRE CAUSE defective cartridge (primer is struck, fail to fire) REMEDIAL ACTION wait 30 sec. in firing position, unload defective or broken firing pin (primer is not or insufficiently struck) wait 30 sec.in firing position, unload and return the rifle to be serviced.
9. CLEANING AND MAINTENANCE: NEVER CLEAN LOADED FIREARMS! REMOVE AMMUNITION FROM CHAMBER AND MAGAZINE BEFORE CLEANING YOUR RIFLE! Cleaning by user: Be aware of the fact that proper handling and maintenance is necessary to guarantee it's perfect functional performance. Clean the rifle after each usage. Only proper cleaning devices and gun-oil areto be used forthis purpose. The wire and bustle brushes are meant only for interior of the barrel.
10. PARTS AND DIAGRAMS (subject to technical change eithout notice) Barrel group Fig. No.
40
Receiver group Fig. No.
10 ~a-'~17 0" 6 12 16 < -(\~39 11~ o < ~ 6 7 8 15 24 1 42 5 ~@ ~~ 3 ~ t.
Hammer group Fig. No.
'-t-'IJ N-tfii!+ 7 CC5l' cry ', \ ~t1!f~ \ I '-- ,:11 .
Bolt group Fig. No.
46
Magazine* Fig. No. Part number Description 1 1245050501 Magazine, complete, 10 round 'Individual component parts not available.
Stock group Fig. No. Part number Description 1 2 3 1 1245060401 1 1200060046 1 120006005t 1 1200060052 190003862112 1 1200060018 1 1200060029 1 1200060017 1 1200060035 1 1200060019 1 1200060065 1 1200060028 1 1200060021 1 1200060066 1 1200060041 1 1200060013 1 1200060077 1 1200060450 1 1200060023 Stock, grey (Figs.
"'''''''hiiDiilillJJllllllliIii 1il I
• Mannlicher Manufactured by Steyr Mannlicher AG & Co KG Postbox 1000, A-4400 Steyr, Austria Telephone 07252/896-0 Fax 07252178621 Telephone From U.S. 011-43-7252-8960 Fax From U.S. 011-43-7252-78621 IISI U.S. Importer GSI Incorporated, 108 Morrow Ave., P.O. Box 129, Trussville, AI 35173. Telephone (205) 655-8299 Fax (205) 655-7078 E-Mail SteyrSBS@aol.