
Installation Instructions

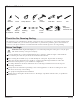
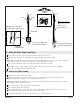
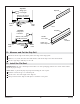

Tools and Materials
Thank You For Choosing Sterling
We appreciate your commitment to Sterling value. Please take a few minutes to review this manual before
you start installation. If you encounter any installation or performance problems, please don’t hesitate to
contact us. Our phone numbers are listed within this manual. Thanks again for choosing Sterling.
Before You Begin
WARNING: Risk of personal injury. Do not cut the tempered glass. If the glass is cut, the glass
will shatter and may cause personal injury.
Your new Sterling door can be installed with the door opening to either the right or left. Install the
door with the pivot side away from the showerhead for best results.
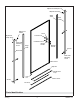
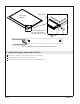
Before starting the installation, lay out and identify all of the parts. Inspect them for damage.
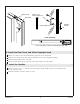
Some steps in these instructions are specific to a right or left side hinge installation. Follow the
instructions which pertain to your installation configuration.
For clarity, illustrations in theses instructions show a left hinge installation. Reverse the steps for
right hinge installations.
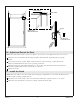
Closely follow the instructions pertaining to the sealant application on the door. Sealing areas other
than those shown may cause leaking.
Two people should perform this installation.
Sterling reserves the right to make revisions to the design of products without notice, as specified in
the Price Book.
Safety Glasses Drill
Level
Caulk Gun FileScissors
Miter Box
Tape
Measure
Claw
Hammer
Phillips
Screwdriver
Silicone
Sealant
Masking
Tape
Center
Punch
Plus:
Drop Cloth
Petroleum Jelly
Hack Saw
Pencil
1034023-2-C 2 Sterling