
Installation Guide
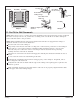

10. Make Electrical Connections
Make Connections
WARNING: Risk of electric shock. To reduce the risk of electrical shock, connect the pump only to
properly installed Ground-Fault Circuit-Interrupters (GFCI). Do not remove the plug grounding pins.
Do not use grounding adapters.
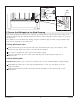
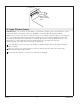
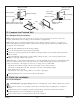
Use a small mirror and flashlight to verify that the air actuator tubing is securely attached to the
pump and to the air switch button in the whirlpool. It should not be kinked or otherwise damaged.
The tubing slips into place on adapters at the switch and at the pump. Make any required
corrections to the air actuator tubing.
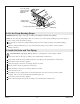
Visually inspect the whirlpool pump and piping harness. Verify that there is no apparent damage.
Verify that the bonding conductor is connected to the pump in accordance with the applicable
codes.
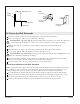
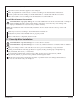
Plug the electrical cord for the pump into the GFCI outlet.
Test Run the Whirlpool
It may be convenient to test the operation of the whirlpool pump before the installation is completed. For
additional information on whirlpool operation, see the Confirm Proper Operation section.
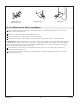
CAUTION: Risk of property damage. Do not fill the whirlpool beyond the bottom of the overflow
drain. Doing so may cause leakage from the whirlpool piping. The unit is not designed to hold water
above the overflow.
Check all electrical connections, and make sure the electrical power to the whirlpool is turned on.
Verify that the pump banding straps have been cut.
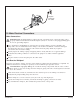
Fill the whirlpool to a level at least 2″ (5 cm) above the top of the highest jet.
Operate the whirlpool for 5 minutes, and check all whirlpool piping connections for leaks.
Stop and drain the whirlpool, then reinstall the protective liner or drop cloth.
Plug the
pump into
the outlet.
1032207-2-C 14 Sterling