
Installation Instructions


Tools and Materials
Before You Begin
WARNING: Risk of personal injury. Do not cut the tempered glass. If the glass is cut, the glass
will shatter and may cause personal injury.
IMPORTANT! This door is designed to accommodate walls that are less than 3/8″ (1 cm) out of plumb.
Verify the area the door will be attached to is within 3/8″ (1 cm) or better of plumb. The door may not
function properly if the wall is more than 3/8″ (1 cm) out of plumb.
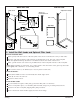
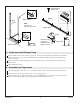
Your new Sterling door can be installed with the door opening to either the right or left. Install the
door with the pivot side away from the showerhead for best results.
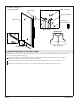
Before starting the installation, lay out and identify all of the parts. Inspect for damage.
During the installation, protect the floor of the shower with a drop cloth to avoid damage.
The shower receptor should be installed and prepared at this time, including finished wall materials.
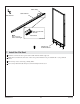
Closely follow the instructions pertaining to the sealant application on the door. Sealing areas other
than those shown may cause leaking.
Two people should perform this installation.
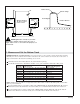
Determine the Door Configuration
IMPORTANT! Install the pivot side of the door on the side opposite the showerhead.
Determine whether the door will pivot on the right or left side.
Make sure the door can swing freely in the chosen configuration.
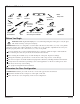
Safety Glasses
Level
Caulk Gun
File
Knife
Miter Box
Plus:
Drop Cloth
Pencil & Felt
Tip Marker
Claw
Hammer
Tape
Measure
Masking
Tape
Silicone
Sealant
Center
Punch
Drill and
Assorted
Drill Bits
Miter Saw or Hacksaw with
32 Teeth per Inch Blade
Assorted
Screwdrivers
1034028-2-G 2 Sterling