
Installation Instructions
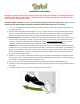

Installation Instructions
Important! StepNpull® will work great on any commercial solid core wood door or commercial metal door
regardless of the door’s size or weight. If, however, the door is abnormally difficult to pull open, the door
closer resistance should be decreased.
Attention! Before installing StepNpull®, check for wall interference when door is fully open. The StepNpull®
bracket has two rubber bumpers designed to contact the wall if wall interference is a concern.
1. StepNpull® should be mounted approximately 1/8” from the bottom of the door and approximately 1/8” from
the edge of the door.
2. Mark the holes with a pencil while holding the
StepNpull® against the door in the appropriate level mounting
position. If a metal kick plate is on the door, drill ¼” holes, where marked for the bracket, through the metal
plate before going to the next step (only go through the metal and be careful not to drill into the door).
3. Solid wood doors: Once the holes are marked use one of the screws supplied to create a pilot hole, for each of
the three holes, by screwing it in about ¼” deep and then removing. Alternately, a 1/8” drill bit may be used
instead to make the ¼” deep pilot holes. Although not required, it is highly recommended that you use the
sexed bolt provided in the middle hole per the directions listed in the next section “Metal doors”.
Metal doors: Drill a pilot hole for each of the three holes using a 3/16” bit. A sexed bolt should be used in the
middle hole and 1 ¼” long #12 screws in the outer two holes. To prepare the center hole for the sexed bolt, use
a 5/16” bit to enlarge the center hole and then continue drilling through the outer metal skin (be sure to keep
the drill bit perpendicular to the door while drilling the outer hole). Remove any burrs. Loctite thread locker
should be used on the bolt threads.
4. Hold the
StepNpull® against the door and install the center screw/bolt but don’t tighten it completely. Install
the two outer screws. Tighten the center screw and then double check the outer screws. To avoid stripping the
screw head, use a large #2 or #3 Phillip’s screwdriver or bit.
5. Open the door fully and check for any interference issues with the wall or floor mounted door stop.
6. Install the instructional sign just above the door handle. Install second sign on mirror, paper towel dispenser or
hand dryer.
7. Installation complete. You’re now just one step away from a clean exit!