
3.0


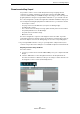
Table Of Contents

104
Advanced Features
Audio Quantization and Free Warp
5. Open the “Time Stretch Mode” pop-up menu, open the Standard submenu, and
select “Standard – Mix”.
6. Make sure that the right audio length is set and that the grid lines are positioned at
the visible beats. In this example, leave everything as it is.
7. Set the Quantize value to 1/4.
You can see the audio file locking to the nearest quarter note.
8. Activate the “Enable/Disable Quantize” option.
The audio automatically snaps to the selected Quantize value.
9. Play back the project; it is now in perfect time.
Free Warp
Sometimes, an event might need a bit of manual adjustment as well. That is where
Free Warp comes in handy. Warp tabs are a kind of anchor that can be attached to
musically relevant time positions in the audio, such as the first beat of every bar. They
allow you to effortlessly stretch and warp audio.
• Load the project “Audio Warp” found in the “Sequel Tutorial 5” folder.
1. Double-click the Drums event to view it in the Sample Editor.
2. Make sure that “Project Tempo” is activated, and activate the “Free Warp Tool”
button.
In this mode, you can adjust the timing of the audio file by creating warp tabs and
dragging them to match up properly with the bars and beats in the ruler. The audio
is stretched accordingly.
3. Determine where the first beat of a bar in the audio event does not match the
corresponding ruler position in the waveform. Click at the beginning of this beat to
create a warp tab.
!
Once set, the position of a warp tab relative to a beat is fixed. Moving a warp tab in the
waveform always affects the timing.