
User manual


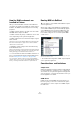
Table Of Contents
- Table of Contents
- Part I: Getting into the details
- About this manual
- Setting up your system
- VST Connections
- The Project window
- Working with projects
- Creating new projects
- Opening projects
- Closing projects
- Saving projects
- The Archive and Backup functions
- Startup Options
- The Project Setup dialog
- Zoom and view options
- Audio handling
- Auditioning audio parts and events
- Scrubbing audio
- Editing parts and events
- Range editing
- Region operations
- The Edit History dialog
- The Preferences dialog
- Working with tracks and lanes
- Playback and the Transport panel
- Recording
- Quantizing MIDI and audio
- Fades, crossfades and envelopes
- The arranger track
- The transpose functions
- Using markers
- The Mixer
- Control Room (Cubase only)
- Audio effects
- VST instruments and instrument tracks
- Surround sound (Cubase only)
- Automation
- Audio processing and functions
- The Sample Editor
- The Audio Part Editor
- The Pool
- The MediaBay
- Introduction
- Working with the MediaBay
- The Define Locations section
- The Locations section
- The Results list
- Previewing files
- The Filters section
- The Attribute Inspector
- The Loop Browser, Sound Browser, and Mini Browser windows
- Preferences
- Key commands
- Working with MediaBay-related windows
- Working with Volume databases
- Working with track presets
- Track Quick Controls
- Remote controlling Cubase
- MIDI realtime parameters and effects
- Using MIDI devices
- MIDI processing
- The MIDI editors
- Introduction
- Opening a MIDI editor
- The Key Editor – Overview
- Key Editor operations
- The In-Place Editor
- The Drum Editor – Overview
- Drum Editor operations
- Working with drum maps
- Using drum name lists
- The List Editor – Overview
- List Editor operations
- Working with SysEx messages
- Recording SysEx parameter changes
- Editing SysEx messages
- The basic Score Editor – Overview
- Score Editor operations
- Expression maps (Cubase only)
- Note Expression (Cubase only)
- The Logical Editor, Transformer, and Input Transformer
- The Project Logical Editor (Cubase only)
- Editing tempo and signature
- The Project Browser (Cubase only)
- Export Audio Mixdown
- Synchronization
- Video
- ReWire
- File handling
- Customizing
- Key commands
- Part II: Score layout and printing (Cubase only)
- How the Score Editor works
- The basics
- About this chapter
- Preparations
- Opening the Score Editor
- The project cursor
- Playing back and recording
- Page Mode
- Changing the zoom factor
- The active staff
- Making page setup settings
- Designing your work space
- About the Score Editor context menus
- About dialogs in the Score Editor
- Setting clef, key, and time signature
- Transposing instruments
- Printing from the Score Editor
- Exporting pages as image files
- Working order
- Force update
- Transcribing MIDI recordings
- Entering and editing notes
- About this chapter
- Score settings
- Note values and positions
- Adding and editing notes
- Selecting notes
- Moving notes
- Duplicating notes
- Cut, copy, and paste
- Editing pitches of individual notes
- Changing the length of notes
- Splitting a note in two
- Working with the Display Quantize tool
- Split (piano) staves
- Strategies: Multiple staves
- Inserting and editing clefs, keys, or time signatures
- Deleting notes
- Staff settings
- Polyphonic voicing
- About this chapter
- Background: Polyphonic voicing
- Setting up the voices
- Strategies: How many voices do I need?
- Entering notes into voices
- Checking which voice a note belongs to
- Moving notes between voices
- Handling rests
- Voices and Display Quantize
- Creating crossed voicings
- Automatic polyphonic voicing – Merge All Staves
- Converting voices to tracks – Extract Voices
- Additional note and rest formatting
- Working with symbols
- Working with chords
- Working with text
- Working with layouts
- Working with MusicXML
- Designing your score: additional techniques
- Scoring for drums
- Creating tablature
- The score and MIDI playback
- Tips and Tricks
- Index

511
Video
Frame rates
Cubase is capable of working with different types of video
and film frame rates. For an overview about the supported
frame rates, refer to the section “Frame rate (speed)” on
page 495.
Video output devices
Cubase supports several ways to play back video files.
Viewing video files onscreen in the Video Player window
may work just fine for many applications, but often it is
necessary to display video in a large format for viewing
small details and so others involved in the session can
also see the video. Cubase provides the ability to use sev
-
eral types of video output devices to accomplish this.
Multi-head video cards
One of the most common methods is the use of a multi-
head video card installed in the computer. Multi-head
video cards allow you to connect more than one computer
monitor to the card, in some cases up to four. If you direct
the video output of Cubase to one of these outputs, the
video file is displayed in fullscreen mode on a computer
monitor or HD television screen.
Ö You can also use more than one video card to achieve
the same result.
Different video cards support different types of outputs in-
cluding standard VGA, DVI, S-Video, HDMI, and compo-
nent video. These options allow you to choose the type of
monitor you use for video. HD televisions and digital pro-
jectors provide the largest viewing screens, but a normal
computer monitor can function as a very high-quality video
monitor as well.
Dedicated video cards
The use of a dedicated video card is also supported in
Cubase. These cards are normally used in video editing
systems to capture video to disk and display it while edit
-
ing. They usually have a high resolution and take some
strain off the host CPU by providing video compression
and decompression processing on the card.
Ö The Decklink cards by Blackmagic Design are auto-
matically recognized by Cubase. Video will be sent di-
rectly to its output.
FireWire DV Output
You have the option to use FireWire ports on the computer
to output DV video streams to external converters such as
various camcorders and standalone FireWire to DV con-
version units. These units can be connected to a television
or projector for large format viewing. The FireWire protocol
is capable of transporting data at high speed and is the
most common standard for communicating with video-
related peripheral equipment.
Preparing a video project in Cubase
The following sections describe the basic operations nec-
essary for preparing a Cubase project involving video. It is
advisable to store your video files on a separate hard drive
from your audio files. This can help prevent data streaming
problems when using high-resolution video with many au
-
dio tracks.
Importing video files
Importing a video file into your project is very straight for-
ward once you know that you have a compatible video file.
Video files are imported in the same manner as audio files:
• By using the File menu (Import–Video File).
In the Import Video dialog, you can activate the “Extract Audio From
Video” option. This imports any embedded audio streams to a newly cre
-
ated audio track positioned below the video track. The new track and the
clip will get the name of the video file. The new audio event will start at
the same time as the video event, so that they are in sync with each other.
Ö If you try to import a non-supported video file with the
Import Video option, the Import Video dialog displays the
text “Invalid or not supported file!”.
• By importing to the Pool first and then dragging to the
Project window (see
“The Pool” on page 299 for details).
• By using drag and drop from the MediaBay, the Pool,
the Windows Explorer, or the Mac OS Finder.
!
Under Windows, it is important that you connect
your device to the FireWire port before launching
Cubase. Otherwise it may not be detected properly
by Cubase.